
For the sake of argument, let’s assume that you’re a new GM, and your guild is finally up and running. You have enough members to start scheduling events, and you’re running at least some raids every week. It might be logical to think that your task as GM is done–if you’ve put in good policies, the guild will run itself, right?
No, dear reader, it won’t. Think of the guild master as the helmsman of a large and unwieldy ship of state. All you can control is your pressure on the wheel–storms will rage above, and whirlpools will draw from below. Heck, in the context of WoW, it wouldn’t be at all out of place to have to deal with a nasty Kraken or two, or at least a few Bloodsail pirates.
The day-to-day business of managing a guild takes time and energy. Many prospective guild masters don’t realize quite how many of their personal resources will go into keeping their organization healthy. At this point, many GMs get frustrated and hand over the leadership. Others fade into the background, letting officers or vocal members de facto lead the guild. A good GM, however, will always be a strong presence in the daily life of the guild.
But…It doesn’t seem like GMs do much!
Most of the work of a GM or guild officer occurs behind the scenes. For many valid reasons, guild members may not be made aware of every little argument or controversy. It’s important to maintain the appearance–and by extension, the reality–of peace in the guild, so discretion is key. For example, my guild is having a bit of a difficult time right now differentiating between friends and family applications and raiding applications. It’s been a multi-hour topic of discussion in officer meetings and the subject of lively debate. We wanted to make sure that the policy we put in–which is now fairly strict–suited our overall guild ethos. However, those hours of talk led to a policy that could be expressed in 50 words or less. What our members see is those 50 words, not the work that led up to it. When I mentioned, in an offhand way, the “F&F controversy,” to a member, he was surprised to learn that officers deal with so much stuff that just doesn’t filter down to the members. This is a good thing. Members are there to play and have fun, and the officers and GM make sure that they are able to do so.
A GM’s Weekly Quests
To borrow a metaphor from the game we all love so much, think of the GM’s job as a series of repeatable quests. The following list details the essential duties that GMs or officers must perform every week, just to keep a healthy guild on an even keel. In WoW, a week is like a year of real time. Guild morale can sink fast, and virtual organizations require constant maintenance.
1. Be Present
The GM and the officers must be a part of most guild events. You should have a hand in the planning for the raid events, and you should raid very regularly. I also advice GMs to put in some face time outside of raids. If you invest your officers with enough authority, this task can be shared. In general, if a significant portion of your guild is interested in doing something, the leadership should participate. Make sure that you don’t simply disappear for several weeks if you get occupied with real life–the guild should know what’s going on. Otherwise, when you return after 6 weeks in Paris, your guild might not exist anymore.
Never underestimate, moreover, the power of just hanging out. Let your voice be heard in g-chat and vent–that way, your guild will come to know you as a person, and not just The Man or The Woman in charge. Don’t censor your personality too much. For example, I let my guild see my silly sense of humor and my love of pets, in-game and out. One guild member referred to me as our guild’s personal lolcat–and I took that as a compliment. I DO like to run around in cat form before raids asking if I can haz mage bizkits. However, don’t let things get too personal. You can share your deepest issues with good friends, but as GM, you need to maintain a degree of professionalism–which means a little distance between your guild and your personal life. If you’re having a fight with your girlfriend, you probably shouldn’t discuss it in g-chat.
2. Keep Your Ears Open
If you’re the GM, you probably don’t have to fish for members’ opinions too often. More than likely, they will share them with you unasked. However, some might not feel completely comfortable talking to The Man, so enlist your fellow officers (particularly any understanding or nurturing types) to keep their ears to the ground, so to speak. If there is a dip in morale in the guild, you should know about it. The person who does recruiting for your guild can probably help you out here. A good recruiting officer will be an advocate for applicants and initiates, and long after they become full members, they will probably feel comfortable talking to that person.
3. Respond to Member Concerns
If a major issue arises–like a serious argument over loot that plays out publicly–don’t just let it drop. Meet with your officers as quickly as possible, make a decision, and explain it to both parties. Someone will inevitably be unhappy, but you want to let your members know that you are capable of handling problems. It also might be a good idea to write a summary of any major decisions–especially if the controversy affected several players–and post it in a read-only forum in the website.
If a minor issue comes up–and they do all the time–make it a topic at the next officer meeting. Officers and GMs alike will receive many tells, emails, or website PMs per week about specific member concerns. Sometimes the member asks you to keep the complaint confidential, but more often, the member wants the leadership to know about and address the concern. Collateral Damage talks about all such requests–both legitimate issues and whiny QQ–at officer meetings. If a member sends one of us a PM, and doesn’t tell us to keep it quiet, it goes on the agenda. Sometimes the decision we make is to do nothing, and sometimes that’s the right call. However, most often something is done to resolve or clarify the issue.
It is important that your members know that their requests will be considered. Once the officers have made a decision, be sure to communicate it to the person who originally asked the question. Even if the answer is “no,” for the most part, people are glad that their ideas were considered.
4. Do Your Homework
It’s highly unlikely in an organization of, say, 50 members, that the Guild Master would happen to be the best player. That usually is not the case–statistics are against you, future GMs. You may not be able to control your natural aptitude for fast-twitch movement, but you can control the amount of information you can master. A Guild Master should do everything possible to be a better player and a better leader. Know your own weaknesses, and work to overcome them. For example, my own personal weakness is panic–sometimes I’ll do the wrong thing in a raid if I get startled. What’s the solution? Never be surprised. I read up on the fight mechanics and rehearse them to myself. I still feel the panic when I see a boss ability for the first time, but with a little coaching, I can usually control my reactions. It’s not enough to know, for example that Illidan does a Dark Barrage in Phase 2. For me to handle it adequately, I need to have linked the ability to the counter in my head, as in: “Okay, Dark Barrage–when it’s my turn in the rotation, that means I target the affected player and hit my Nature’s Swiftness/Healing Touch macro.” Figure out your personal kryptonite as a player and find ways to work around it. It might seem a little petty, but I have seen many players criticize their guild masters for being bad players. I know that different skills are involved in being a great raider and in being a great leader–but try not to give the QQ machine any more ammo than necessary.
It’s one thing to master your own class and spec, but as GM, your research needs to extend beyond yourself and your immediate needs. You are your guild’s visionary, and if you don’t have a sense of the future, your guild is lost. Always know what’s on the horizon, both for the game in general and for your own guild. For example, a guild master at this moment should be very informed about raiding post patch 3.0.x and in Wrath. The GM should have a sense of how things have changed with the new patch not just for her own class, but for every class. A good GM will be checking the news sites daily, and he or she will be leading the officers in discussions about how the guild will change once the expansion hits. My guild is extremely forward-looking, to the point of already having our first Naxx 25 on the raid calendar. We already have many policies in place for Wrath–with some major changes to suit the new raiding paradigm–and we are planning a mini-retreat (virtual style) in which we meet for multiple hours two days in a row and hammer out the final details. It’s entirely possible that some members will be just as interested and informed as the officers, but they certainly don’t have to be. When the game changes, you, the GM, will have to guide many of your members. The information is out there–inform yourself so that you can teach.
If you are also the raid leader for your guild, your task multiplies. You must absorb all of the information available about the bosses you will be taking down, and you should stay several bosses ahead of your guild’s raid progression. Once again, your task will be to teach others, and your ability to communicate information will help you construct your authority as leader. However, raid leading is truly difficult. The only way to get better is to practice, practice, practice. If you’re new to leading, let your guild know, and be humble about it. Usually, people will be understanding. The worst thing you can do is to get defensive. Try to master your task and keep a strong command of the situation, but if that fails, don’t be afraid to take suggestions.
5. Maintain Dialogue With Officers
I cannot stress enough how important it is to have a weekly officer meeting. Do not make all decisions yourself. Even if you are the final arbiter, discussion and negotiation are helpful processes. The officers’ meeting has a very significant benefit when it comes to making new policy. Even with only three or so officers, there will be a diversity of opinion. The give-and-take from an officer’s meeting will help you workshop your ideas. By the time you present new rules to the guild, you will have already worked out many of the problem areas.
In addition, officers should participate in the little daily tasks of guild management. Make sure that members are aware of what officers do and the authority that they hold. If members don’t observe the officers making decisions, they’ll take all further concerns and QQ directly to the GM’s virtual door. Moreover, they might feel resentful toward a too-powerful GM. No one likes to feel like they belong to an organization led by a tyrant! Where the balance of the the day-to-day work in your guild falls–on the officers’ shoulders or on the GM’s–is entirely up to the individual organization. Collateral Damage is quite unique, but we’ve been extraordinarily successful without a true GM. Instead, we’ve got 8 officers fully invested with GM-level powers, and we all serve as checks and balances for each other. I can tell you, our bargaining and negotiating skills have gotten quite good over the last several months.
Conclusions
Guild management always takes more time than you expect, and it will scale with the complexity of your organization. Raiding guilds in particular are delicate to manage. If you want to maintain your own authority–and a stable guild–you have to get used to working for the good of your organization on a consistent basis. Yes, this means that the GM is held to a higher standard than the members. For you, it’s not all about fun and games–you have responsibilities too.
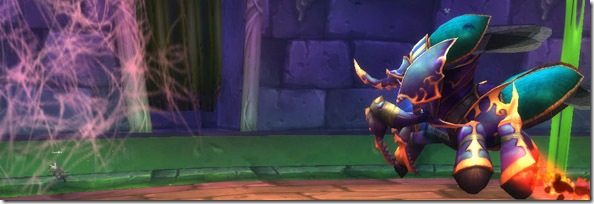
 He likes to spawn a mob during this phase. Have your off tank keep an eye for one. When you kill it, it’s going to spawn these mini-mobs called Corpse Scarabs. Have any AoE DPS lock them in place and burn them down before they get on the tanks and healers.
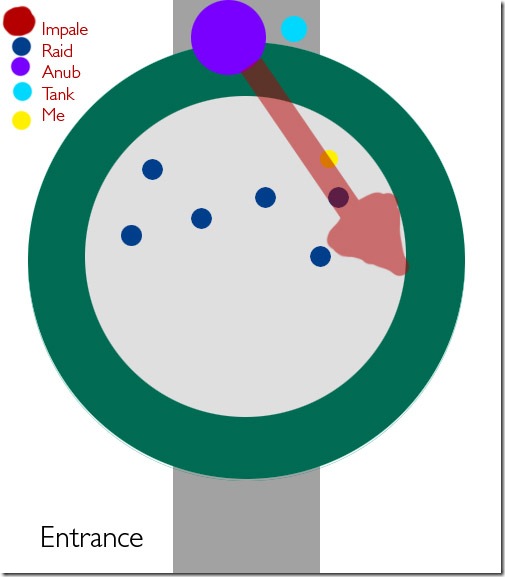
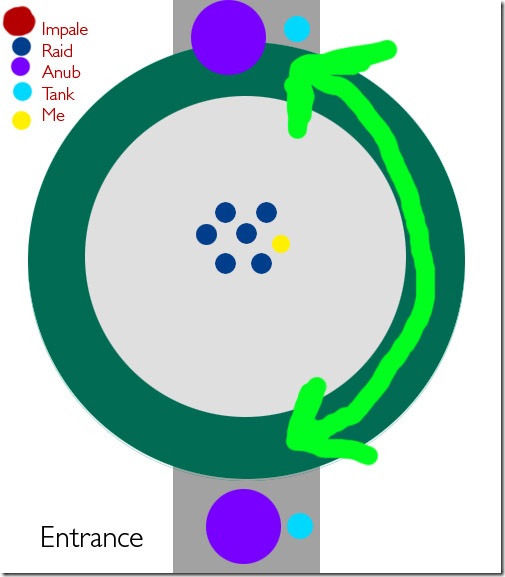
  So for instance, the red arrow signifies an example Impale targeting a blue raid member. I, being the idiot Dwarf I am, is standing just ahead of him. I’m close enough that I would get struck by Impale as well.



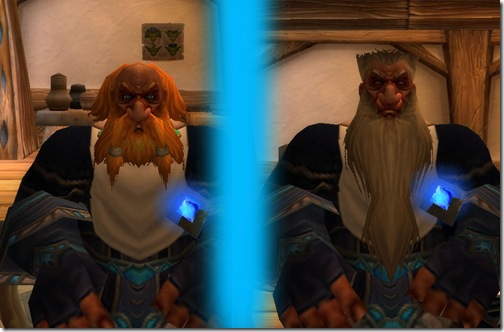
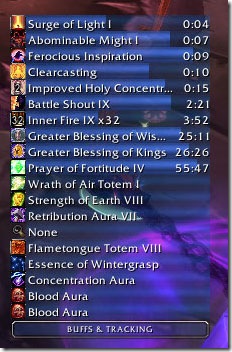
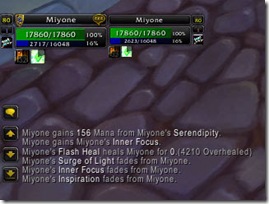 I’ve noticed Inner Focus and Clearcasting be consumed at the same time after one Greater Heal.