Raid Leading Smoothly Like Barney Ross

This is a guest post by Blacksen of Blacksen’s End. Don’t forget to check out his blog!

I just saw The Expendables a couple of nights ago, and while not a particularly fantastic movie, there were a few good moments. The movie basically revolves around a team (called “the Expendables”) who undertake a mission to free an Island from a tyrannical General and the American investment puppeteers ordering him around.

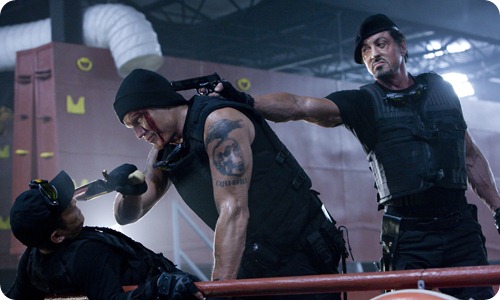
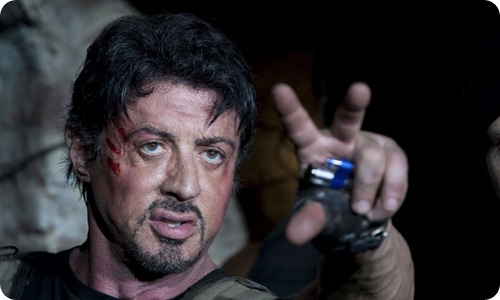
The team consists of 4-5 skilled assassins (if you can call them that), all taking orders from Barney Ross (Sylvester Stallone’s character). While watching, I noticed that the movie was kind of like a World of Warcraft raid. The Expendables fought wave after wave of terrible soldiers (Sylvester Stallone ironically calls them “trash”). At points, they were just throwing out grenades and AoE’ing the trash down. Eventually, they would run into one of the Americans (which we could call a “boss”), and there would be a big battle around them. Throughout the movie, I noticed that Barney Ross had a lot of characteristics that matched my own raid leadership style. Even towards the end, Sylvester Stallone made a terrible “your mom” joke.

What other qualities that Barney had that would make him a good WoW raid leader?

Draw the line and stick to it. Without giving anything away, there are numerous instances in which Barney clearly draws a line. At the start of the movie, he draws the line for one of his team members. He essentially says “this is how much I’m going to tolerate,” and when that team member does cross the line, there are some real consequences.

A lot of World of Warcraft raider leaders don’t know how to do this (and I admit, I sometimes fail at enforcement). You must clearly identify the point in which someone isn’t adequate. Is it 8k DPS? 10k? 2 Malleable Goos? 5 Deathwhisperer ghosts? And when one of these does get crossed, you should be prepared to actually enforce the proposed consequences. If you tell everyone “we’ll be swapping you out the second time you get hit by Halion’s cutters,” then you should actually swap people out at the second time they get hit by cutters.
expendables-3

Keep your cool. Even amidst hundreds of bullets flying his way every second, Barney is still able to stay calm and make good decisions. He doesn’t get too angry, stressed, or upset, despite being in a very difficult situation. Being able to make decisions when things are very challenging and stressful is a critical part to effective raid leadership. Barney could have started to freak out and make rash decisions. Instead, he chose to stay cool, think things through, and make good calls.

Know how and when to change plans. Sometimes, things just aren’t working. For Barney, crap seemed to hit the fan all the time. Whether he’s just riding in a car with his friends and getting ambushed, or he’s trying to set up remote mines in the villa, things just never seem to go right. For both Barney and his second-in-command, it was critical to deviate from the plan and adapt to the situation. For raid leaders, there are several points in which you might also need to do this. If you don’t have a raid composition that’s going to complete a fight, it might be worth not trying (heroic Lich King without a disc priest, for example). There’s really not much of a point in attempting heroic Halion with 5 healers, so you might need to change plans.

If you’re trying a certain strategy and it just isn’t working, try something else. Heroic Halion was a good example for us: I was stubborn for a while and insisted that Halion be tanked at the wall while upstairs. We eventually found that it just wasn’t working, so we tried the “run through” strategy that we use now.

Stallone probably would have been more willing to change plans much earlier, as it was pretty obvious things weren’t going right.

Delegate to key players. For some raid leaders, it can be really tempting to try to micro-manage everything that’s going on. After all, most of us trust ourselves more than anyone else. By trying to control everything, you feel like there’s less room for other people to make an error in judgment. Usually, this mentality leads to poorer decisions and a more stressed raid leader. Barney clearly would have known that if he were a raid leader. Throughout the movie, he knows when there are times to delegate tasks for the rest of his crew. Sometimes, you just can’t do everything alone. More importantly, he knows which members would succeed better in certain areas.

At one point, the “short” team member was given a job in which his small stature would help him. By identifying the advantageous qualities of your key players, you can delegate them tasks in which they will truly shine.
expendables-2

Recruit a completely badass team. I’ve said it a hundred times, and I’ll say it again: the key to a successful progression guild is effective recruitment.

Barney would have died within the first 5 minutes of the movie without the support of his team. For raid leaders, this is also the case. Recruit badass players – you’ll need their support in order to free an Island from a tyrant… erm, I mean free Azeroth from Deathwing.

Holy Power and More for the Post-Cataclysmic Paladin

Please give a warm World of Matticus welcome to guest-blogger Ophelie, and remember to visit Bossy Pally for more great Paladin posts!

I came home from a weekend in the wilderness to discover my class turned upside down. That’s what happens when you spend two days and a night in the middle of nowhere without internet. You come back and you’re lost.

As I was scrambling to piece together the bits of news, Matt suggested I guest post about it. Guest post about the paladin news, of course, not my scrambling. So I did what I always do when having to talk about Cataclysm news. I grabbed a pen, some paper and called up Google.

And if that wasn’t enough, a new beta build was released between then and now, just for confusion purposes.

So…here’s what I found out, and there’s what I think of it all.

Apparently, last Friday there was a certain Twitter Developer Chat. Apparently, some paladiny stuff was said. Apparently, it was stuff like:

All of the paladin specializations will make use of a new resource called Holy Power. Holy Power accumulates from using Crusader Strike, Holy Shock, and some other talents. Holy Power can be consumed to augment a variety of abilities, including:

An instant mana-free heal: Word of Glory
A buff to increase holy damage done: Inquisition
A massive physical melee attack for Retribution paladins: Templar’s Verdict
Holy Shield’s duration is now extended by Holy Power
Divine Storm’s damage is now increased by Holy Power

We also introduced several new heals for Holy Paladins including Healing Hands (an AoE heal-over-time that is applied to all players standing near the paladin), Light of Dawn (a cone heal with a 30-yard range), as well as a new heal called Divine Light, which is similar to a priest’s Greater Heal, and the new instant heal mentioned above, Word of Glory.

As for the release of new talents builds, for those of us who aren’t lucky enough to witness them first hand, here’s a link to the MMO Champion version.

I’m going to stick with the holy side of the things, because I’m primarily a healer and this, after all, is primarily a healing blog. I’m also going to stick with the big picture and what stood out to me. I figure anyone who really cares about the nitty gritty details has already read (if not tested) them anyway.

Back to the dev chat news, in other words, we get a new bar (like a health or mana bar, and yes it’s currently supposed to be an actual bar and not cute circles on our screen) to record stacked up combo-like points as we cast Holy Shock, as we directly heal our Beacon target (via the Tower of Radiance talent) and possibly as we do other things. We’re then given Word of Glory, a get-out-of-jail free card for when there’s need to fill in one of the gaps caused by Holy Shock cooldowns.

More Bars, More Bars!

When I first heard of a Holy Power bar, I froze for a second, worried that my mana bar was being replaced. But no, they’re actually adding a new bar and not removing old bars. I like that. It gives us something else to keep our eyes on and to make the mental hamster run faster. It’s not too complex, after all, last I heard, Holy Power only stacked up to 3. 3 points is totally something I can keep track of.

Forcing us to use Holy Shock regularly, keeping track of Holy Power stacks and deciding when to use a finishing move is a small but welcome addition to the holy paladin thought process.

EDIT : In the comments, Esh, who’s been playing in the beta, reported that Holy Power is actually a buff icon and not a bar, at least at lower levels. It’s been assumed that Holy Power would be a bar due to a post by Ghostcrawler, but a buff icon certainly makes more sense.

Holy Shock: A Love Story

Personal confession time: I love Holy Shock. I’ve always loved Holy Shock. Holy Shock and I go way back. Holy Shock was the whole reason I specced Holy in the first place (hey I was new to the game and didn’t realize there were more efficient ways to deal damage). Though I eventually discovered it wasn’t the wonderful spell I had imagined, it’s still been there for me through all the hard times. Whenever I needed to quickly save someone without abandoning the tanks, it didn’t hesitate. It was my companion during all those ICC fights that had me casting and running (and cursing!) at the same time.  It listened to all my problems and never laughed at me… Erm. Moving on.

In one sentence, it should come as no surprised that I’m thrilled to see Holy Shock finally getting the game mechanics buff it deserves.

Oh, and if adding importance to Holy Shock wasn’t enough, its mana cost is brought down to 8% from 18% and it helps with all the slow casting via the talents Infusion of Light and Speed of Light, somewhat replacing the current Light’s Grace.

There’s also a new spell, Holy Mending, that gives Holy Shock a small heal over time. 15% of a Holy Shock over 9 seconds seems a little silly, but, um, you know, at least they’re trying.

EDIT: Ryonar left an excellent comment that is unfortunately stuck in pending comment limbo. He pointed out that Holy Mending is already in the game: it’s the tier 8 2p bonus. The MMO Champion Paladin page makes it look like a skill trainable at level 80. It either a bug, or it’s becoming a permanent skill in the expansion.

Addressing the Movement Issue

Remember what I said about casting and running at the same time?

Sorry, I couldn’t heal I was moving.”

How often has an embarrassed paladin said that following a premature tank death? (There’s also the slightly more disturbing “sorry, I couldn’t move I was healing”.)

To me, the new emphasis placed on Holy Shock, and the addition of Word of Glory, another instant heal, looks like an attempt to make movement more manageable. I’m curious to see how much assistance the final mechanics of Healing Hands and Light of Dawn end up providing to the current movement impaired paladin. As of now, both are instant and both seem to allow movement during the spell effect.

Healing Hands even increases movement speed by up to 60% when talented into Speed of Light. Being someone who staged a large protest when she couldn’t fit Pursuit of Justice into all her paladin specs, my stomach did summersaults when I discovers the good news.

Feelin’ Like a Paladin

Like druid healers and their tree forms, like shamans with their skirts, like priests with, um, whatever is meaningful to priests (normally I’d make a joke about priests always being dead, but for some reason, it feels like a bad idea to do that here), us paladins have a sense of identity too.

In our history, we’ve been blasphemized. We’ve been forced to wear certain pieces of mail gear because it was better itemized than plate. (Min/maxers even went as far as equipping the Meteor Chaser’s Raiment, which is made of toilet paper, of all things). Again and again, we’ve been sent to the back of the room with all the casters. Many of us were even deprived of shields, resigning ourselves to carrying orbs or lamps in our off-hands. The horrors just never end.

On top of it all, Cataclysm promises to lessen the differences between the healing classes, in an effort to promote Blizzard’s “blame the player not the class” campaign (or was it, “bring the player, not the class”? I can never get it straight.)

But you know what?

I’m ok with it.

Seriously. Healing Hands and Light of Dawn introduce some multi-target healing beyond the limitations of Beacon of Light and Glyph of Holy Light. Healing Hands and Holy Mending/Holy Shock also flirt with heals over time, another element lacking in paladin healing.

Yet, while the end results are similar from one class to another, our ways to reach those ends are tailored to our unique paladin interests (special little snowflakes that we are). The mechanics of our new spells encourage us to get up close and personal (hopefully, my stubborn plate wearing tendencies will finally be useful) and Holy Power…

Ah! Holy Power!

I can just picture my little paladin puffing up with zealousness as she casts, then unleashing it all in one blow.

Oh, and yes, I do agree with Rohan and a number of others in their preference for the term Zeal. The concept of Holy Power is terrific, the name Holy Power, however, makes me think of energy drinks.

But you know that when we’ve reduced ourselves to complaining about semantics, we’re finally getting some pretty promising Cataclysm news.

Bursting Bubbles

This is a guest post from Dwynwen, a Discipline Priest with some lessons to share. Be sure to visit her blog!

I’m one of many burned out 25 man raiders who have turned to 10’s to help minimize raiding impact on ‘real life’. I’d been at loose ends for a regular but casual raid for a few weeks after an alt run I’d been tanking fell apart.

When the call went out for a healer to join a better-geared 10 man ICC alt run, I offered my priest without really thinking about it and almost immediately wondered what the heck I’d done. In theory my priest was quite well geared to start ICC, wearing mostly 232 and 245 with a couple of PVP 264. The real problem was that I’d never really learned to heal in a raid as disc, and I wasn’t looking forward to attempting harder content than I’d ever tried on her before.

dwyn2

I had two major problems with discipline. One was of perception, and the other performance. Disc isn’t widely understood, at least on the servers I’ve played on. While the information is certainly out there if you look hard enough, holy priests are assumed to be the default and it takes a little digging to pull out the disc information from priest threads dominated by Circle of Healing. Worse, those who don’t know much about the differences between two specs judge us against our holy brothers and sisters, against which bar for throughput we haven’t a hope. I’d had quite a few bad experiences at the hands of PUG raid leaders who judged me purely on healing done, which does make my performance look appalling. Lacking the confidence to challenge this assumption, I tried to adopt a throughput-focused playstyle by using Prayer of Healing, Flash Heal, and Greater Heal. I struggled with mana issues and still performed poorly, and had added quite a bit of stress and anxiety for myself into the bargain.

In desperation, I respecced to holy expecting that to be the answer. I lasted half a heroic before teleporting back out to the trainer. I missed the powerful and dynamic playstyle that I’d fallen in love with in the battlegrounds, using every tool at my disposal to survive and claw my allies back from the abyss. I have the greatest respect for holy priests, but I regretfully concluded it was simply not for me.

Defeated, I stopped putting my hand up for raids. My confidence continued to take a beating from the usual abuse meted out to healers in LFG. Intellectually I knew full well the Paladin had killed himself by standing in a void zone, but with my faith in my abilities at such a low ebb I meekly dropped group to save them the trouble of a votekick and vowed to focus on PVP.

It’s probably understandable that after all of this I would be nervous about stepping into ICC. The first run I was healing with a druid who had a disc priest main. The druid took over healing assigns and she was confident in directing me. “We’ll get the Paladin to tank heal” she suggested, “so you can focus on raid healing with me.”

Raid heal? I didn’t think I could.

“Keep an eye on the tanks just in case we run into trouble, but focus on keeping bubble up on the raid.”

I followed her advice as best I could. The first four bosses passed without incident as I focused on learning this new playstyle. Without a healing meter that tracked absorbs I had no idea how well i was doing, but I soon found I felt far less anxiety and my mana problems went away. At first, my saviour complex had me leaping to direct heal DPS who were taking damage but I slowly learned to have faith in the bubble to hold them until the druid HOT’s could roll in.

To start with, I was quite sparing of the bubbles, only casting them over the whole raid when I knew raid-wide damage was about to occur. As started to see heal reports whispered from the druid that showed how powerful my absorbs were, I gradually learned the art of bubble spam. I modified my raid frames to show Weakened Soul, and aimed to keep it up on all members of the raid at all times. I made a mouseover macro for Power Word: Shield, and bound it to 1.

I learned to move almost constantly to keep myself out of damaging effects while still rotating through the raid, keeping up POM and throwing out Penance. I kept casting, throwing out Renew if I had nothing else to do. If I didn’t have mana problems, I pushed harder until I did.  I started to get better at picking the times when direct healing was called for. Bubble-Spammer I am, but as the only healer in our raid able to break both fears on Blood Queen I gloried in throwing caution to the wind, stacking haste procs, and exploding out in Prayer of Healing to get the raid through. If that’s what it feels like to be a holy priest, I think I’m starting to understand.

dwyn

If the mistakes I made were driven by the perception and attitudes of the community, so was the solution. I can credit good mentoring for most of my improvement. My druid friend gave me many tips, hints, and plenty of encouragement. Apparently this is as natural to her as breathing, because when I credited her with teaching me how to disc she scoffed and assured me I already could.

If only she knew.

There’s a certain truth however to what she says. I already possessed enough of the information I needed to raid successfully as disc, little bits here and there I’d gleaned in my wider reading. What I was really missing was the confidence to put into practice what I knew was right, and the numbers to back it up. Penance Priest, World of Matticus and Plus Heal have filled in some of the gaps for me here. The final piece though only dropped into place when I was provided with an environment where constructive criticism abounded in which to develop and learn.

I can wholeheartedly agree with "The ABC of Discipline Priesting" that playstyle makes far more difference than perfect stat itemisation, and I think it’s a message that many new disc can benefit from. I can assure you I could be gemmed with pure agility and still be performing better than I was before – and I’m not a bad player. I’ve raided 25 man content as progression over two expansions, and have always had a reputation in my guild as someone who hits hard above their gear level and follows direction well. It still took more than a few trial-and-error runs and a guide to gemming for me to finally shed my fear of disc’s perception and start learning to play well.

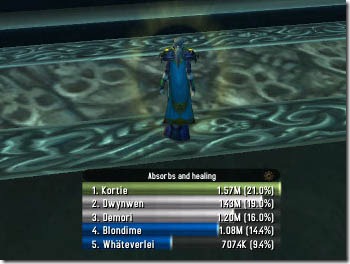
My gear is certainly not fabulously itemised at the moment – I’m high on haste and regen and low on crit according to the conventional wisdom, and the 200 hit rating and 150 resilience I’m carrying probably isn’t doing anyone any good. I had my reward for all my hard work and development though when, finally brave enough to enter a 25 man ICC PUG, I saw myself top the charts fight after fight against very geared healers. Winning the roll on Althor’s Abacus possibly assisted with the general feeling of benevolence to all humanity, but at the root I was thankful I could finally feel proud of my impact. Bubble is, after all, the ultimate heal snipe.

Of course, the meters don’t tell the whole story and that’s not really what I’m celebrating here. My sense of achievement comes not from indulging my saviour complex, or from the numbers on recount, but from a feeling of mastery of my class. Besides, it doesn’t matter how much you push to top the chart – you’ll still be outhealed by the hunter you killed with Mark of the Fallen Champion by meter-chasing instead of following your assigns.

skada

Oops.

The Flash of Light Spec

This is a guest post by @Dtotheug

What spec and glyphs should I should I use as a Holy Paladin for raiding?

That is a good question and really depends on how you want to play and what your role is in the raid. Currently there are two prevailing specs and each have their plus and minuses.

The first spec is the Flash of Light spec (51/5/15) which focuses on a bigger Flash of Light (FoL) heal, more mitigation via Sacred Shield (because Sacred Shield scales with Spell Power), increases the HoT effect of your Infusion of Light talent, and relies more on your healing spells to crit. The problem with this spec is that if you are not mostly using FoL you’re going to have to watch your mana pool closely because Holy Lights and Holy Shocks are going to eat through your mana pool.

This spec also greatly benefits from the four piece bonus of the T9 set which increases the HoT of your FoL by 100%. The major glyphs I would recommend if you are thinking about using this spec are Glyph of Seal of Light, Glyph of Beacon Light, and Glyph of Flash of Light.

Glyph of Seal of Light is a flat 5% increase to your healing spells and since you will be criting more with this spec (which means more mana being returned) you won’t have to worry about your mana as much, which means this glyph is going to benefit you more than the Glyph of Seal of Wisdom.

Glyph of Beacon of Light is chosen because it is going to add 30 seconds to Beacon of Light which means you don’t have to worry about it dropping off your target as quickly. In addition you won’t have to worry about trying to cast Beacon of Light and Sacred Shield (both have a 30 second durations) at the same time, it will also conserve some mana because you won’t be casting it as much, and plus it will let you focus on using your healing spells more.

Glyph of Flash of Light is a must have for this spec. It increases the crit chance of your Flash of Light by 5% which calculates out to a 1.5% mana return and a 2.5% increase on your Flash of Light heals.

If you are going to be the main tank healer in a 10-man or 25-man ICC raid I would suggest against this spec, you’re are going to be clicking FoL so much you may break your mouse. There are two situations when I would use this spec. The first is if this is my off-spec and I was running a 10-man or 25-man and if an extra healer was needed, I would step in. Between your Beacon of Light, Sacred Shield, and FoLs, this should give the other healers in your raid the buffer area they need to keep everyone topped off.

The other situation I would use this spec in is if I was backing up the main tank healer or helping with raid healing in a 25-man raid. Your FoLs will be filling in the gaps of the other healers and help keep everyone topped off.

EDIT: Forgot to mention there’s a part 2 coming

Healing Icecrown from a Druid’s Perspective – Part 2

This is a guest post by Epiphanize, a Resto Druid, and co-host of Raid Warning.

Now that we got all that out of the way, it is time to get down to business. You didn’t really show up just to listen to me go on about glyphs, did you? No, you came to heal your branches off! One quick thing: Be sure to check out the comments in my previous article; there were some good suggestions for alternative point distribution.

Lord Marrowgar

So here we are, Lord Marrowgar, a very interesting challenge for healers. However, it does give Druids a chance to show off their ability to heal on the run. This can be a relatively hectic fight, so regardless of whether you are tank or raid healing, you will need to be tossing HoTs at some points during the fight.

Tank Healing

This is the easier of two roles against Marrowgar.  During his initial phase and all the ones where he is not spinning all over the place, it is essentially a one tank fight. Since the nerf, Marrowgar does quit a bit less melee damage. So the damage your meat shield will be taking will be fairly minimal. This is pretty manageable for Trees, as we can keep the tank pretty well topped off with our HoTs.

One ability you need to be prepared for though is Saber Lash.  Saber Lash is an ability similar to Koralon’s Meteor Fists, in which two tanks will need to stack in order to distribute the damage. Your healing priority will be the Main Tank followed by the Off-Tank after a Saber Lash. As a tree, you have the added benefit of hitting both with Wild Growth before topping off the Main Tank. Other than dodging the occasional slow-motion blue flames, there is not much to deal with during this phase.

Raid Healing

As stated above, this fight can be quite hectic for a raid healer. During the first phase you will have quite a bit to manage. In 10-player, one random player will be Bone Spiked. DPS will be turning to focus on getting the player down as quickly as possible. This presents two things for you as a raid healer. You obviously will need to be focusing on healing the spiked player. I’ve managed to safely keep them up with Rejuvenation and Swiftmend, though this can also be accomplished with a few Nourishes as well. The other thing is people taking Coldflame damage, as they will often be ignoring the flames to get the person off the spike. Again this is usually handled by tossing some Rejuvenations and Wild Growth, saving Swiftmend for anyone who stands in the fire just a bit too long.

The last thing you will be concerned with during the pre-Bone Storm phases is the aforementioned Coldflame. As the raid healer, you will be responsible for topping off anyone who doesn’t get out of the way of the flames quick enough. The damage it does is not too horrible as long as no one just stands there. Its actually more of a nuisance avoiding it yourself, as you will often need to decide between standing their long enough to finish casting a heal, or cutting it short to avoid taking too much damage yourself.

Bone Storm

This phase is pretty similar for Druids regardless of your role. Marrowgar will become untauntable and spin around the room doing relatively minor AOE damage. It is still good to avoid him if possible, as it makes life a bit easier on all the healers. The big thing you will be dealing with is blue flames (of ice?) again. Only this time he drops 4 at a time. This phase is all about survival. Since you will be on the move during this, Druids will be arguably the best healer for this phase. This is where glyphs like Rapid Rejuvenation and Wild Growth start to shine in ICC. Just keep HoTs on everyone and toss Wild Growth on cooldown and you should be fine. Make sure to keep Swiftmend and your NS-HT macro at the ready in case anyone gets into trouble.

One last thing that the Tank Healer needs to consider is the position of the tanks during all chaos. The tanks will be sticking close to Marrowgar during Bone Storm in order to pick him up at the end of the phase. Not only will the tanks be taking a bit extra damage, but you will want to be nearby to keep the Main Tank healed up while everyone gets back to some semblance of order.

Lady Deathwhisper

The next boss in The Citadel is quite a bit easier on the healers than Marrowgar. If your group is good about staying out of Death and Decay and interrupting Frost Bolts, you won’t have to mash the keyboard nearly as much. For Druids, this fight is all about situational awareness and keeping in range of the players taking damage.

Phase 1

The key to Lady Deathwhisper is getting through her first phase. During this phase she will be behind a mana shield that DPS will need to burn through in between dealing with adds that spawn from either side of the room. After that, the fight is pretty much tank and spank. In my experience, this is the fight where you are most likely to only use 2 healers.

The mechanics of the adds are pretty complicated at times, so it is good to familiarize yourself with them. There will be times the tank and raid will be taking increased damage based on these mechanics. There is a lot of movement involved, so there will often be times you will have to drag your stump across the room to toss a heal or two.

There are a few other considerations during this phase. First,  Adherents will place Curse of Torpor on random raid members that increases the cooldown of their abilities, so you will want to make sure you are decursing as often as possible. There will be a bit of randomness from the Death and Decay and Shadow Bolts, so be on the look out. Again, there is going to be some bouncing back and forth because of adds, so communicate with the other healer(s) to make sure you have all your bases covered.

Phase 2

Congratulations, you have made it through the hard part. After her shield is down she becomes tauntable, only has 3 million hit points, and the adds stop spawning. Since this is often 2-healed, you will more than likely be both on raid duty and tank duty. While this phase is pretty much tank and spank, there are some things going on that affect the healers.

The tanks will be swapping as Deathwhisper places a stacking debuff on the tank that reduces their threat. So you will want to keep an ear out for who is tanking her and focus your healing accordingly. She will still be dropping Death and Decay, as well as random frost bolts that should be interrupted. Finally, she will summon on non-targetable Vengeful Shade that will follow a player around and explode if it catches them. You will need to do your best to avoid them if they follow you, and be prepared to heal someone if they get caught (if they don’t get one-shotted).  It’s a pretty quick phase though, and you will be on your way up the elevator in no time.

Gunship Battle

This is a gimmick fight through and through and is a lot of fun. There aren’t really a lot of important mechanics here for healers. Your gunship has two guns that you use to attack the enemy’s gunship.  Occasionally, the opposing ship will summon a mage/sorcerer that will freeze your guns. You will then need to send some raid members over to kill it in order free up your cannons. Back on your own ship, mobs will appear through a portal that will need to be killed, while avoiding incoming rockets and axe-throwers.

Defenders

This is the easier of the two healing roles. Usually one tank and some ranged DPS will stay behind to deal with the enemy boarding party.  The portal will spawn a Sergeant and some Marines. The Sergeant is the only one that really poses any threat, as he has pretty nasty Bladestorm and Wounding Strike abilities. Most of your healing will be focused on the tank, especially if you only have ranged DPS defending. Just be prepared to work a bit extra to overcome the -25% healing debuff.

Two other items of note: First, stay out of shinnies! Rockets will be coming over to your side and the big shiny circle on the ground is an indicator your in the path of said rocket. Be prepared to heal anyone who has yet to learn this golden rule of Warcraft. Second, keep an eye on your boarding party tank. They will be taking damage as they fly back over to your ship, and not every healer is as equipped to heal in the air as us Trees. I have seen quite a few tanks bite it on their way back over as they still have the aggro from the ranged mobs on the enemy ship. A well timed heal from you can be the thing that saves them.

Boarding Party

As the boarding party healer you got the short end of the branch (no, the bad tree jokes will not stop). You will be heading over to the enemy ship with most of the DPS and a Tank to take down the mage/sorcerer while fending off the general and adds. On your way over it will be a good idea to HoT up the tank, as things will be a bit chaotic when you first get over there.

The tank will be keeping the enemy commander busy why DPS take down the mage/sorcerer. Keep an eye out because the longer you are over there the stronger the enemy gets. This will cause everyone to take quite a bit of damage. As mentioned earlier, you will need to keep some heals on the tank as he will take some damage on his way back over. Probably a good idea to leave a Rejuvenation in case you need to toss an emergency Swiftmend on the return flight. Again, a fairly straightforward fight for healers.

Deathbringer Saurfang

Phew, here we are, the final encounter of the entrance to the Citadel. This is probably the most interesting fight so far. A lot of what you need to do as a healer will be determined by your groups strategy, but Druids have a few things to keep in mind both as a tank or raid healer, regardless of how you handle Mark of the Fallen Champion.

Raid Healing

First, you do not have any way to stop the damage people will be taking like priests do. So your main role will be to heal up the damage that does get through. There are three mechanics that will be causing you trouble: Boiling Blood, Blood Nova and Mark of the Fallen Champion.

The first ability, Boiling Blood, will be case on a random raid target. If you have a Priest, they will mitigate a lot of the damage to avoid Saurfang building Blood Power. Its still a good idea, whether you have a Priest or not, to toss Rejuvenation on the Boiling Blood target to keep them topped off. The damage isn’t too bad, and one HoT should be enough to keep them safe.

Blood Nova can be more troublesome depending on how much melee you have. If this gets cast on one, a good amount of people will be taking damage. The player that get Blood Nova should run out of the raid to minimize damage and blood power gain. However, if they don’t get out in time, be prepared to throw out Wild Growth and a couple single target heals.

Finally, there is Mark of the Fallen Champion. How you handle this (if at all) is going to depend on your raid strategy. A lot of guilds, mine included, will just let that player die. This minimizes the buildup of blood power and puts a lot less stress on the healers. If you do decide to keep that person alive you will want to give them full HoTs. Yes, you may have to dust off Lifebloom for this one. I usually put up Rejuvenation and Regrowth, with a Swiftmend if needed.

Tank Healing

There is not nearly as much to deal with as a tank healer. The tanks will be switching when they gain the Rune of Blood debuff, so as per most two tank fights you will need to be paying attention. You will also need to be concerned if a player gets Blood Nova near the tank, which could cause a nasty damage spike. Your final obstacle is at 30%, where Saurfang will Frenzy. This means you need to get your stump in gear and heal faster! Other than that, he is business as usual for a tank healer.

—–

And that’s it! You’ve Stormed the Citadel. Just in time for the Plague Works to open. Thus is the life of a WoW player. In the next installment we will be covering healing Rotface, Festergut, and Putricide, all while avoiding getting any goo on your leaves.