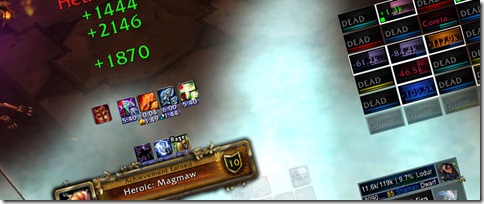
Note: That’s actually Lodur’s kill screenshot. How he heals with raid frames that small, I have no idea =).
Conquest is officially 2/13 in the hard mode 25 progression. It was nice getting the kill and getting the monkey off our backs. It had been weeks since our last progression kill and this was much needed.
Why Magmaw?
We had been struggling for a long time on heroic Chimaeron and it was felt that a change of pace was needed. Knowing it was nerfed, we detoured straight to him instead. I think it took us about ~20 wipes.
Setting up
The first 14 attempts of the night saw us using 7 healers and 4 tanks (1 Frost DK kiting). On the kill, we ended up with 7 healers and 5 tanks (2 Frost DKs kiting).
Healers
2 x Resto Shaman
1 x Resto Druid
1 x Holy Paladin
1 x Disc Priest (Shields)
1 x Disc Priest (Atonement)
1 x Holy Priest
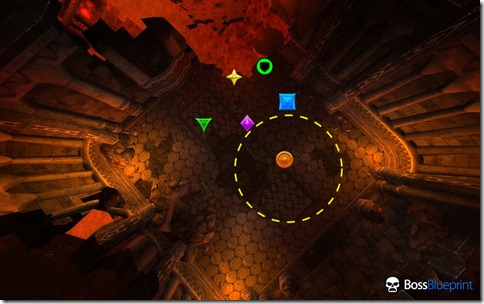
Every DPS player and healer stands on the star and DPS’s from close quarters. The two tanks on Magmaw positioned themselves on the shield depicted above. Our resident Holy Paladin and Resto Druid were assigned to both of them. The triangle, diamond and square marks served a purpose.
We had a group of players who would stand on the outside in order to draw fire from pillars and Nef’s fireballs. We had a Frost Deathknight pick up the parasites but I was having trouble keeping him alive towards the end. This was offset with a second Frost Deathknight who assisted on picking up additional parasites (and split the parasite damage accordingly).
Bro tip: Place all of your outside players together in a group to maximize group healing. In our case, both of the Frost Deathknights, myself and two Hunters were placed in that group. Prayer of Healing combined with Chain Heals and other spells were enough to keep us alive through the pillars.
Tank healing
You will want to use two dedicated players. One healer by themselves may not be enough (at least, when learning). If you’re tank healing, you can’t even deviate for a moment because that tank will die. It’s going to take everything you have to keep them alive. Configure your raid frames to show debuffs like Mangle. If necessary, get your tanks to call the switches so you can keep pace with them.
Assign another healer to cover the tank grabbing the Constructs. They can switch between the tank and the raid if they choose.
Raid healing
Raid damage is going to continue slamming the players (the outside group especially). I wasn’t able to keep them and the kiters alive myself. You’re going to want to use 2-3 healers at least. It’s to counteract the damage from Magma Spit and Lava Spew. Be fast with any Ignitions. It’s up to the players to move, but if you’re standing at the right spot, it shouldn’t take more then a few steps to get clear.
Head phase
When Magmaw eats the spike, this is the time to regenerate and use mana cooldowns. With 3 Priests, we used our Hymn of Hopes separately. Our Resto Shamans used their Mana Tide totems earlier on. Telluric Currents for Resto Shamans helps immensely from what I understand.
Additionally, you may want to consider having 1 Atonement Priest. Smite during the head phase to heal up any residual damage from the transition.
Concentration Potions are awesome here.
Parasite kiting
For the kiting healer on the outside, I suggest using a Holy Priest. My main job was to heal our Frost DKs as they were weaving figure eights around the room. Body and Soul was enough to give them a little burst of speed if they needed it. The benefit of a Priest is that if the DKs get trapped with incoming parasites or encroaching fires, Life Grip gave them a way out. If the kiters were in no danger, I’d default to throwing Renews on the group while running around fire dodging.
This job sucked for me. I had to hog Innervates and use the expensive spells. There were times when I had to swing through in front of the marked positions to get in range of Druids. With the amount of cooldowns we had and the DPS, we were able to afford to do that. The faster a fight goes, the higher the HPS since you’ll have more mana.
Hunters: Don’t use Ice Traps. Outside group may not be able to see Pillars or Nef’s Blazing Infernos
Final phase (sub-30% health)
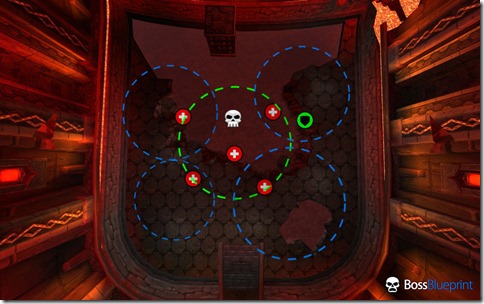
Spread out immediately (Try 6 – 8 yards). This is the most stressful part of the encounter.
Your healing lead is going to want to take a broader look at the health of the raid. Use Tranquility and Divine Hymn accordingly. Don’t forget about DPS Druids or Priests.
The DKs and I drop back further away to allow room for players. Shadowflame Barrages are going to hurt. You may wish to take a moment before the encounter to manually position your healers to maximize the area.
Continue to keep 2 tank healers for Magmaw, 1-2 on the Construct tank and the rest on the raid. Construct tank healing is going to be sketchy. Your raid leader might have to call a DPS burn on a Construct if there’s too many up when you transition. It’s going to be nearly impossible to keep a tank alive with 3 Constructs up. It’s doable if they have 2 Constructs. Watch their tank cooldowns and when theirs wear off, use yours. That should buy you about 30-50 seconds if healers have their single target cooldowns free.
Good luck!
The next question is heroic Maloriakk or heroic Atramedes next.
Also, Conquest healing corps is looking for another Holy Paladin, Boomkin/Resto Druid, Shaman (all specs) and Priest (all specs are welcome). DPS classes are also encouraged to apply.


