What Can Healing Meters Tell You?

meters
The conflict over healing meters is an old topic, on this blog, the WoW healing forums, the PlusHeal forums, and, for many of you, within your own guilds. While it’s widely accepted that meters are one of the best tools dps players can use to analyze their performance, the usefulness of meters when it comes to healing or tanking has always been in doubt. The official line from Ghostcrawler is that meters can’t tell healers very much about their own effectiveness. The following story is a tidbit taken from a forum topic on Shaman PvE healing. I first read it, however, in a repost on my own guild’s site. It seems that whenever the developers comment on healing meters, people take notice. Ghostcrawler says:

We were talking about healing this very fight [XT hardmode] just yesterday. One of the designers had an interesting experience. Their first Holy priest had much larger healing (total and effective) on the fight than their second Holy priest, so they asked the second priest to go Shadow. They kept wiping. They then swapped them, and made the star Holy priest go Shadow. The second Holy priest’s healing was much lower, but they won on the first try. The second priest just had better timing and cast the right spell at the right moment, even though his total and effective healing was lower overall. The moral of the story is meters are very useful, but like any tool, their ability to measure what happens in reality has limitations. In my experience, players put too much emphasis on them, especially for healing.

I have to say that GC’s Tale of Two Priests seems apocryphal to me. As my guild members pointed out in our website discussion, this is an odd situation that we can’t really imagine in any of our raids. It seems–to us anyway–that there’s not enough information here to judge what really happened. One of my guildies suggested that maybe the “star” Holy Priest was also really good at Shadow, and that seems pretty reasonable to me. However, what’s clear is that Ghostcrawler–who, let’s face it, has more information than you or I do–thinks people put too much emphasis on meters.

The truth of the matter is that healing meters CAN tell you a good number of things about a healer’s overall effectiveness. The trick is learning to read them with a critical eye. In the interest of full disclosure, I’ll tell you that I probably like and use healing meters more than most healing bloggers I read, and certainly more than Ghostcrawler. However, in my own guild, I’m usually in the anti-meters faction. Ironically, our guild’s biggest advocate for healing meters is not himself a healer. There’s no guarantee that a guild’s leadership will be healing-savvy, and the points in this article should help raiding healers enter into an intelligent discussion with even the most determined meter-maid of a raid leader.

In this article, I’m going to go over a few things that healing meters CAN and CANNOT reveal about your guild’s healers. I would never, for example, promote or dismiss a healer from my raiding corps based on meters alone. However, if I were evaluating a new healer, I would expect the different logs to be able to tell me a certain amount of things. At certain points, I’m going to be referring to the combat log parsers I’ve personally used, including WWS, WoW Meter Online, World of Logs, and of course, the ubiquitous Recount. Each of these programs displays the information differently, and some are more nuanced in their presentation than others.

What Meters Reveal

Who won the meter?
Did you win the meters last night? If you can answer this question, as a healer anyway, you don’t know how to read the meters. In the above screenshot from WoWMeter Online, it might look like Kaldora “beat” Mallet on the meters…until you notice that Mallet is a discipline priest and, as such, his primary ability doesn’t even show. Essentially, when you are looking at any combat log statistics in any form (even scrolling through the log itself), what you are doing is reconstructing the raid from perspectives other than your own. It’s a bit odd, like watching a home movie of yourself. Just like the camera’s lens, the log parser has a limited view of your actions. It collects statistics, and these tend to be fairly accurate, but you have to do the evaluation yourself. I read a combat log parse critically, and the following are the questions that the statistics can help me answer.

1. What were the healing assignments?
As a rule, tank healers place lower on the meter than raid healers. That’s just how it is–unlike dps, who can do infinite damage, a healer can only put out the numbers in response to damage. The more targets, the higher the ceiling. When I look at a breakdown for a particular fight, I can reconstruct the healing leader’s instructions to the raid pretty easily. The “Breakdown” section of WWS or “Who Healed Whom” section of WoWmeteronline will tell you for certain where people spent their time. However, for the most part I can reconstruct who did what just based on percentage of healing done and spell choice. When I have a new recruit in the raid, I use the meters to check if she’s been following instructions.

2. What is a player’s rotation?
If you’re a longtime healer, you might think that you don’t have a rotation. You just do what seems “natural,” right? Healing might seem like a mysterious force that arises out of the aether, but in fact, every healer has a rotation, either explicit or implicit. It only seems that there’s no rotation because you’re not mashing 1-2-3-3-3-3-3-4-4-4-4-4 like a Moonkin would (and let me tell you, the rare times Matticus lets me play laser chicken I need serious help from Squawk and Awe to get the 3’s and 4’s at the right time). Healer rotations are not necessarily set; rather, they are a series of if-then statements. If X kind of damage occurs, the healer casts spell Y. Some healers have a more explicit rotation than others. Druids are the most like dps in that our healing spells set up combos. 3X Lifebloom is a component of a rotation, as is a HoT setup for Nourish. And that 6-second cooldown for Wild Growth or Circle of Healing? That little piece of timing contributes to the development of a rotation for Resto Druids and Holy Priests. I don’t know about the rest of you, but whenever I’m raid healing, I’m watching my Wild Growth cooldown like a hawk. I know the number of casts I can perform before it’s up again. Every single class has something they do pre-emptively. For Healadins, it’s Bacon of Light and Holy Shield. For the Resto Shaman, it’s Riptide.

After long practice, these routines become automatic. The muscles are quite literally faster than the brain, and before you know it, you’ve hit Rejuv-Rejuv-Rejuv-Swiftmend-Wild Growth without once stopping to think about it. My favorite section of the log parsers are the spell breakdowns. On WoWMeterOnline, I particularly appreciate the pie chart of my abilities. I love the fact that I can compare two sets of statistics–the proportion of spells I actually cast (the pie), versus how much effective healing those spells accomplished (the column). This feature lets me amend my rotation. If I’m casting something too much and not getting enough effective healing out of it, I can alter that pattern. I can also compare my spell choice and cast ratios to other Druids. I’m never the best one out there, and I know it. If I think someone put in a stellar performance on a fight, I try to learn from it. If I see a Druid do particularly well in a fight using 15% Nourish, I’ll make a conscious effort to use it the next time.

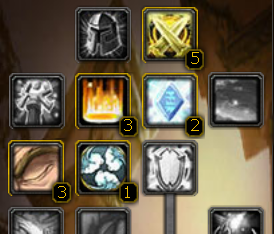
The following image is the breakdown of my own abilities during a Mimiron fight. From this chart, you can reconstruct my rotation. It appears to be very heavy on Rejuv and Wild Growth, probably during the raid healing portions of the fight, with Lifebloom and Nourish used much less (probably mostly on tank targets in P1 and P4).
spell choice

Here is the WoWMeterOnline pie chart for a different Mimiron fight. Even pre-4pc bonus, I’m still getting more than my money’s worth for Rejuvenation. It accounted for 23% of my casts but did 38% of my healing. Nourish, on the other hand, is a relative loser, being a fairly large portion of my casts but a fairly small portion of my healing done. To some extent, this is just the nature of the two spells, but on this particular fight, HoTs are king. Rejuv doesn’t look nearly as good on a fight with less predictable AoE damage.
healing pie chart

3. Did something go terribly wrong?
If you’re accustomed to reading log parses for your guild, you can start to separate the wipes from the successes. Particularly if a wipe was blamed on healing failure, I urge you to go through the parse for that attempt. For this purpose, I find the death log and the Who Healed Whom? sections to be most useful. If you have a healer who repeatedly dies to the same (avoidable) boss ability, that information may help you improve your healing corps. I find, however, that most healing fails have less to do with healers standing in the fire than with healers deviating from their responsibilities. If you lost a tank on an attempt, go look at what your tank healers were doing. In particular, a little statistic called the Focus is helpful for this. If a tank healer has a high focus, that means they are healing randomly in the raid–i.e. diverting attention from their assigned tank. There are many reasons healers do this, but I’ll tell you, most of them have to do with a desire to look better on the meters. I’ve done it myself–looked away from the tank for one moment because I thought I could–and boy does it feel bad afterwards when that little innocent raid heal causes a wipe.

4. Which healer–allowing for class, spec, and assignment–contributed the most on a particular fight?
This is the moment where you really get to compare. You won’t necessarily be able to do this on every fight. Healing corps tend to shift about a bit, as healer turnover is always pretty high. However, on the occasions where you have two holy priests, you can compare them if and only if they were given the same assignment. If you are a healing lead, and you have a new recruit, try to assign them to the same thing as one of your veterans. This is most useful if you can pair them with the same class, but if that isn’t possible, try to match their role as closely as possible. You won’t get anywhere comparing the numbers of a Resto Shaman and a Resto Druid, even if you assign them both to heal the tank. However, if you assign your Resto Shaman to tank healing, you can compare his or her numbers to a Holy Paladin. It might not tell you much, but at least you can see which one kept a tighter focus on their tank or did more healing on that one target. If you do get the magical situation where you can compare raid-healing Resto Druid to raid-healing Resto Druid, you can actually pick a winner. Try to use your knowledge for good and not evil. If you have a new recruit who has some learning to do, encourage them to adopt spell choices more like your veteran. I do urge you to have several parses before you make your recruit change things. What the parses can’t do on their own is tell WHY one player “won” the meters.

5. How much of a role did heal-sniping play in a particular fight?
Ah, sniping. Whenever someone “loses” the meters and others make a big deal about it, there will be talk of sniping. The rather ugly word “sniping” indicates the practice of sneaking around on one’s healing assignment by spot healing other players. To some extent, sniping is something that can’t be avoided. If players are assigned to raid healing, those assignments have to be loose in order to let healers react to the actual damage that goes on in the fight. Even with mods, it’s sometimes hard to tell which raid members are about to receive a needed heal. As a healing leader, just understand how raid heal sniping works against certain classes. Circle of Healing and Wild Growth, due to their “smart” nature, can’t be kept to a neat assignment. These spells will “steal” some heals from your Resto Shamans. If you know that, you know to calm your shamans down when they’re worried. It’s just something that happens–so don’t demote your Shamans or overly praise your Druids. That’s just how the mechanics work together. Believe me, you need every competent healer you have–a raid is not a game of Survivor. If you want to minimize raid heal sniping, I suggest giving your healers proximity-based assignments. Our Mimiron strategy is a good example–we assign healers to quadrants, and as we’re spread out in a ring for P1, P2, and P4 of the fight, healers can’t reach across the room to snipe from their fellows. However, when you’re all clumped up, snipe happens.

Raid heal sniping tends not to affect the outcome of a fight, but the same cannot be said of sniping while tank healing. Sometimes tank healers need a little support. While a HoT or two from a raid healer on a tank is technically sniping, it’s usually helpful. After all, if the tank dies, you’re done, and extra insurance is not a bad thing. However, when your tank healers sneak heals onto the raid, it’s not always so helpful and it sometimes gets the tank killed. However, in some sense we are set up to do just this. I know that in particular, Holy Priests and Resto Druids can (and sometimes should) sneak a few Circles of Healing or Wild Growths on the raid while they’re tank healing. The trick is to have a realistic sense of how often you can turn away from your focus and for how long. I know the couple of times in my healing career I’ve caused a tank death because I’ve been sniping have been moments of intense shame and regret. If you have weird tank deaths in your raid, go check out healers’ focuses. That should tell you if sniping is the cause.

6. How do the healing classes differ from each other?
Whenever I look through a log parse, I’m struck by just how different the four healing classes are. I especially like to look at players’ spell choice. Some, like Holy Pallies, will show a lot of casts of the same thing, while others, like Holy Priests, will show a variety of abilities. This helps me reconstruct what healing was like in a particular raid. When you’re reading those meters, particularly a simple meter like Recount, you should know that “winning” those meters is linked to class and spec. If I’m looking at Recount, especially one that hasn’t been reset for a certain fight but rather has been running all night, I’m probably going to see either a Resto Druid or Holy Priest on top. That’s just what happens–it doesn’t mean too much. The meter is not a perfect measure. It sees a limited amount of information. It can’t tell you, for example, just how important your Pally’s tank heals were. All it can tell you was that he put out less raw healing than your raid healers. Even on the same assignment, your Resto Shamans, Holy Pallies (unless you have no Ret Pally and your Healadin gets to cast Judgment of Light), and Disc Priests will almost always be lower down. This is just how our spells work together, and it doesn’t make Pallies or Shamans bad. Also, if your raid is melee heavy, you might sometimes see the Ret Pally sneak up the meter with just Judgment of Light. However, this doesn’t mean that you should make your Holy Pally go Ret because Ret’s healing is “better.” Believe me when I say that Judgment of Light alone won’t heal your tank.

Why Do Some Players Place Higher than Others on the Meter?

Even when class, spec, and assignment are the same, players’ numbers will vary. Many people would claim that “skill” determines placement, but it’s only part of the truth. That sort of answer contradicts GC’s anecdote and gives healers a sense that they can’t improve, no matter what they do. However, there are usually resolvable issues that determine effective healing. It’s not all reaction time or “innate” gaming ability! As a 30-year old woman who didn’t grow up playing video games, I wouldn’t stand a chance if it weren’t possible to learn better healing techniques. However, I find myself on the top of the meters from time to time (and also…on the bottom). This wouldn’t happen if it weren’t possible to change my performance through effort.

As a healing lead, I’ve read a lot of meters. In my mind, the following are the most common reasons for meter differences between players.

1. Casting speed. By “casting speed,” I mean the rate at which the player queues up a new spell once the old one casts. This is the magic of reaction time. It’s hard to learn, but faster casting is supported by Quartz, readable raid frames, a faster machine, gear (especially haste), talents, and little things like a Tuskarr’s Vitality enchant to boots. It seems silly but yes, faster running almost always means more time to cast.
2. Talent choices. Sometimes there are many correct builds, but there is usually one best one for certain raid functions. The “best” build can depend on what the person’s role in your raid is. If your recruit will primarily be a raid healer, she might want to adapt her talents to reflect that.
3. Spell choice. What you cast is just as important as how often. There’s no “right” answer, but there are better and worse choices. A heavy use of Nourish with no HoT support is an example of a poor choice. To make intelligent choices, read your blogs and Elitist Jerks and try out different things in raids. If you’re a healing lead trying to diagnose problems, try to find an “ideal” spell cast ratio to suggest to the healer in question from a reliable source. Usually, finding an “expert” in the class to talk to is quickest and easiest. When in doubt, email a blogger! You might just get a whole post in response.
4. Gear, gear, GEAR. I can’t overemphasize what a difference equipment makes. Sure, there are prodigies of healing out there that can outheal me in their Naxx gear. Don’t expect your recruits to be among these magical beings. Amazing reaction time is rare, and it can make up for gear deficits. However, for the rest of us, properly maintained equipment with the right stats, the right gems, and the right enchants is one of the major things we rely on to put in a good performance.

Wrong Ways to Use the Meters

If you’re in charge of a guild or healing corps, please do not indulge in the following meter-related Healing Destructions.

1. Looking exclusively at total healing done for the whole night
I hate it when people post their Recount for a four hour raid. Every fight is different, and many players respec to different roles throughout the night. Moreover, assignments differ from fight to fight. If you’re number 1, try to restrain the need to pat yourself on the back. If you’re number 7, you don’t really need that box of tissues.

2. Looking exclusively at HPS
HPS graph

HPS varies wildly by class, assignment, and fight. After all, you need damage to happen before you can heal. Here is a World of Logs chart showing my guild’s healers’ HPS for a whole night. What useful thing can you glean from that? Um, overall HPS is higher when heroism is cast? Big surprise there. If you’re in charge, don’t make your healers paranoid about HPS. They’ll be afraid to CC during trash, and they’ll snipe more during bosses.

3. Comparing apples to oranges
If you’re going to pick “winners” on the meters, make sure you’re looking at the same thing. The values for class, spec, and assignment need to match. Also, be really careful if you’re comparing your guild’s parse to another guild’s. You don’t know how they do things or how good they are. Judging your healers by an arbitrary external standard isn’t necessarily meaningful. For an example of this type, before we killed Vezax, our raid leader was outraged at the healers because we needed Saronite Vapors to stay in mana. He was looking at a parse where almost no one in the raid took damage and where healers used no vapors. It took me about ten minutes of staring at the report of a “better” guild with “better” healers before I realized that all these (failed) attempts were tries at HARD MODE. You have to walk before you can run, people–comparing your guild to the “best” guilds in the world is the Path of Anguish. The reports reconstruct the raid, but they are at best a distorted mirror. If you’re going to look outside the guild for comparisons, try to find a guild that’s similar to yours that’s working on the same goals.

4. Hiring and firing based on the meters
Everyone wants something concrete to rely on when they have to make a tough decision. Just don’t succumb to this pressure. If you have a borderline healer, watch her DURING the raid. I sometimes keep new healers as my focus so I can see what they’re doing. Give your newbie tough assignments and see if people die. These things will be more meaningful than saying: “You’re number 6 on Recount, so you’re out.”

5. Encouraging meter-based competition among your healers
The more the leadership emphasizes meters, the more your healers will respond. No one wants to be voted off the island. Instead of becoming better players, your healers will start ignoring their assignments, sniping, and whining. You really do not want this. Your healers are supposed to be a team.

Conclusions

Yes, healing meters can be useful. If you have access to log parses, you can certainly learn from them. As an individual, you may be able to tweak your performance. However, naive uses of the healing meters can cause mischief and pain. Reading a meter intelligently is a difficult skill to learn, and if you’re in a position of power, it would be in the best interest of your guild if you interpreted the meters as thoughtfully as possible. There’s no magic stat that you can read to tell if someone is good or not.
Sydsignature

Official 3.2 Patchnotes for Shamans

Ok so yesterday I posted what the Devs were saying, but now they are officially up on the forums. Lets see what shamans have cooking for the patch and PTR

Shaman

  • A customizable totem bar will now be available for shaman allowing the storing of 4 different totems. These totems can be placed on the ground at once in one global cooldown for the combined mana cost of all 4 totems.
  • All Shocks now have a default range of 25 yards, up from 20 yards.
  • Base health increased by approximately 7% to correct for shamans having lower health than other classes.
  • Chain Heal: Jump distance increased to 10 yards. In addition, the amount of healing now decreases by 40% as it jumps to each new target, instead of 50%.
  • Ghost Wolf: Can now be learned at level 16. While in this form, snaring effects may not bring the shaman below base normal run speed.
  • Talents
    • Enhancement
      • Shamanistic Rage: Cooldown is now 1 minute, down from 2 minutes. Successful melee attacks now have a chance to generate mana equal to 15% of the shaman’s attack power, down from 30%.
    • Restoration
      • Ancestral Healing: The buff from this ability now reduces the physical damage taken by the target by 3/7/10% instead of increasing the target’s armor.
      • Cure Poison and Cure Disease: Combined into a single spell, Cure Toxins.
      • Earth Shield: Dispel effects will now remove charges of Earth Shield rather than the entire aura.
      • Healing Way: Redesigned. Rather than providing a chance of increasing Healing Wave spells on a friendly target, this talent now innately increases the effectiveness of the shaman’s Healing Wave by 8/16/25%.
      • Mana Tide Totem: Totem health now equal to 10% of the shaman’s health.
      • Nature’s Guardian: Redesigned. Now has a fixed 100% proc rate, has a 30-second internal cooldown and increases the shaman’s maximum health by 3/6/9/12/15% for 10 seconds.
      • Nature’s Swiftness: Cooldown is now 2 minutes, down from 3 minutes.
      • Tidal Waves: No longer reduces the cast time of Lesser Healing Wave by 30%. It instead now provides +25% critical strike chance to Lesser Healing Wave, along with the previous 30% cast time benefit to Healing Wave.

Lodur’s thoughts:

Oh my! We knew about the totem bars, and we knew an increase in health was comming. 7% increase will be very nice for our survivability in PvE as well as PvP

Nature’s swiftness – We already knew about but it’s nice to see it in print

Ancestral Healing – Great googly moogly thats awesome. I have to say reducing incomming damage by 10% that’s just amazing! And it scales ridiculously well with content. I mean Disc priests used to only get 3% from grace.  This change has made me excited (I hope this one stays! think of this with chain heal!)

Cure Toxins: With us having Cleanse spirit this change is kindda meh for restoration Shamans, but really awesome for odd PvP specs.

Earth Shield: More of a PvP buff but still pretty slick.

Healing Way: This is very handy. The change to this talent will let you roll your Healing Wave around a bit and I’m certain more people will use it now as a result. Maybe not much more, but a bit.

Nature’s Guardian: Also more of a PvP fix, but I’ve seen some Shaman pick it up for progression fights, which isn’t a half bad idea. The change to it could see more use esepecially in hard mode fights with lots of raid wide damage.

Tidal Waves: A lot of Shaman I’ve been talking to haven’t taken a shinning to this one yet. Personally I think it’s a great thing. The extra crit will let you get Ancestral Healing out there and its a fast heal to begin with. I like this change.

Improved Water Shield: 30% change to be triggered by Chain Heal is nice. Not losing an orb is even better. There have been too many hectic fights where you forget or just can’t spare the GCD to toss Water Shield back up. This takes care of that and lets you keep it up a bit longer, which will help your overall mana regen.

Chain Heal: We new the increase in range as well as the lower number on the healing reduction, but seeing it there is a comfort for sure

I can’t wait to test these out!

*edit*

I forgot to mention the replenishment nerf.

Replenishment: This buff now grants 1% of the target’s maximum mana over 5 seconds instead of 0.25% per second. This applies to all 5 sources of Replenishment (Vampiric Touch, Judgements of the Wise, Hunting Party, Enduring Winter Frostbolts and Soul Leech).

Also at the same time MP5 gear will be getting… more MP5

I do <3 me some MP5

Who wants to do some hard modes? What do you guys think so far?

I’ll update this post as needed, but until then, Happy Healing,

Sig

  • Improved Water Shield: This talent now has a 10/20/30% chance to be triggered by Chain Heal, and the charges of Water Shield are no longer consumed by this talent.
  • New Shaman Changes Announced!(updated)

    Well we talked about it durring the Shaman Q&A recap here. At the time they were talking about revamping the way totems are handled, and well some news has just come up to shed some light and detail on the new design.

    Nethaera Chimed in an official blue post:

    There comes a time in all shaman’s lives when they must learn to harness the power of nature and wield powerful totems. As they grow in power, so do the opportunities to use these instruments of healing, protection, and destruction. In the upcoming content patch, Call of the Crusade, the shaman will be able to quickly place totems of each element, aiding them in managing these powerful focuses of nature.

    We wanted to provide some insight regarding the upcoming shaman-specific interface addition, the Totem Bar. Shaman will be able to utilize this new bar to manage their fire, earth, water, and air totems in a more accessible and convenient way. This bar will appear on the left-hand side above the standard toolbar, similar to warrior stances or druid forms. The bar contains space for four totems of the player’s choice, one of each element. Clicking the respective button will drop that totem. To the right of the four totems is a button for Totemic Call, which we have renamed Call of Earth. To the left of the four totems is a new ability named Call of Fire which will drop all four totems on the bar at once. The mana cost is the same as if the shaman dropped all four of the totems one at a time. However, it takes but a single global cooldown.

    Questing shaman will be able to quickly move their totems of choice forward, while a shaman in an instance, Arena, or Battleground will be able to replace their totems if they have to move or if the totems are destroyed.

    Shamans will also be able to customize their bar to set Call of Fire to drop less than four totems if they choose. Access to this functionality is made available at the same level as Call of Earth (currently level 30.) At higher levels, Shaman will gain two additional spells, Call of Air and Call of Water. These function exactly the same as Call of Fire, essentially giving the shaman three different sets of totems that can be placed at once. New key bindings will also be made available for all of these slots.

    As with all new content under testing, we want to caution players that, as a new part of the interface, there may be additional changes during the period of the PTR until the release of the Call of the Crusade content patch. We look forward to constructive feedback once it is available for testing.

    This is FANTASTIC news! First of all it should be noted this is something many many players have been suggesting for a number of years. The “stance” bar for totems should provide a nice, neat way to keep them organized. On top of that not only do we get our promised ability to drop all our totems on one cool down but we get THREE sets. Call of fire, Call of Air and Call of Water. This means we can swap from casting say our standard caster totems, to melee to even PvP.

    I’m already making plans for what mine are going to look like if we get them and baring any totem changes. Tentatively I’m looking at the following unless they do revamp all the totems drastically.

    Call of fire (caster) Stoneskin Totem, Flametongue Totem, Healing Stream Totem, Wrath of Air

    Call of Air (melee) Strength of Earth, Healing Stream Totem, Windfury

    Call of Water (utility/pvp) Tremor Totem, Cleansing Totem, Grounding Totem.

    I look forward to being able to run in after a tank on a fight like hodir, hit one button and then run like hell out of there and start healing right away!.

    Not to be left in behind, Ghost Crawler himself pops up and has a few things to say about Shaman healing as well.

    GC:

    We have changed Healing Way to work better with HW and we have changed Improved Water Shield to also work with CH. We also dropped the cooldown of NS to 2 min so that you can HW more often. We’ll try to make a post of all of the Resto changes soon.

    Improved Water Shield procs will not consume Water Shield charges. The tooltip says something like “as if you had consumed an orb.”

    Oh my!

    Nature’s swiftness dropping a full minute off of its cool down is really huge, Chain Heal causing Improved Water Shield to proc is very nice as well not to mention that Improved Water Shield will not consume an orb. That’s really really good news!

    I think this is a step in the right direction. They are beginning to look at our healing and are trying new things to tweak us and bring us up a bit in mana conservation as well as throughput. I’m excited to see these hit the PTR and I look forward to seeing what else they have in store for us!

    So, what do you guys think so far? What other changes do you expect?

    EDIT:

    ANOTHER HUGE change

    GC says

    We have changed these spells for 3.2. And yes, there are some other changes. The main buff to Chain Heal is likely to come in increasing the jump distance to 10 yards and buffing the amount of healing decrease with subsequent targets to 40% down from 50%. CH, HW and LHW should all be doing bigger numbers when you consider all the talent changes.

    We’ll try to get the full notes out soon, but even then remember that this is a major “new tier” patch and is likely to have more iteration due to PTR feedback than the last few patches.

    OH BOY! Chain heal going to 10 yards and retaining  only losing 40% of its heal!?!? I’m a happy happy happy shaman with this news.

    My fingers are firmly crossed that this happens.

    Priest Guide: Part 2 – How to Build Holy

    Building-your-spec

    So now that you know what each talent is, does, and have a basic idea of when it’s most effective, let’s take a look at how to build a spec:

    Step 1:14-mandatory-points

    To start, plug in those mandatory 14 points:

    • Twin Disciplines – 5
    • Improved Inner Fire – 3
    • Improved Power Word: Fortitude – 2* **
    • Meditation – 3
    • Inner Focus – 1

    *PvEers: If you are 100% certain that another Priest in your raid will have Imp:Fort, and not mind buffing, and you REALLY feel the need for threat reduction, you can move these two points into Silent Resolve. I don’t think it’s worth it, but it is an option.

    **PvPers: Choose Martyrdom rather than Imp:Fort.

    Step 2:

    Decide whether this is a Holy build, or a Discipline build. For this example, I’ll walk you through my Holy spec, my reasons for each point, and where you could easily change it to suit yourself – and which changes wouldn’t be as helpful.

    Step 3:

    Build it!

    CritFor Tier 1, take a look at your crit on your character screen. The idea here is that you want enough crit to get the mana saving goodness that is Surge of Light and Holy Concentration with reasonable reliability. Since Holy is largely a raid-healing spec, your three major raid-healing spells are Circle of Healing, Prayer of Mending, and Prayer of Healilng. CoH hits 5 people (6 if glyphed), ProM hits 5 (6 with 2-piece T7, assuming full duration),  and ProH hits 5. If you have 2-piece T8, ProH gets 10% extra chance to crit.

    Why does this matter?

    Because in the first tier, Holy Specialization allows you a tremendous amount of control over the crit chance of your heals. Having around 20% crit unbuffed (25% fully raid buffed) gives you a 1-in-5 crit chance for each 5-target raid heal, with the raid buffs allowing some insurance. As with everything heal-related, you want to react as quickly as possible, and KNOWING that you will get a free, instant Flash Heal after every AoE allows you to plan ahead. If you have enough crit on your gear to get you to that threshold, you can start subtracting points from Holy Specialization. Personally, I like having the freedom to stack a bit more Spell Haste on my gear, so I choose to max out Holy Specialization so that my crit isn’t lacking.

    Wynthea-holy-spec-tier-1

    Next, take a look at a Recount, WWS, WoWmeter, or other combat log parse. How much do you Renew? A  lot? A little? For more research, check out the uploaded combat logs for a guild that’s farming the content your guild is learning. Do those Holy Priests use Renew? Often, if there’s a huge discrepancy between a very successful guild, and a guild that’s having trouble, a small strategy change can make a big difference for those new to the content. (I’m probably going to catch some flack for that – yes, the idea is that all Priests are individuals, and your spec should reflect that. My argument is that when evaluating the effectiveness of a particular spell, look ahead and see how effective it is for successful people in content that you plan to clear. Don’t be so attached to your personal status quo that it prevents you from achieving your goals.)

    If Renew is something you use, or plan to use, a lot, pick up the three points in Improved Renew.

    Healing Focus – for this talent, consider the content your guild is working on. Are you having trouble keeping yourself and your assignment alive during Mimiron? This could be a great option. Aside from that, there just aren’t many fights where the pushback will kill you, and you’ll be too far away from a Paladin that could use Concentration Aura – or another healer that can help you until the danger has passed.


    Wynthea-holy-spec-tier-2Tier 2 gives you even more wiggle room. Spell Warding will help you if you tend to die to spell damage. If you’re building a spec specifically for Mimiron or Mimiron hard mode, this will help protect you from his Rapid Burst ability. However, it’s five points that help NO ONE except you.

    Divine Fury  – points in this are a must if you still use Greater Heal a lot – more than can be helped by Serendipity, or if you also use your raid spec to solo quest grind. If neither of those are true, and you took points in Healing Focus, feel free to only put in two points. If you skipped healing focus, you have to put at least three points here to move forward. (Two will get you to tier 3, but you’ll need 3 for tier 4 if you take Desperate Prayer, and 4 if you don’t.)

    Since I do all of my dailies in my Holy-raiding spec, I go ahead and max this out. It only costs me one extra point, which I steal from Improved Healing.


    Wynthea-holy-spec-tier-3

    Tier 3 includes an easy decision: Max out Inspiration. Even though this is a raid-healing build, it’s a guarantee that some of your AoE will land on the tank. Spreading the love around won’t hurt the rest of the raid, either – if anything, it’ll make your job easier.

    Blessed Recovery won’t help you in a raiding scenario, so skip it. (If you’re getting critical melee hits regularly enough to take this, get yourself a new tank.)

    Desperate Prayer is completely up to you, but I find it very useful. It’s cheap, instant, has a short cooldown, can crit, and is a GREAT “Oh Sh–!!” button, especially now that pots are only once-per-fight.


    In tier 4, since this is a healing build, forget about Searing Light.

    To move forward, you’ll need 5 points between Holy Reach and Improved Healing, or 4 if you also maxed out Divine Fury. Since Improved Healing only affects Greater Heal (which I use rarely these days) and Divine Hymn (Which I always Inner Focus), I give Holy Reach both points, and stick just 2 in Improved Healing for filler.  (You could also completely bypass Improved Healing by putting these two points in Healing Focus.) In my opinion, that 5% savings on a heal I don’t use often is less efficient than the extra radius on my AoE heals. (And I’m more comfortable putting that point into Divine Fury, where on the rare occassions I do need Greater Heal, it will be fast enough to be effective.) Although you’ll run into many people who are perfectly comfortable with 1 point in Holy Reach, you will rarely see Holy builds that skip it entirely – you want CoH and ProH to have the chance to hit as many people as possible. If you skipped Healing Focus, you’ll notice only 1 point in Improved Healing is needed to move forward. You can easily plug that point into Lightwell, Blessed Resilience, or Test of Faith later in the tree.

    Wynthea-holy-spec-tier-6Once you reach Tier 5, maxing out Spiritual Guidance is a no-brainer, since it’s a flat-out increase to your spell power. Similarly, don’t skip Spirit of Redemption, since one point here buys you an extra 5% spirit. (Which, obviously, also increases your spell power in addition to your regen. It’s also nice to not ever have to inform your raid leader when you need a battle-rez, since it will be glaringly obvious.) Your other choice in this layer is Healing Prayers, and since Prayer of Healing and Prayer of Mending each benefit from set bonuses, and the AoE damage in Ulduar encounters makes Prayer of Healing your work-horse spell, skipping Healing Prayers is mana-suicide. Max it out.

    In tier 6, Spiritual Healing is a misnomer, since it has nothing to do with spirit, however, it’s a straight up increase to the amount healed by all of your healing spells; max it out. Surge of Light is another talent where theorycrafters disagree: is one point sufficient, or are two required? Because I count on these procs, I max it out to ensure that I get them as often as possible. (And, really, why wouldn’t you want more mana-free, castable-on-the-move heals that stack Serendipity and take advantage of Twin Disciplines? More to the point, where could that one point buy you more benefit?)

    By now, you’ve got more than enough points in Holy to get you to Tier 8, but this part of the tree is thick with awesome points. Still in tier 7, Holy Concentration is one of the best talents we have to increase our mana-regen, and you’ll find yourself gasping for water on longer fights without it. Combined with Surge of Light, this is one of the main reasons that crit is important for Priests these days. Take all 3 points. Lightwell, on the other hand, is a polarizing point. There are enough points in this particular spec that you can take it if you have trained your raid to use it properly, just either drop Divine Fury down to 4 points or Improved Healing down to two. Both of these will impact your Greater Heal (the former will nerf your cast time by .1 seconds, the latter will increase its mana cost by 5%.) Personally, I skip lightwell altogether.

    Blessed Resilience used to be a strictly PvP talent. Then they re-worked it to “increase the effectiveness of your heals by 1% per rank.” Which makes it viable for PvE, theoretically. Frequent plus heal poster Sindaga posted the math over on the Elitist Jerks Priest Compendium that shows how this works:

    “Empowered Healing vs. Blessed Resilience (yes, the PvP talent)

    Taking two examples for empowered healing (Flash Heal & Binding Heal); this is due to the very low amount of greater heal casting, personally, done in Ulduar 25 and 10-man. Each heal will be looked at with empowered healing or with blessed resilience. Calculations will be done with 3000 spell power (a very attainable goal with even just a couple ulduar upgrades). The formula used will be as follows:

    Spell = [Average + (Spellpower * coefficient)]*(talent modifiers)

    i) Calculations with Empowered Healing (w/ spiritual healing modifier)
    Flash Heal = [2049.5 + (3000 * 0.9668)]*1.1
    Flash Heal = 5445 healing average
    Binding Heal = [2237.5 + (3000 *0.9668)]*1.1
    Binding Heal = 5652 healing average
    Greater Heal = [4300.5 + (3000 * 2.2256)]*1.1
    Greater Heal = 12075 healing average

    ii) Calculations with Blessed Resilience (w/ spiritual healing modifier)
    Flash Heal = [2049.5 + (3000 * 0.8057)]*1.13
    Flash Heal = 5047 healing average
    Binding Heal = [2237.5 + (3000 *0.8057)]*1.13
    Binding Heal = 4969 healing average
    Greater Heal = [4300.5 + (3000 * 1.6111)]*1.13
    Greater Heal = 10321 healing average

    iii) Calculations with Blessed Resilience & Test of Faith (w/ spiritual healing modifier) – I found something interesting testing with Renew. If the spell is cast below 50%, the ticks (even if the health goes higher than 50%) stay with the 12% increased effectiveness.
    Flash Heal = [2049.5 + (3000 * 0.8057)]*1.25
    Flash Heal = 5583 healing average
    Binding Heal = [2237.5 + (3000 *0.8057)]*1.25
    Binding Heal = 5818 healing average
    Greater Heal = [4300.5 + (3000 * 1.6111)]*1.25
    Greater Heal = 11417 healing average

    So those are some pretty plain numbers. If you find yourself casting greater heal more than once in a blue moon, perhaps stick with Empowered Healing. If you regularly find yourself not casting it at all during fights then a spec for better output would first put the 5 points from empowered healing to 3/3 blessed resilience and then 2/3 Test of Faith.

    Justification for taking test of faith is it provides more healing to those targets who need more health.” — Sindaga

    The bottom line here is that putting 3 points in Blessed Resilience along with 2 in Test of Faith increases the amount healed on targets below 50% by a significant amount. If you’re looking to take advantage of Test of Faith in the next layer of the tree, it’s a good idea to pair it with Blessed Resilience – and you can easily take the points from Empowered Healing to make that happen. It’s entirely a play-style dependent call, and I personally prefer the constant levels of healing provided by Empowered Healing to the low-health dependent benefits of Test of Faith.

    Wynthea-holy-spec-tier-9 Moving into tier 8, you’ll find some of your decisions have already been made, due to the preceding math. If you decided to put Sindaga’s 3 points into Blessed Resilience, you have already decided to skip Empowered Healing. If you decided against the BR/ToF combo, you’ll max it out instead. The other talents in this layer are Serendipity and Body and Soul. Although I’ve read some arguments that the self-poison cleanse is useful on the more poison-heavy encounters in Ulduar, if your Shamans, Druids, and Paladins are doing their jobs, you won’t need Body and Soul. Serendipity, on the other hand, plays a major role in making Holy a more synergistic healing spec. Layering spell haste for your bigger heals is a huge part of the raid-healing strategies for fights like Ignis, Deconstructor, Freya, and Mimiron. My typical heal pattern takes careful advantage of this: Inner Focus-Prayer of Healing -> Surge of Light-Flash Heal -> Binding Heal -> Circle of Healing -> Surge of Light-Flash Heal -> Serendipitous- Prayer of Healing -> Surge of Light-Flash Heal…. into infinity, peppered with Prayer of Mendings and Renews as much as possible, both of which provide extra Surge of Light procs, and, therefore, free layers of Serendipity to haste my next Prayer of Healing. Make sure you take maximum advantage of Serendipity.

    Like tier 8, you’ve already made quite a few decisions regarding tier 9, without realizing it: If you picked up Improved Renew in tier 1, you would shortchange yourself to skip Empowered Renew. When you decided to build Holy, you decided to take Circle of Healing,  (I know there was a lot of noise about avoiding it when they added the 6 second cool down, but with its coefficient balanced to reflect the cooldown, the glyph to increase it to 6 targets, and its ability to proc Surge of Light, skipping Circle of Healing would be foolish.) And when you decided between Empowered Healing and Blessed Resilience, you decided whether you would take Test of Faith as part of the Blessed Resilience package. If you’re following my build, take all three in Empowered Renew, Circle of Healing, and skip Test of Faith.

    For tiers 10 & 11, you’ll notice you have exactly 6 points left. Finish out your spec by finishing out the tree with 5 points in Divine Providence, and the last into Guardian Spirit.

    This is my completed spec – and I fully expect as many detractors as I do compliments. Lightwell may work for you and your raid, or perhaps you think I’m foolish to finish out Divine Fury rather than taking Healing Focus. I’d love to hear about tweaks that you make (and how they work for you), but for me this is my perfect spec – Renew-heavy, allowing me to stack haste, and with Desperate Prayer the only concession to keeping myself alive rather than focusing on my raid. Wynthea-holy-spec-final

    Next Post: How to Build Disc

    Luv,
    Wyn

    Timing is Everything!

    timing

    You know the old saying timing is everything right? Well it’s very true for healing. Bad timing can cause a dead tank, or a wiped raid. Management of global cooldowns, spell cooldowns and compensating for lag can make all the difference in the world between a bad healer a so-so healer or a good healer. So, how can we deal with these as healer? Well there are a couple mods that I’ve found quite useful for dealing with this.

    Quartz

    Quartz is a casting bar mod addon that replaces the default Warcraft one. It is highly customizable and is very useful for help with compensating for latency.

    Picture 13

    That’s a picture of it in use. The icon of the spell is displayed to the left of the bar and the bar shows the time left on the cast, as well as the estimated time of completion. In this case you can see that my Lesser Healing Wave was taking 0.9 seconds to cast, and had 0.1 seconds left before it completed. I couldn’t get a good picture of it, but it adds a latency marker at the end of the casting bar. It’s a red block with with the latency added in on the bottom of it. You can see it slightly at the back end of the 0.9. You have to enable the feature in the options for the addon, but once you do you’ll be good to go.

    Picture 1

    It will compensate for whatever latency the game has, and anytime you see your cast bar hit that red block, it’s safe to hit another spell and have it begin to cast when your current one is done. This is useful for many reasons, chief among them is to keep your heals streaming without interruption. Nothing worse then hitting a heal and not have it start to cast, only to find your tank or DPS dead as a result. The mod is highly customizable in look, size and what it shows you. It can show you everything from your own global cooldown, how long is left on an interrupt on you as well as function as an enemy casting bar display. If you haven’t taken a look at Quartz, you might want to.

    Fortex

    Fortex is a mod that tracks quite a bit of information for you. At first glance you’re probably saying to yourself “but that’s just for warlocks”, but I can assure you it’s not. The mod has an options for every class’ cooldowns in the game.

    Picture 14

    You can see here that it makes a bar for you to use. The bar is resizable and you can adjust it’s color. When you cast a spell with the cooldown, it will show on the bar at the time marker closest to its cooldown. When a spell reaches the end of its cool down a splash icon will display growing outwards from the endpoint to let you know it’s ready. You can see in the image above my Riptide has just become available while my Nature’s Swiftness is still on cooldown. I’ve found this very handy because it’s something I can catch out of my peripheral vision easily while still keeping my eyes on the encounter and health bars. It has a ton of options and many for other classes

    Picture 2

    It can show you debuffs, soulstones, buffs, even trinket cooldowns. I’ve also found this very handy on my Death Knight and my Hunter. Since installing it I can tell you my healing has gone up as well as my DPS on my other toons. Knowing when your spells and trinkets are available and using them as quickly as possible can make a tremendous impact on your healing and damage output. This mod definitely helps me get the most bang for my buck out of my spells and trinkets.

    Having a mod that helps you compensate for your latency and one that can help you manage your cooldowns is incredibly useful. There are many out there, I suggest taking a look through all the ones that are available and find ones that work for you and fit your play style and your User Interface. I just happen to have found these two mods quite useful in this endeavor. Here’s a picture of how these two mods fit with my UI featuring my friend’s lovely pet Gertrude tanking Chillmaw for us.

    Picture 11

    So what about you? Have you found any mods that you find useful for managing your cooldowns? How about a good casting bar to help compensate for latency?

    Until next time, Happy Healing!

    sig3

    Image courtesy of www.sharewareplaza.com