Healing: Priority, Priority, and Priority

Several weeks ago, I mentioned how much I didn’t like two-healing 10 man raids. Why? Basically because if a healer goes down, there’s utmost pressure on the other healer. A raid almost never recovers. With 3 healers, if one dies, you can still pull off a kill. And today, I’m going to write about one of those experiences where I was 2-healing a guild 10-man raid where another healer went down.

Sometimes you hit one of those days where your ego gains a massive boost because you’ve singlehandedly healed a raid down to 0%. The worst case scenario that you’ve planned for countless of times in your head actually happened in a raid encounter and you pull off every pre-planned spell, move, and cooldown with such eye surgeon-like precision leading to an unexpected kill.

And I still can’t believe I pulled it off. Anyway, while the kill is still fresh from memory, I’ll walk you through my various thought processes in the event something like this should happen to you. Healing can be a sleepwalk. Other times, it can be a big kick in the groin. Our healing pairing happened to be Holy Priest and Discipline Priest (I was Discipline for the fight). We determined ahead of time that since we had a Prot Paladin tanking Ooze, they could tackle the dispels.

We were taking on Rotface in ICC 10. Everything began smoothly. It started around 85%, give or take. I had just cleaned off a disease and was in the process of running back in after my ooze had merged. I look up where the group is and see a massive ooze heading in the direction of the boss. Uh oh. Someone’s about to eat it. Then I see Priestly angel wings and I knew our only other healer would have a few heals before she’d be out of action. Our only druid was tanking the boss so executing a battle res was out of the question. There were essentially two things we could do at this point:

  • Wipe the raid: Start fresh, rebuff, get everyone at full strength.
  • Play the stress the @#$% out of Matt game: Essentially, it’s to see how long the raid can do as is with just one healer.

So if you happened to be in Matt’s guild and you had those two as options, which one would you pick?

Naturally, the raid decides to opt for the second option.

At this point, no cooldowns had been used. Everything was still available. I hustled back into position in the middle of the raid. The Ooze Explosion indicator goes off. I swivel the camera and watch for it. But there’s still more to it than that.

Priority, priority, and priority

My thinking instantly turned from “Top off players to 100%” mode to “Keep players from reaching 0%” mode. And I guarantee you, there is a huge difference in spell usage and target selection when that happens. DPS doesn’t exactly become expendable. You still need them. You can get by with 1 DPS dead. But if 1 tank dies, it’s an instant game over. Thus the healing priority shifts slightly towards a greater emphasis on keeping tanks alive.

Analyze the raid: There are two tanks and the overall raid to worry about.

  • Raid frame shows that the Rotface tank (our Druid) takes approximately 7000-9000 damage a hit. She has about 59000 health. 7 goes into 59 about 8 times (roughly). In other words, she can survive 8 melee swings before it’s game over. Rotface swings at a rate of about a second and some change (1.* seconds of which I didn’t know off the top of my head and it wasn’t the time to look it up). I ballparked it at around 9 seconds without a heal.
  • The Ooze tank is tanking a Big Ooze that had already absorbed several smaller Oozes. I knew the Big Ooze was 1 or 2 small Oozes away from exploding. From that, I could further deduce that the Ooze tank would get 2 shot if they were within melee range of it.
  • Raid health was at varying levels due to Slime Sprays and some coming back in from being infected.

I threw shields on both of the tanks immediately (they weren’t at full health, but they weren’t exactly at imminent death either. I figured the shields would buy at least one or two hits). The raider with lowest health was immediately Penance’d.

All of us scattered to avoid the incoming smattering of green stuff in the middle of the room. A few players were hit but still managed to survive because they only took a blow or two. I didn’t have time to think, so I slammed the Inner Focus –> Divine Hymn macro bringing everyone back to the top before rejoining the raid in the middle of the room.

There happened to be a small pool of Ooze between me and the raid. I ran into after hitting myself with a Prayer of Mending (Note: Risky. Don’t actually run into bad things on the ground unless you know you will survive it). Every player that did not have Weakened Soul was continuously chain shielded. Somewhere in my head, I knew I felt super sluggish. I needed much more heals than what I could cast because at the rate we were going, the damage incoming to the overall raid was greater than the heals I could muster.

And then it hit me.

We have a Shaman, moron. We usually blow Heroism at 30%. He’s at 70% right now. Just use the damn thing!”

Sure the extra speed from the Heroism would help with the damage. More importantly, it allowed the heals to go off at a much faster pace.

Anyway, I believe there were a few Paladin bubbles and Divine Guardians going on to help lower the damage. The tanks blew their cooldowns at various points to give me precious seconds to catch up. Now I had to worry about dispels. Infections were either getting progressively faster or the Ooze tank had other things to worry about. This is where you play the balance game and go back to thinking priority, priority, and priority. I could spare them a quick shield and then focus back on ensuring my tanks, myself, and other players were above 20% health or so. While the Infection would slowly kill them, it wasn’t going to be immediate. It gave them time to run out and it’d avoid any slimes that happened to be in the middle. If there happened to be two Oozes dispelled back to back, it’d morph into an Uberooze right in the middle of the raid. I didn’t even look at them to see if they were completely clear. Either I hit them with a dispel, or the tank would hit them. Either way, they were slowly piling up quicker.

I think I made an angry poo-poo. It gonna blow!”

And this is where I made a crucial misplay. My first instinct is to run away from the center when I see the Unstable Ooze Explosion go off. I had no idea which direction the Rotface tank was running. I should have slapped our bear with a blind Pain Suppression in the event we ran to opposite sides of the room. Doing so would’ve dropped her down on my mental list of healing priorities. I know they’re not likely going to die with a defensive cooldown up (at least not as fast) and I could work on stabilizing the Ooze tank and everyone else.

Unfortunately, I didn’t think about that.

But she still lived. Maybe someone gave her a Hand of Sac or she popped a cooldown or something. But thank goodness because we actually did run to opposite sides of the room when I glanced at the map. I was out of tricks. No more Hymns, no more Pain Suppressions, but I still had a Power Infusion. I could put it on myself to keep the fast heals going or I could drop it on our Mage to speed up the fight. Out of the question though since right when I was contemplating doing that, they died (Again, proof that you shouldn’t actually think. You should simply react. Thinking leads to death, right?). I figured I may as well Power Infuse myself and started the entire process of priority, priority, and priority again. Pain Suppression had well worn off and we were all grouped in the middle again.

*BOOM*

Hear that? That’s the unmistakable shrill of Omen sounding. It means you have about 3 seconds before you’re dead. I figured it wasn’t the boss. Not a chance in hell I could’ve caught up on threat. Our tanking Paladin was still running around with another large Ooze.

… But it turned out there happened to be a second large Ooze that I didn’t see. It made short work of me. I exhaled and collapsed back into my chair before clicking on the boss. Rotface was at 3%. BOOM! Another DPS dead. BOOM! Paladin tank dead. BOOM! I saw another player fall over. Rotface is down to 1% and I knew we had it.

And people wonder why I sometimes hate two healing raids.

14 Things that can go Wrong and will go Wrong on Sindragosa

sindy-hurts

She is the General Vezax to Yogg-Saron. Never has such an encounter led me to curl up in my chair and cry. The margin of error is so small and so minute (my-noot?). There are so many things that can cause failures. It contains of 6 minutes of sheer endurance before you get to the final phase. Anyone with a compromised computer or a laptop or a bad connection will not even do well. On other encounters, you can get away with a disconnect or a death. Here? Not so much. So here I’ve compiled the ultimate list of things that can go wrong when taking down Sindragosa.

  1. Guild leader’s WoW crashes during ground phase (True story, happened to me last night, and miraculously didn’t get pulled in)
  2. Raider inability to run out when Sindragosa chain pulls everyone (I specced into Body and Soul so I could hit the players who had the most difficulty)
  3. Raider inability to mouse turn when pulled into Sindragosa and go in the wrong direction.
  4. Raider runs out to the wrong side when pulled in and happens to be the target of a Frost Beacon in phase 3 thereby getting caught on the wrong side leading to insane stacks of Mystic Buffet resulting in a wipe.
  5. Inability to use own judgment to spread out on the bottom of the stairs when hit with frost beacons. We don’t need 4 guys on one side. It’s 2 left, 2 right, and 1 middle.
  6. People cheating too close to Frost Beacons before they hit resulting in more Frost Tombs.
  7. Melee building up too many debuffs and having to run out when pulled in and not getting a heal because the healers go one way and they go the other.
  8. Healers dying to Backlash because we’re too busy tunnel visioning the raid (I am guilty of this). Fixed it by setting Power Auras to show Instability in big flashing letters, 100% opacity, and 300% size. Manage to cut down the deaths some. It still happens.
  9. Mystic Buffet not clearing because we mis-time our ability to run behind a block and shake off the buff.
  10. Raiders cheating up the stairs instead of staying on the bottom as specifically instructed to before Frost Beacons are hit and then having to run back down and look for an open spot. God this pisses me off so much. I don’t know why people have to cheat up the stairs. I don’t know why waiting at the bottom of the stairs is so difficult to do.
  11. Thunderstorms knocking out internet connections.
  12. People who don’t have the Frost Beacon stand where people with Frost Beacons are supposed to run to resulting in a double tomb or a death on phase 3.
  13. People who are too slow and don’t get into position in time.
  14. Instability on half the healers leading to temporarily reduced healing on the raid, leading to more deaths due to insufficient heals. Like the Backlash problem I had earlier? It’s me getting people up to the survivability levels without realizing I have that stuff.

All I can say is, thank goodness we managed to take her down last week. It’s just unfortunate to have players who have computers or connections that just can’t seem to handle the stress of the encounter. The expansion is also winding down now even though we have Ruby Sanctum coming up and it’s getting a little harder to find raiders.

If we get her down again, I’m tempted to simply extend the lockout so we can focus exclusively on the Lich king.

Raid Leading 101: Maximizing DPS Uptime

Normally, most bosses are kept still. There’s a cleave effect or some other ability which makes it difficult for tanks to herd them around. Every so often, a boss comes along where even though it isn’t necessary to move them, it can sometimes be extremely beneficial. In this week’s Raid Leading 101 post, I want to highlight a little trick that Conquest used during our first kill of Professor Putricide. It’s a really minor adjustment that our raid leader came up with and looking back now, I almost wish I had thought of it first. Who knew something so simple and minor would’ve helped out so much?

Initially, we had a DPS problem. We were having a difficult time burying slimes and phasing Putricide within a timely fashion. We were rocking six healers at the time. The raid was taking obscene amounts of damage and many players were struggling with avoidable damage. I myself hit a streak where I went 9 consecutive attempts being hit by Malleable Goo on the same night. That’s some serious tunnel vision going on.

If we downgraded to five, we’d solve our DPS issue but our stressed healers were going to be stressed even further. We found a way to help resolve these issues and it’s nothing to do with player substitution or gear. It was all due in part to improved movement and positioning.

In last week’s post about Placement and Direction, blogger What’s My Main Again made an excellent suggestion:

If I may make a suggestion on putricide… after the green ooze dies you waste a lot of time moving all the way to the other side of the room. Just have everyone move to the center. Ranged can dps the gas cloud as soon as it spawns and then melee can quickly switch after it targets someone. This also makes it easier to run back into the orange corner for the green ooze.

We’ve actually been doing that for a while, but I wanted to elaborate on that further and illustrate how we tackle it.

The orange ooze

We’ll use the Professor Putricide example.

WoWScrnShot_031010_113848 

When the orange ooze was active, we used to tank Putricide on the far right very close to the green wall. Our melee DPS had to run the length of the room to open up on the orange ooze when it fixated on a target. It was during these parts of the fight that we were able to close the gap on our damage. In order to do that, we made two changes.

First change: Instead of tanking him on the right, we placed Putricide closer to the middle where the pattern is. The orange ooze spawns, it locks on to a target and goes after them. If it happens to be a melee player, they still have plenty of time to hustle it and kite it around the room. Regardless, we cut the distance the melee had to travel to DPS the Ooze by half! They didn’t have to run as much. There was more DPS on the ooze meaning it died quicker which led to more DPS on the boss.

Second change: Instead of simply keeping Professor Putricide stationary, our Putricide tank was instructed to keep Putricide as close to the orange Ooze as possible. The reason? It allowed for incidental AoE attacks from melee to hit multiple targets. Chain Lightning would help. Divine Storm would help. Cleave, and the list goes on. The orange vials that the Professor drops wouldn’t be a problem since the entire melee group is constantly moving alongside the Professor and the orange Ooze anyway.

While it doesn’t seem like much, those two changes were enough to help put us over the top on our kill.

The lesson here is when working on a boss, try to set your tactics up in such a way that will cause the boss to take extra damage. Again, not every encounter will allow for this, but the possibility is there. Put those AoE strikes to maximum effect whenever it is feasible to do so.

If you’re curious, here’s a video of our first kill up:

Conquest_Professor_Putricide from Dannamoth on Vimeo.

This is from the perspective of one of our top mages. Look at how our tank gradually follows the orange ooze around. We have a set path to use when orange oozes are up that involve running toward the green wall, up to the table, then down the orange wall.

Also, excellent use of Invisibility during tear gas phases. Such cheater DPS!

If you look closely at the end of the fight, there’s about 6 or 7 players still alive. Yeah, we barely scraped by on this kill.

Last night, we managed to take down Sindragosa on 25. I want to stab my eyes out. We managed to get a video of it as well, so I’ll see if it can be placed up somewhere.

Raid Leading 101: Placement and Direction

raid-directions

I’d like to share two stories today.

I remember years ago when my guild (at the time) set foot into Serpentshrine Cavern. We nuked the trash and faced Hydross for the first time. Our raid leader gave us directions on which elementals to DPS down first and which side of the room we had to drag her to. Since we had 4 tanks, each one was assigned a different elemental. One was assigned to the left, the other was on the right, and so forth. Things seemed to look good until the fateful question was asked:

“Wait, is that our left or is that Hydross’ left?”

And so the next fifteen minutes were spent debating which left was appropriate.

The next one is a little more recent and it comes at the heels of our Sindragosa attempts. We’ve sort of managed to stabilize our ground and air phase placements. Where we’ve struggled was during phase 3. Here’s a glimpse at our attempts:

Raid lead: “Okay guys, on phase 3, I want the frost beaconed player to stand on his tail.”

*Phase 3 hits, beaconed player runs very far toward the end of the tail, wipe ensues due to distance*

Raider: “You told us to stand on the tail.”

Raid lead: “Okay guys, well when I meant tail, I meant that you should stand where the tail and the butt meet, not the end length of the tail.”

*Phase 3 hits, beaconed player runs just below the butt, raid follows, gets Tail Smashed*

Raider: “I’m pretty sure that we stood in the right spot.”

Raid leader: “Well when I meant where her tail and butt meet, I didn’t mean directly behind it. You should stand just beside it so that the conical attack doesn’t hit you. Try a little to the left of it.

(At this point, he asks in officer chat if he wasn’t being precise or clear enough.

I looked skyward before burying my face in my hands.)

As you can see, good communication is a necessity. I’ve been in many pickup groups where raid leaders say one thing only to mean the other. They were not clear at all. In today’s post, I’d like to introduce a few terms and concepts that have allowed me to place players with pin point (almost smart bomb-like) accuracy.

Various terms

Set the orientation

The first thing I like to do is set the orientation of the encounter. In order to determine this, you need to figure out in your strat whether or not the boss is going to be mobile (constantly moving around like Professor Putricide) or static (like Festergut or Deathbringer Saurfang). Everyone needs to be on the same page and be reading from the same playbook.

Examples:

  • Using cardinal directions, you’ll be standing…
  • Facing this boss, I want you over to the…
  • Boss will always be moving, so you need to stay within melee range on…

For bosses where they are tanked all over the place, sometimes it’s best to rely on relative terms (left of, right of, behind, close to, etc). On bosses where they get tanked primarily in one location, compass directions can work well (North, south, east, west).

Identify landmarks

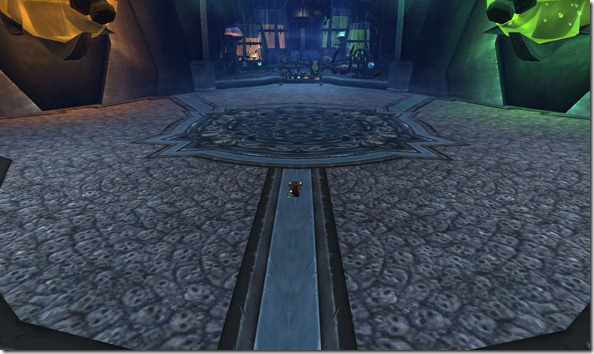
Look around the area and see if there is anything you can use. Perhaps there is a pattern on the floor that will make an excellent bullseye for players to stand on. Or maybe there is an object that can be used.

Examples:

  • The entrance
  • The orange wall (Professor Putricide)
  • Base of the stairs
  • Right pillar

Be as descriptive as necessary. Try to look for features that are unique. There is only one table in Professor Putricide’s room. One of the faucets are colored green (Exception: You may need to be more specific when working with colorblind raiders).

On the go

Most fights tend to involve a lot of movement. Players need to be instructed on the fly where to run to or where to run away from. Using land marks helps as well, but focus more on the words you’re using. Note the italics.

Examples:

  • Run along the orange wall
  • Run away from the boss
  • Move toward the yellow star’d player
  • Tank the boss as close to the edge as possible

Really obvious directions are being given to players. It’s easy enough to hear these instructions and catch on to what the raid leader wants you to do.

Dress rehearsals

At the very top chamber where Blood Queen Lana’thel is, you’ll notice that there is a grate. When you kill her, you can simply drop down to the floor below. Until then, it can serve as an excellent way to place raiders before actually engaging the boss. I put a star icon on my head, run to a specific spot on the circular pattern on the ground, whisper a player and tell them to run to me. This is where they stand on the fight using the circular pattern on the ground that’s directly in front of the Blood Queen.

putricide-placement

(Example instructions for avoiding oozes: Start at the orange wall when the green ooze comes out! Don’t stand in the middle pattern. When it’s dead, cut across and stand under the green faucet. Avoid standing in the middle pattern. When the orange ooze comes out, wait for it to cross the middle. Start going to the green wall, then head towards Putricide’s table at the back before running toward and along the orange wall.)

Simple communication cuts down on wasted time and attempts. Be as clear as possible. Try to think of ways where raiders might misunderstand what you’re saying and plan around that.

Be not afraid, as the forest nymphs will guide you on how to please your raiders.

Priest Tier 10 Changes: Right Idea, Wrong Timing

Thespius covered his thoughts on the proposed tier 10 changes yesterday so I won’t rehash his words. In this post, I’m going to try see if I can logic out why the changes were made.

You know, there was a PTR patch not too long ago where Priests received similar tier changes. I can’t remember if it was tier 8 or tier 9, but the details were some percentage increase based on some spells. Actually, it might have been tier 10.

Whatever. The point was, it was the PTR, and the change wasn’t final. In fact, the finished product ended up being radically different to what it was initially (I have a strong hunch it was tier 9).

Right now, I’m really super skeptical that this change will make it live as it is. The entire internet blinked at the changes. Personally, I think its a placeholder change. Numbers can always be adjusted later. I’ve done a lot of PTR bosses and they’ve always worked on fleshing out the encounter details before tweaking the numbers (Faction Champs on the PTR was AoE’d down instead of CC’d and single targeted). Maybe set designs are the same process.

Now, let’s discuss the bonus itself. I’m in a fairly unique position where I can say I am neither a Holy Priest or a Discipline Priest. I am a healing Priest and I’ll switch to whatever spec is deemed necessary. Naturally, I shot straight for the 4 piece right away because I wanted to give them a shot. I’m also going to compare this with the Ret Paladin 2 piece (On melee swing, resets the cooldown timer on Divine Storm).

  • How often does it really get used? I know there are clutch moments when you’ve chained 2 back to back Penances or got that extra Circle of Healing when it counted. But that’s not exactly the norm. I get those too. But more often than not, I get the cooldown reset and I end up not using it because no one needs a heal at that particular moment in time. What ends up happening is that by the time I use it, the amount of time that passed would have been the same when the spell was on cooldown without the reset anyway.
  • Overhealing and not enough health: To build upon the previous point, the heals are held when the cooldown resets to preserve mana and preserve the cooldown. No point in using it when no one needs that heal. Looking my Ret Paladin for a second, I watch that Divine Storm cooldown like a hawk. The moment it’s up, I slam that ‘3’ key like no other. Sometimes I’ll get 3 in a row and I’ll not use my Judgment or Exorcism or whatever spells simply to work that Divine Storm cooldown again. What’s the difference between this and the healing? When you’re DPSing, the mobs you fight end up having a lot of health. This makes the spell much more useful because there is a chance you can end up using it more times then you normally would. In fact, as a DPS, you end up using those abilities everytime the cooldown is 0. Anything that resets the cooldown is a plus.

    But as a healer, you’re not healing players with 80000 health. You’re not getting a maximum gain back every chance the cooldown is up because it isn’t always used. The health ceiling is too low. The only encounter where you would use up the Penance cooldown every time would be on the Dreamwalker fight. A Disc Priest just alternates between Penance and Flash Heal and lights up Penance everytime it resets on Valithria herself. In that sense, they are no different than a DPS player. The difference is that the bar increases instead of decreases.

    With the current raid health, we just don’t get those kinds of opportunities enough.

  • Constant versus proc: You can tell where I’m going with this one. The proposed changes are a constant. They will always be in effect. One of my Priests in the guild likes to refer to proc chance items as “The Vala’nyr Effect”. Its absolutely awesome when the proc lights up, but its just like any other item later. Having a constant is (usually) better since it’s always there. I love my Vala’nyr to death, but sometimes it just fires off at non-opportune or non beneficial times (“Crap, I got the buff when I’m stuck inside a giant frozen ice block or am busy running out of this really long trail of purple fire”). Straight buffs are straight buffs.

All in all, if our current tier bonus does end up changing, I do hope they file this set bonus in the “future tier 11/12/13 set bonuses”. It was a great idea and I know many of you were pleasantly surprised at how well it turned out. Maybe when the increased health pool changes go up (during Cataclysm), we can make it really shine.

Anyway, I still maintain that the PTR is the PTR. This is the direction they’re leaning toward and it’s either a placeholder or the numbers will be changed later. What we do definitively know is that there will be a change to it.

Now if you really want to make it interesting, here’s my proposed T10 change:

4 piece: Your Circle of Healing and Penance spells have a 20% chance to cause your next Flash Heal cast within 6 sec to remove the Weakened Soul debuff on that target.

How is that for complicated? Probably overpowered. But that’d be kinda fun to play with.