Healing Ulduar: Kologarn

kologarn

For other bosses in Ulduar, check the Ulduar Healing Strategy Page.

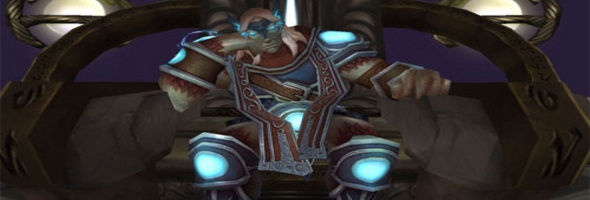
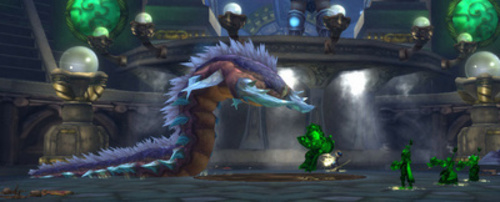
Kologarn is the sentinel that stands in the way between your raid group and the rest of Ulduear. He is a challenging boss for guilds that are new to raiding. Like Deconstructor, victory lies in the ultimate ability of individual players.

Abilities

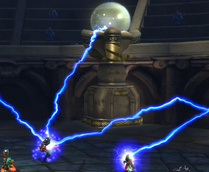
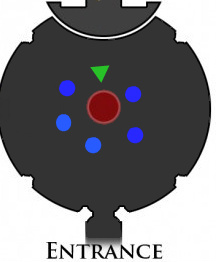
Eyebeams: Two ways to handle this. Run out the door or run circles on the right side of the platform. More on this later.

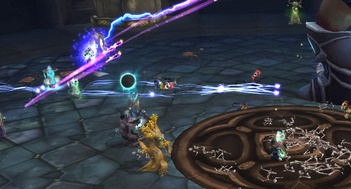
Stone grip: He’s going to pluck three players into the palm of his hand and attempt to squeeze them to death until they get broken out. The only way to break players out is by DPSing the arm. Once it takes 380000 damage, the players are released.

Execution

DPS priority is going to approach the boss in this order: Right arm, Elementals, torso. When any arm is destroyed, the torso loses the same amount of health.

It’s best to call out right arm health at 5% intervals starting from 20 so your tanks know when to switch. After the right arm falls, elementals will spawn.

Two tanks are needed to hold Kologarn’s attention. He’s got a Gluth-like debuff that requires two tanks to taunt off each other. Otherwise, the debuff becomes flat-out unbearable.

kolo-beams

Dodging eye beams

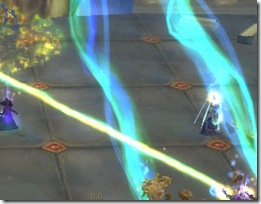
When you get focused by twin green beams, you have around 2 seconds to start hustling before you get rocked. There are two ways to handle avoiding them:

Out the door

Make a beeline for the door and down the stairs. The upside is that it presents minimal risk to the players in your raid group. The down side is if the player is too slow, they might die due to line of sight issues. As healers, we don’t have to worry about this.

Laps on the right side

Have beam-focused players run circles along the right side of the room. The pros and cons are the exact inverse of the bailing-out-the-door method. Focused players are well within the range of healers. But poor kiting can lead to multiple casualties.

Whatever solution you choose, drill it in the heads of the rest of the raid to immediately get out of the green. The beams are extremely hard to miss. Keep your head up.

The Elemental Tank

It’s happened before. I’ve seen the off tank gain aggro of all ads and get focused by beams at the exact same time. As a tank, he’ll live for a few extra seconds but not anymore after that. Use whatever saves you can on him to help lessen the blow. Pain Suppression, Guardian Spirit and Blessing of Sacrifice work admirably.

Healing strategy

Around 6-7, healers is a good number to start with. This can drop with more gear and experience. Expect an enormous amount of raid damage being doled out. His left arm sweeps the entire raid for around 15000+. Pick two of your strongest tank healers and assign them to the main tank (this will vary as they’re taunting off each other). Be sure to have Kologarn’s target up so you can see which tank he’s presently on.

If you have access to two Resto Shamans, they can anchor the Stone Grips quite easily.

Healer items

Ironmender OH (Priests, Druids)

Gloves of the Pythonic Guardian Gloves (Paladin)

Robes of the Umbral Brute Chest (Priests)

Unfaltering Armguards Wrists (Paladin)

Abusing General Vezax as Discipline

The Conquest strike team reached General V on Monday evening. In the final hour remaining in our raid night, we spent most of the time identifying the environmental elements of the fight.

What did the Saronite Vapors look like?

What’s Shadow Crash?

How do we deal with Mark of the Faceless?

More importantly for healers, how do we manage our mana while being truly unable to gain it back unless it’s from said Vapors?

One of the aspects of the fight that I noticed early on is Shadow Crash.

"”Fires a shadow missile at a target. Upon impact, it leaves an energy field that lingers for 20 seconds, increases magical damage dealt by 100%, increasing casting speed by 100%, reducing healing done by 75%, and reducing mana costs by 70%.”

The primary strength of Discipline Priests lie in their powers of mitigation. Shadow Crash affects a healer’s mana cost, cast speed, and actual healing done. You can see where I’m going with this.

Power Word: Shield is instant. The casting speed debuff won’t have an effect there. It’s also not technically a heal. It’s a damage absorption. Finally it does reduce the cost of shields by 70%.

The bottom line: ~200 mana costing shields. Very nice.

Heh, I’m not going to jinx the week by predicting whether or not we’ll obtain a kill. I had an internal progression timeline for Ulduar when it came out and we’re right on schedule.

Hybrid it up on General Vezax

380033-header

This is a guest post by Paladin blogger Honorshammer of Honor’s Code.

General Vezax is the the last boss you must down before you cross swords with Yogg-Saron himself.

The General is one of most challenging fights in all of Ulduar due to his Aura of Despair. What is it that this lovely gift from the Developers does?

From WoWWiki (http://www.wowwiki.com/General_Vezax) we find:

Aura of Despair – Prevents mana regeneration throughout the fight by all means, except for Judgments of the Wise, Spiritual Attunement, Aspect of the Viper, Thrill of the Hunt, and Shamanistic Rage. Note that unlike the Play Test Realm version of this encounter Mana Potions and active abilities such as Evocation and Life Tap will not function.

My guild recently downed General Vezax. I was Retribution for the fight, but when one of our healers went down; I jumped in and started throwing some heals on the tank. That’s when I discovered the power of Judgments of the Wise for this fight. By Judging and stopcasting I was able to take over the 3rd healer role and concentrate on helping to keep our Main Tank alive, and do it on a Ret Paladin’s mana pool.

What exactly does Judgement of the Wise do?

Judgements of the Wise Rank 3 – Your Judgement spells have a 100% chance to grant the Replenishment effect to up to 10 party or raid members mana regeneration equal to 0.25% of their maximum mana per second for 15 sec, and to immediately grant you 25% of your base mana. (Source)

The replenishment aspect is useless. After reviewing the WoW Web Stats, I can see that I never gained Replenishment. However I did gain over 100,000 mana from Judgments of the wise! Because it works off base mana, it would restore the same amount regardless of the current mana pool of the Paladin.

We know that for a Level 80 Paladin, Holy Light cost 1,274 mana. So with a little napkin math, we can conclude that I regenerated enough mana from Judgments of the Wise to cast over 70 Holy Lights. That’s without the use of any Saronite Vapors at all.

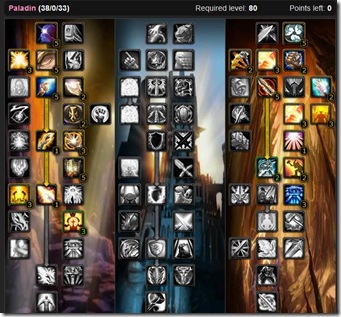
How practical would it be it for a Holy Paladin to get Judgement of the Wise? Let’s look at a talents build that allows a Holy Paladin to get Judgement of the Wise, and the tradeoffs it makes to get there.

The most popular Holy Paladin build according to TalentChic is 51/5/15. Let’s look at what is needed to turn that into our hybrid build.

First off, the 5 points in Divinity have to go. Divinity is a really strong Tier 1 talent, but we simply won’t have room for it in our build. It doesn’t matter how hard the heal hits if you don’t have the mana to cast it.

Those 5 points move into Sanctity of Battle and Pursuit of Justice. Sanctity gives you even more crit for your Holy spells which should offset some of the loss of Divinity. There is a ton of movement on General Vezax so Pursuit of Justice is really nice as you move away from a Shadow Crash or into a Saronite Vapor.

Then we take the points out of Beacon of Light. This is one tank fight. Let the other healers handle the Raid; you can stay on the Tank so Beacon is a minor loss. You are going to lose the Haste from Judgments of the Pure and Infusion of Light. You will also have to heal from melee range because you won’t have the range increase from Enlightened Judgments. We had our Resto Druid healing from near melee range, so we could just have just as easily had a Holy Paladin there.

You won’t have the mana reduction from Divine Illumination. Based on General Vexax’s enrage timer, you would only be able to fire Divine Illumination more than 3 times during the fight. Are those 45 seconds of reduced cost worth the mana you can get back from Judgments of the Wise?

Assuming a little haste from gear, we’ll call Holy Light a 2 second cast. In those 45 seconds, we can get off 22.5 Holy Lights. To give every advantage to Divine Illumination, we’ll call it 23.

Holy Light costs 1271 so half it’s cost is 635. So we’ve saved 635 mana times 23 casts or about 15,000 mana. It’s about 10% of what Judgments of the Wise gives you. So Divine Illumination is gone as well. Bu-bye!

Our final move is to take 2 points out of Holy Guildance which will result in about a 4% loss of spell power from Intellect. The rest of the Holy Paladin build is pretty much intact.

With these points freed up, we continue to ascend the Ret Tree. The next point taken in Ret is Sanctified Retribution. This will increase all damage done by everyone near us, even if we are running Concentration Aura.

We want to pick up Improved Judgments so we can judge as often as possible, and trigger Judgments of the Wise as often as possible. Now we need two ‘filler’ points to move into the next Tier. There aren’t any great places to put them. I chose to put them in Crusade to increase the damage of Judgment by 3%. This build relies on judging often, so you might as well have them hit a little harder.

On the next tier, we grab Divine Purpose. The 4% spell miss will act as increased resistance to Shadow Crash and Searing Flames should one get through your interrupters.

Here again we find ourselves two points short of the next tier and not really any good place to spend them. I opted for Vengeance. Maybe you could get a stack going and hit those Judgments a little harder. It’s a filler choice so anywhere you want to throw two points will probably work.

Finally, we open Judgments of the Wise.

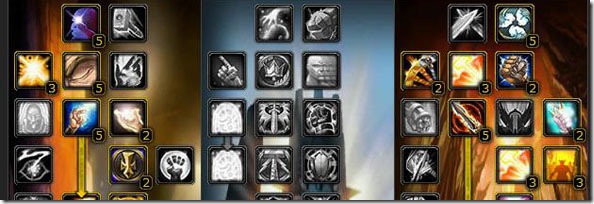
Here’s the final 38/0/33 build in the WoWhead tool.

General Vezax is a challenging fight. Specing for a specific fight is something that used to be fairly common in late Tier 6 and Sunwell. We didn’t need it for Tier 7 raids, but as we near the end of Tier 8, it may be something to consider again.

hybrid

Healing Ulduar: Hodir

creature_hodir

For other bosses in Ulduar, check the Ulduar Healing Strategy Page

Hodir is a fight that requires a lot of movement. This boss is a big cuddly snowman who likes to spread the love, and the iceblocks. This fight will keep you on your toes.

Notes about the fight:

  • Lots of movement
  • Raid wide damage

Abilities

Biting Cold – This is an aura like affect that pulses through the entire raid. This is much like the ability from Keristrasza in the nexus, you need to keep moving to keep it from stacking up on you. Each stack increases the periodic damage it deals.

Freeze – This deals about 5k frost damage to all players within 10 yards of the target, it also roots the targets in place.

Flash Freeze – This encases the entire raid in blocks of ice. This is prevented by standing on snowdrifts.ÂÂ

Icicle – Occasionally giant blocks of ice will fall from the ceiling. These deal 12,000 damage to anyone hit and have a knock back component. You can see which areas will be hit by a small circular glyph on the ground. If you are having trouble seeing the glyphs, go into your video settings and turn on Projected Textures. Before a flash freeze, a larger glyph will show on the ground before the ice falls and will leave behind Snowdrifts which must be used to avoid flash freeze.

Frozen Blows – Reduces Hodir’s physical damage but adds a frost damage component to his attacks. This also has a raid wide frost damage effect.

Enrage – Hodir has a 9 minute Enrage Timer

Ability Examples:

ice

Icicle

snowdrift

Snowdrift

freeze

Freeze

NPCs

Hodir also comes with a selection of NPC’s that must be broken out of their icy prisons. There will be four on normal and 8 on heroic. The npc’s consists of the following.

2x Druids: The druids are hard to miss, they’re in boomkin form. When you break them out they DPS Hodir but also cast Starlight which increases the attack speed of anyone standing in it by 100%

2x Shaman: The shamans DPS Hodir elemental style and will occasionally cast Storm Cloud on a raid member. This ability lets you buff several raid members with Storm Power which increases their critical strike damage by 135%.

2x Mages: The mages will help try to break fellow NPCs out of ice blocks and will cast a Toasty Fire. The fire is literally a campfire on the ground, but it fights off the effects of biting cold. Falling ice and Flash Freeze will wipe out the fire.

2x Priests: The priests will smite and occasionally throw out a heal, but most importantly they will cast Dispel Magic to free players from the effects of Freeze

Execution

Your raid will head in following the Main Tank. The tank will take Hodir back towards the rear of the room. DPS will begin by breaking out the NPCs. After all the NPCs have been broken out, DPS can start in on Hodir. When DPS first engages Hodir it is a good time to blow Heroism / Bloodlust. Healers should move into position near the Main Tank while everyone else needs to move into position around the raid. DPS continues on Hodir until he is about to cast Flash Freeze. Everyone needs to move to the Snowdrifts to avoid being frozen. After the Flash Freeze any raiders who were frozen should be broken free ASAP. DPS will then begin on the NPCs again until all are free, and then will resume DPS on Hodir. Rinse and repeat until the big guy is done.

Healing Hodir

Healing Hodir has two major components.

Main Tank – Three healers should be assigned to the main tank. They should be in close proximity at all times and moving with the tank as needed. Grace from a Disc Priest helps even out the damage from Hodir.

Raid – The rest of the healers should be spread out along the outside of the raid to cover as many raiders as possible.

All healers will be moving quite a bit during this fight, dodging falling ice and shaking off the effect of biting cold until the NPC’s are broken loose. Shamans will be using a lot of Riptide and Lesser Healing Wave, Druids will be right at home rolling HoTs, Paladins will be using quick Flash Heals, as well as priests utilizing renews and quick heals. It is possible to toss out a longer cast heal such as Greater Heal or Chain Heal and move before biting cold stacks, as long as you can find yourself a rhythm for move and cast. Your main goal as healers should be to find a Toasty Fire close enough to the raid to sit on. If you have the Toasty Fire buff, you can spam heals without the worry of stacking Biting Cold. Since the rest of the raid will be moving around though, be prepared to move to keep people in range. Once you learn to balance the movement and the heals the fight is pretty straightforward.

Until next time, Happy Healing.

Healing Ulduar: Freya

freya_banner

For other bosses in Ulduar, check the Ulduar Healing Strategy Page

Freya offers everything a healing druid could ever want: pretty flowers, sparkly green trees, gnarled ents, angry seed bombs, and even friendly mushrooms of safety. This boss fight is a colorful, chaotic miscellany that asks healers to use all of their skills without overtaxing them in any one area. When you take on Freya, be prepared to react to whatever her tree-friends throw at you next. Keep reading for a healing-oriented rundown of her abilities.

The Pull

Conquest wiped this weekend in our 10 man because Yogi Ragadast, our bear tank, decided to eat a pickinick right in the middle of Freya’s patrol path. Beware that this guardian of the forest ranges far. Ideally, you want your tank to charge in and keep Freya occupied by the creek while the raid stands toward the center of the room awaiting adds. Note that attacking Freya before taking care of her trash waves does exactly nothing.

Phase 1:The Trash Roulette

In Phase 1, you cannot damage the boss and must instead deal with waves of adds. Freya will summon three separate trash events to keep raiders’ nasty paws out of her vegetable garden. Waves will spawn once per minute, and it’s possible to have more than one wave active at a time if your DPS is slow. They can appear in any order, and some will repeat during your encounter. I will explain in brief how to deal with each.

Type 1: Snaplashers, Ancient Water Spirits, and Storm Lashers
This wave is the most dangerous. Each mob type has a different amount of health, and all three must die at the same time or they will be rezzed. The Snaplashers have a stacking buff that makes them hit harder when they receive damage, so your dps will have to periodically switch away from them. In 25-man raids, two tanks may be used to deal with this phase. If that is the case, healers must keep an eye (or two) on the Snaplasher tank. In 10-man raids, one tank will take care of all these adds.

Type 2: Detonating Lasher
These little flowers may look sweet, but don’t be fooled. They’re rotten little skunkflowers at the core. These guys can attach themselves a healer very easily, and they’ll blow up when killed. If I attract too many four-petaled friends, I use Shadowmeld or Barkskin until they make like a tree and leaf. The Detonating Lashers are not particularly dangerous, though raid healers may have to clean up the mess that results if someone’s too close when one of these little suckers blows up.

Type 3: Ancient Conservator
This is essentially a tank and spank add. However, he spawns fun happy mushrooms that you absolutely must stand under in order to avoid his silence. Remember, mushrooms are a good thing.

Miscellaneous Phase 1 abilities:
During phase 1, Freya will also summon a glowing green tree, the Lifebinder. When it appears, the raid must kill it immediately in order to avoid its healing effect.

Healers must also be aware of the debuff Sunbeam. Freya will target a player and cast this ability, which does a weak AoE. It’s not disastrous in regular mode, but I expect that with hard mode it’s a different story.

Phase 2: Goddess on the Move

Phase 1 serves to wear down Freya’s HoTs and allow her to take damage. In Phase 2, your tank will need to kite her in a circle around the room. Why? You’ve heard of the druid spell Living Seed. Freya, the druid goddess, casts seeds of evil. These are small glowing seed pods that appear on the ground and then detonate after a few seconds. The raid will need to stay ahead of the chlorophyllic explosions. Aside from the Bad Seeds, the spawns of the Lifebinder tree, and the Sunbeam effect, Phase 2 is a tank and spank.

Healing Assignments

Much of the healing in this boss encounter is reactive, and it can either feel like catch-as-catch can chaos or like a perfectly orchestrated minuet. It all depends on the skill of your individual raid members at their jobs. A knowledge of movement and the basic raid mechanics like target-switching on demand will lead to a win. Everything might be messy, but it’s not difficult. Healing assignments can be fairly loose here, but we assign one specific healer to the main tank and one to each of two offtanks. Beyond that, healers work their magic on the move and cover players in their area. I’d say this is one of the least demanding fights healing-wise in Ulduar. Even though the adds phase can be hectic, it’s nothing like Thorim’s arena. I’d also say this boss is slightly more difficult on 10-man because there’s less redundancy in raid roles. In 25-man, you can still eke out a kill if, say, your players execute the different movements with something less than precision.
sydsignature