Healing Naxxramas – Anub’Rekhan

anub-header

Anub’Rekhan is the first boss of the Arachnid Quarter (Spider Wing). Most guilds entering Naxxramas for the first time will wish to go and try their luck against him initially as he’s the easiest boss to get to. He’s a really big Spider boss with a few tricks up his sleeve.

Anub is a two phase, repeating encounter.

Phase 1

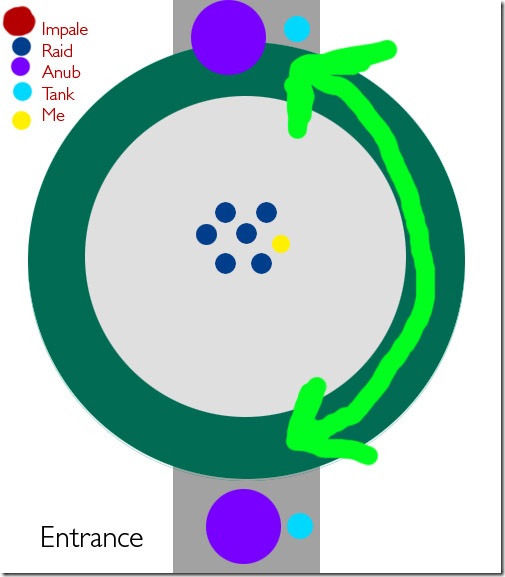
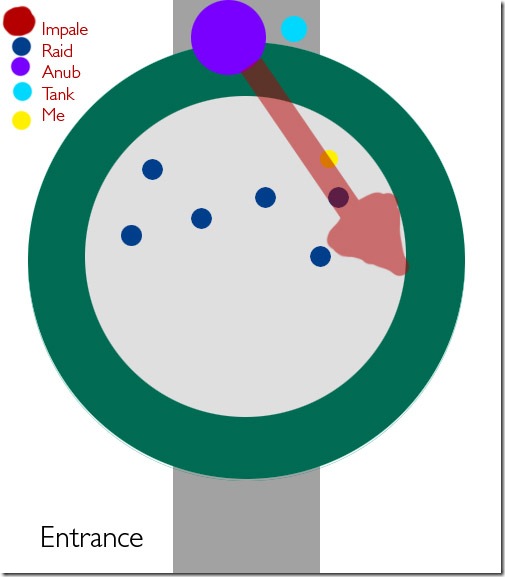
Anub does a knock back. Your MT is going to want to position him against the far back wall with the boss facing the right (Look at my diagram).

Every so often he’s going to use an ability called Impale. It’s a straight line damage spell which knocks players in the air if they get hit by it. In other words, anyone in the path of an Impale will get thrown in the air.

WoWScrnShot_091308_102037 He likes to spawn a mob during this phase. Have your off tank keep an eye for one. When you kill it, it’s going to spawn these mini-mobs called Corpse Scarabs. Have any AoE DPS lock them in place and burn them down before they get on the tanks and healers.

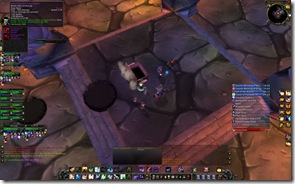
WoWScrnShot_091308_102157 So for instance, the red arrow signifies an example Impale targeting a blue raid member. I, being the idiot Dwarf I am, is standing just ahead of him. I’m close enough that I would get struck by Impale as well. 

Impale’s target the player. They’re inevitable and players will get hit by them. But we want to minimize it by having them spread out in a staggered line facing Anub. Impale will hit for about 4400 on Cloth.

Really important: See the green slime? Don’t stand in those. Or run into there. Don’t come in contact with it. Trust me.

Example: Stop’s Warlock is right behind me. Anub targets him and lights up an Impale. The two of us go flying in the air. I pop a CoH in the air to help boost our health a little and Levitate down. Stop just… lands really hard and continues DPSing.

anub-phase1

Phase 2

In this phase, your tank has to do one really important thing:

run-forrest

Run along the outer edge of the room in a circular fashion (Refer to the image header at the top). By outer edge, I mean run in the green slime pit but not in the actual slime. You can still run on the outer rim without getting in contact with it. Anub slows down a lot. In addition, he’s going to use an ability called Locust Swarm. At this point, all casters and healers should fall back to the middle of the room. Locust Swarm will silence players and hurt a lot. It’s a 30 yard radius stretching out from Anub’Rekhan that’s in constant effect (like an aura almost) In this phase.

WoWScrnShot_091308_091910

Similar to the first phase, he also summons a mob. Make sure your OT jumps on it.

Make sure your tank does not run it into the raid. It’s absolutely imperative that they run along the outside. When you run to the other side of the room, Locust Swarm should expire and he’ll return to phase 1 mode.

The green arrows signify the path your tank should take. Note how the scattered raid has collapsed to the center. The second time you enter phase 2, go ahead and take the reverse path back up.

anub-phase2

Pro tip: Are your tanks out of shape? Their armour really heavy? Having a hard time running away from the boss? If you have a Hunter, have them activate Aspect of the Pack temporarily. Death Knights should switch to Unholy Aura for increased run speed. If you have a Warrior as a tank, feel free to have a player jump across the river of goo and have your Warrior intercept into them.

Just take care you don’t run too fast that Anub starts cutting across the raid.

Healing

Anub hits fairly hard. I’m going to suggest a 2 healer on MT with 1 healer on the raid and OT. Note that the raid doesn’t take a lot of damage throughout the encounter as long as they spread themselves out to avoid and mitigate Impale damage. Once the impale hits, your 3rd healer should drop a few AoE spells or whatever to get them back up (I’m not telling you what spells to use. You’re in Naxx now).

Like I said earlier in Phase 2, collapse to the middle. Try to load up the tanks with as much HoTs and mitigation spells or abilities as possible. If you need to sneak out and hit your tank with an emergency heal, do it even if it means risking a Locust Swarm. You should be able to max range the tank without getting affected by it. Another method is to run slightly ahead of the tank so that you still remain out of range of Locust Swarm.

Example: Assuming I’m a Discipline Priest, I would park myself on the side and heal the MT. Anna, on her Resto Shaman, would be tasked to healing the raid. Jess’s Resto Druid would be unloading HoTs on the MT as wel as any melee players that are up front.

Loot

Edit: Clarified tank path during phase 2.
Post Your Haircuts!

mattshair

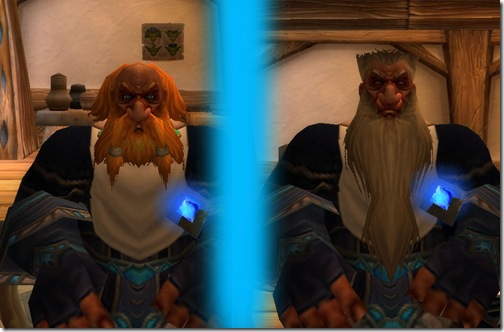
Old Matticus on the left, new (old-er) Matticus on the right!

I can easily explain the hair and color change. The buzzcut is a result of dodging Fireballs and various Shadowbolts. The color is from the age and stress that comes from the weary campaigns against Kael, Vashj, and Illidan’s forces. Mallet is older. Much older. The new look helps reflect that. The beard is longer from the lack of contact with civilization. Hasn’t had time to properly get a beard cut (trim).

What about you? Let’s see your haircuts!

* Syd, Wyn, feel free to edit this post if you like to include yours along with descriptions.

Guides to 3.0.2

Didn’t feel the need to do one of my own. Already technically contributed to the Priest column (and really inaccurately at that).

Happy patch day!

Most likely not going to update a whole lot of addons. Not sure how much more we’re going to raid. Just going to update raidframes and thats it. Going to try to configure key bindings via WoW default interface (Thats going to be fun).

To do list

  • UBRS for the Leeroy title
  • Leveling every capital city and smashing said leaders
  • World domination

Might squeeze in some study time in there. Who knows?

Order of Operations: Surge of Light, Clearcasting, Improved Holy Concentration

clearcast

A question was posed this morning on the two articles I wrote on Spiritual Guidance this morning. A number of talents have been modified for Priests in the Holy tree.

If Surge of Light, Clearcasting, and Improved Holy Concentration proc, will Flash Heal eat all 3?

(Not the exact question, but the exact question was much longer which sort of leads to the same direction)

A quick examination of the talents:

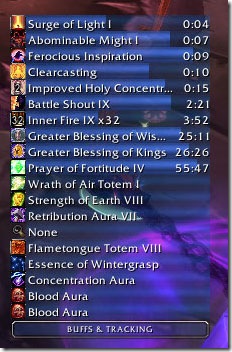
Here’s an action shot of my buffs. You’d think activating all 3 (well 2) would be rare. It actually occurs more often than you’d think. So here’s the million dollar question:

What happens?

In all of my experience at beta healing, I noticed that Surge of Light gets checked first. If you cast a Flash Heal, it eats Surge of Light. Clearcasting and the 2 charges of Improved Holy Concentration remain active. The next direct heal you cast (Flash Heal, Greater Heal, Binding Heal) will trigger the Clearcasting and 1 Improved Holy Concentration charge. This will result in you having only 1 Imp Holy Conc charge remaining. The next direct heal you cast will consume this.

What if we open up with a non Flash Heal spell?

Dropping Greater Heal first will activate Clearcasting and 1 Improved Holy Concentration charge. Surge of Light will still be available. Casting Greater Heal again will eat the Improved Holy Conc charge left. Lastly, Flash Heal will then trigger Surge of Light.

So to summarize, if you have Surge of Light on you and you cast Flash Heal, it will always be free and non-crit.

Things to remember

Watch your freakin’ buffs! Have your sound effects on! You should be able to recognize the distinctive chime of Clearcasting! When you hear it, dart your eyes to your buff bar and see what happens. Use up the effect that has the least amount of buff time remaining. In the shot above, since I have only 4 seconds to use Surge of Light and 10 seconds on Clearcasting, I have 3 seconds to make a decision to cast a free Flash Heal or I lose out on my freebie.

Don’t forget that Surge of Light also activates on Smite. So if you don’t have any present targets to heal at all, target the boss and slam your Smite key. It’s free!

On the other hand, if you have less time remaining on Clearcasting as opposed to Surge of Light, cast a non Flash Heal. You probably want to use Greater Heal at this point first since the Flash will be instant.

What about Inner Focus?

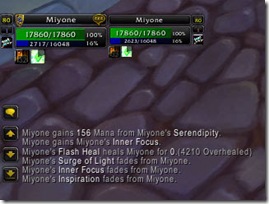
surge-focusI’ve noticed Inner Focus and Clearcasting be consumed at the same time after one Greater Heal.
Surge of Light also gets eaten if Inner Focus is activated. Check out the shot on the right. I was able to proc just a Surge of Light. Casting Flash Heal knocks off both Surge and Inner Focus respectively. Even though there’s a slightly increased chance to crit, I highly doubt it can due to the restrictions imposed by Surge.

Sigh. Isn’t that just we need? More things to watch for. More complications. More conditions. More ifs, ands, or buts. Gone are the days where I could mindlessly spam stuff while watching games on TV.

However, I’ve adapted. It will take some time for you to do the same (even the most veteran of Priests). I promise to do what I can to ease the transition from old school healing to that of the new hotness. 

Observations taken from beta. Could change at any time. Disclaimers own you.

Healing Naxxramas – Four Horsemen (10 man)

4H-title

Here it is. Welcome to the most potentially complicated 10 man boss ever. By popular request (from Jove!), I’ve nailed down the process of how to handle the Four Horsemen on Normal Naxx mode. I’ve seen a few questions asked by a people asking me if I’ve ever done this fight before. I did do it on 25 but I didn’t feel qualified to address this on 10s. I’m not going to write about a fight until I get to experience it myself first hand (and that will continue to always be the case with boss fights).

The Four Horsemen have had a reputation for being the most difficult encounter before Burning Crusade hit due to the level of timing and coordination that it required from players. The Wrath variants, while a little easier, will still require some semblance of coherent teamwork.

The Abilities

The Knights have their own individual debuffing marks which gradually increase the amount of damage that tanks and other players around them take:

Note the fact that it is a stacking debuff which increases the amount of damage you take. The first debuff is applied after 20 seconds and then every 12 seconds after that. It has a max range of approximately 65+ yards and is applied one everyone within the vicinity. You cannot use any abilities to make the Mark fall off (Divine Shield, Ice Block, etc).

Every Horseman must have a player nearby that can get the Mark. If there is no player within 65 yards of the Horsemen, the raid will take massive damage and subsequently wipe.

Each Knight has it’s own unique spell:

Placement

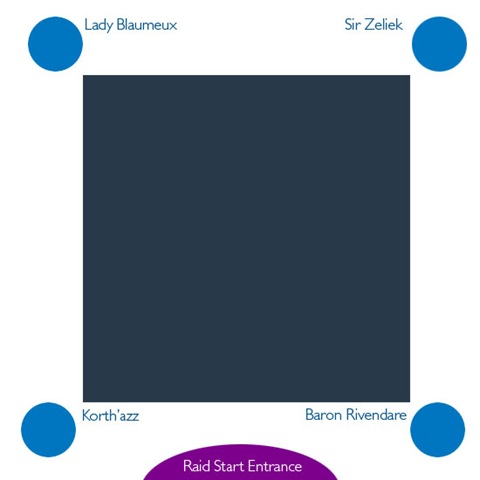
4H-placement

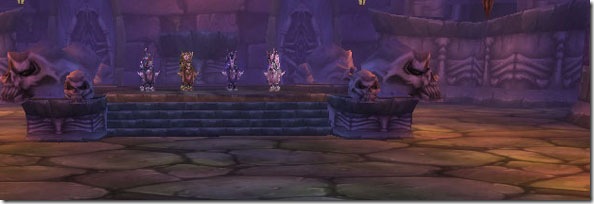
Four Horsemen is unlike most encounters you’ll see in the game as the bosses are on preset scripts that take them to specific locations. Sir Zeliek will always go to the back right of the room, for example. When setting up, send your Caster/Healer pairing to the back end along the left and right walls respectively.

4H-right Note: I really recommend using a healer class and a class that has the ability to heal itself (Balance Druid or Elemental Shaman), but I stress that the fight can be done without either of the two. The healer in the back has to compensate by being really on the ball with their regeneration and healing if such a player is unavailable.
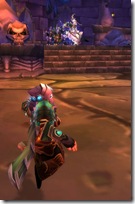
Left: Matticus sneaking up the right wing. Those Knights won’t know what hit them!"

To activate the event, all you need to do is walk up to them and shoot them before they automatically race off to their locations.

Lady Blaumeux and Sir Zeliek do not move from their positions at all for the duration of the encounter and remain stationary. Korth’azz and Baron Rivendare are tauntable and movable.

Strategy

This strategy used makes sense if you remember the fact that each Knight has their own debuff that they apply. Each tank is required to pay strong attention to their debuffs.

Raid DPS starts out at the front of the room working on Korth’azz and Baron Rivendare. The raid will be positioned on the front left side of the entrance engaging Korth’azz first to eliminate the Meteor effect as quick as possible.

Caster tanks

Once the Knights are in place, they’ll start locking onto the players that are closest to them. Zeliek does have his own chain damage type spell (Holy Wrath) and that’s why the Zeliek tank is going to be alone for the first half of the encounter.

The magic number of debuffs before you move? 3 maximum.

Once you get 2, signal the other tank on Lady Blaumeux. Remember, the debuffs have ranges. The only way to shake them is to outrun the original Knight.

Example

I was tanking Zeliek and I had a boomkin as a partner on Blaumeux. When we got to 2 debuffs, we’d slowly cheat towards the middle. Once we hit 3, we made a mad dash to the other side and star tanking each others original mob. As I ran by, I loaded up my boomkin partner with Renews, a Prayer of Mending, and a Shield. Similarly, he’d hit me with a full stack of Lifeblooms.

4H-switch-caster

Center: Me and my Boomkin homeboy tag teaming. Note the Shadow Bolt from the left and the Holy Wrath from the right about to nail the two of us. He’s running right towards my original Knight and I’m running left towards his Knight. Void zone on the bottom left.

Don’t worry extensively about the damage being done. The Holy bolts hit me (clothie Priest) for about 2500.

4H-DPS-Z

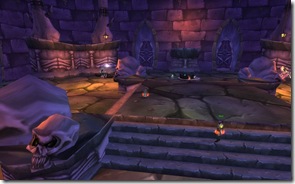
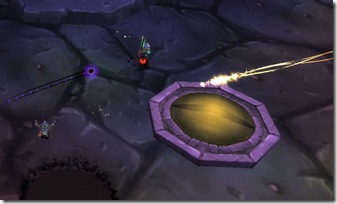
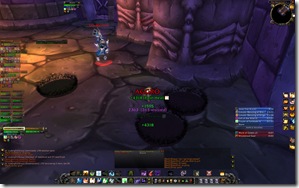
Be aware that Lady Blaumeux does put out void zones. She targets the player when she does so. Keep your eye on the ground and when you see the black hole, side step it. Try to be tactical and strategic about your placement. Don’t place them in the path between Blaumeux and Zeliek. (Pictures at the bottom)

Melee tanks

Set up 1 healer on the front right and the front left. Those healers will be assigned to the tanks that are immediately close to them.

Got the raid set up on the left? Good. They need to stay within 8 yards of Korth’azz to distribute the meteor equally. Here’s the tricky part of the encounter which is based mainly on observation and inquiry.

Tanks will still switch after 3ish or so debuffs, but there is a trick. The two tanks for Rivendare and Korth’azz have to run towards each other and meet in the middle. Then they taunt off each other, and turn around and run in the direction they were originally coming from. The raid group and the supporting cast will need to stay in their locations. Some things have changed. The DPS group runs towards Korth’azz (meteor guy) and the lone healer on Rivendare will also follow. The idea here is to shake off the original debuffs. Let the tanks switch their targets. When the original debuffs fall off, they return to their original targets.

Example

That last part may not have been clear, so let me try again.

Ubertank the Death Knight tank is on Korth’azz left. PseudoPally the Paladin tank is on Rivendare on the right. The third mark’s about to hit, so they run towards each other.

At this point, they’re within melee range of each other and will soon begin to acquire debuffs from both Knights.

PseudoPally tanks Korth’azz, turns around, and drags him back to the bottom right. UberTank, the smart Death Knight that he is, realizes that PseudoPally’s taunt affects more than 1 mob at a time and waits for PseudoPally’s taunt to go off before using his own taunt to peel Rivendare off and back to the left.

The two Knights have now switched locations allowing time for the original debuffs of the raid to wear off. DPS stays for a few seconds and DPS Rivendare. After the FIRST MARKS WEARS OFF, they run towards Kor’thazz and the Paladin on Rivendare switches back to healing PseudoPally.

Both Knights should die within seconds of each other as the DPS will be split amongst them fairly equally.

Korth’azz and Rivendare down

At this point, the initial Knights are dead. The entire raid will then move up and start working on Zeliek and Blaumeux. The same tank switching principle applies. All healers will collapse back to the original spawn platform where the Horsemen stood. If any player that isn’t a tank picks up too much of one debuff, have them turn around and run back towards the south side of the central platform. At that distance, the Mark should easily slip off and allow them to resume.

Get the raid to focus on Blaumeux first before the Void Zones become a pain. You don’t want to deal with Ziliek’s proximity chain Holy spell just yet anyway.

After 3 Marks, PseudoPally and Ubertank will have to switch and continue to do so. Just mind the Void Zones! Keep that up, and the boss will go down.

Congratulations! You just killed what was once considered the toughest boss in Naxx!

Healing

For Priest tanks, I suggest keeping a Renew on yourself to help lessen the blow. When you reach around 60%, drop a Greater Heal. If you’re healing the other tank near you, don’t forget to use Binding Heal and maintain Renews on the two of you.

When you’re on the just the two Caster Knights, work out a rotation with the healers. Try not to eat the Marks. Sometimes you have to because of LoS issues or because you just have to.

Action shots

WoWScrnShot_101108_202357WoWScrnShot_101108_203748

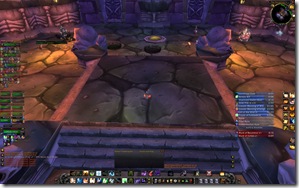
Above left: Even at this distance, I can still hold aggro against this boss. Note the positions of the Void Zones. As I’m tanking, I try to position as many of them together in a cluster as much as possible.

Above right: Me trying to shake off the two Marks on me. I’m at the back of the platform not healing and the other 2 healers are aware of this. We’re each taking turns switching on and off.

WoWScrnShot_101108_203824WoWScrnShot_101108_204100

Above left: A Starfire about to kill Void Zone queen here.

Above right: The results of our labor. A 2H sword. Where’s my freakin’ caster loot?

EDIT: 11/25 – Modified strategy for the Kor’thazz and Rivendare aspect. Look for the Strikethroughs.

Did I forget anything? Please post a comment! Questions? Post those too! I’ll do my best to get to them! Otherwise, feel free to check out my healing guide for the Naxxramas bosses.