Healing Crusader’s Coliseum: Lord Jaraxxus

jaraxxus

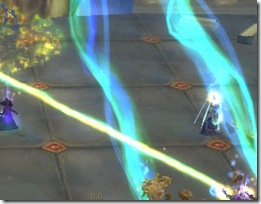
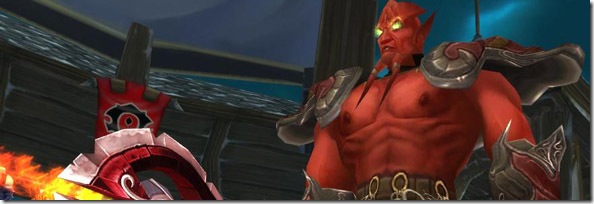
Lord Jaraxxus is the second boss that will be available this week for Coliseum raiders. Take a look at the video below. Be advised that it’s in German. Couldn’t find any other ones around (if you manage to find one, please post it in the comments below). The video shows the Lord Jaraxxus fight from a an off tank perspective. It looks to be a very healing intensive fight.

Breaking down abilities, execution, and healing below.

Abilities

Fel Fireball
Inflicts 18038 to 18962 Fire damage and an additional 7800 to 8200 Fire damage every 1 sec for 5 sec.
Fel Inferno
Periodically inflicts Fire damage to allies within 15 yards for 6 sec.
Fel Lightning
Strikes an enemy with Legion Lightning that arcs to another nearby enemy. The spell affects up to 5 targets.
Fel Streak
Inflicts 8288 to 8712 Fire damage.
Incinerate Flesh
Burns the flesh off your bones! Absorbs the next 70000 healing received and decreases damage dealt by 50% for 15 sec. If Incinerate Flesh is not removed before it expires it will cause a Burning Inferno.
Burning Inferno
Burning Inferno inflicts 3120 to 3280 Fire damage every 1 sec for 5 sec to all friendly targets. The Burning Inferno is caused by Incinerate Flesh not being removed before the duration expires. Incinerate Flesh is removed after absorbing 30000 healing.
Infernal Eruption
Lord Jaraxxus summons an Infernal Volcano which causes Infernals to spawn.
Legion Flame
The Legion Flame inflicts 3900 to 4100 Fire damage every 1 sec, also you are creating a Legion Fire every 1 sec for 6 sec.
Legion Flame
Inflicts 6825 to 7175 Fire damage.
Nether Portal
Lord Jaraxxus summons a Nether Portal.
Nether Power
The Power of the Nether increases magic damage dealt by 20% for 30 sec.
Touch of Jaraxxus
The Touch of Jaraxxus inflicts 3900 to 4100 Shadow damage for 12 sec and causes nearby players to be effected by Curse of the Nether.
Curse of the Nether
Inflicts 4388 to 4612 Shadow damage every 1 sec for 15 sec.

Mistress of Pain

Mistress’ Kiss
Next spell with a cast time interrupts that school for 8 sec and causes 8288 to 8712 Shadow damage.
Shivan Slash
A whirling attack that deals 75% weapon damage and pierces through armor.
Spinning Pain Spike
Leaps towards an enemy, grabbing them and inflicting significant Physical damage.

Execution

You’ll need 2 to 3 tanks for this. Have your main tank set up shop directly in the middle of the arena. The ranged and the healers will need to fan out to help mitigate Touch of Jaraxxus.

Melee DPS will be interrupting Fel Fireball. If it connects, it needs to be dispelled.

It looks to be a fairly simple tank and spank encounter.

But wait! There’s more!

You thought Black Temple was the last time you’d see these lovely ladies. Your off tank needs to keep his eyes open for a portal. A Mistress will emerge from one and it will need to be picked up. The video shows the Mistress being tanked on top of Lord Jaraxxus. Presumably so that melee DPS will be able to add extra damage from AoE hits and the like. The pain strike move appears to be random. Casters (healers especially) need to keep their eye out for Mistress’ Kiss. I’m assuming it will wear off after some time. Don’t cast if you’re hit by one.

There’s also Infernals that need to be tanked. I’m not sure if it’s possible for Infernals to appear at the same time a Mistress of Pain is up. It’s always a possibility. The 10 man video shows 3 Infernals that spawn. Not sure how the 25 will be like. The Infernals could have more health or there could just simply be more of them.

I suggest melee players divide themselves up in two groups not exceeding 3 players. Put 1 group on each leg of Jaraxxus to help mitigate the Fel Lightning attack (Chain Lightning).

One more mechanic is the Legion Flame. If a player gets it, they will be generating flame patches on their position. Whoever gets it needs to get clear of everyone else and just start doing circles to get the patches away from the rest of the raid. Luckily it only lasts 6 seconds.

Healing

I’d suggest stacking 6-7 healers the first time through.

2 healers on the main tank, 1 on the off tank and have the rest on the raid. Advise even placement of healers across the room: 2 on the left, 2 in the middle, 2 on the right.

I think the melee players are going to need a dedicated healer but I’m confused by the wording of Fel Inferno (damage to Jaraxxus allies or to us?).

There is a lot of raid damage coming in. It looks to be a brute force healing type of encounter.

The biggest threat to the raid is largely going to be from the Incinerate Flesh + Burning Inferno combination. Whoever gets affected by Incinerate Flesh needs to be healed up. 30000 damage. Shields won’t count I don’t think.

Healers, you are going to need to do some think-healing on the go. It’s very difficult to set up healing assignments for a fight like this as there’s so many sources of damage coming in. Play it by ear. Take initiative and don’t be afraid of healing the wrong person. It doesn’t matter what the name of the spell is since they’re taking damage anyway.

Good luck in there! Again, post any observations you see in the comments below (corrections are good too)!

Healing Crusader’s Coliseum: Northrend Beasts Encounter

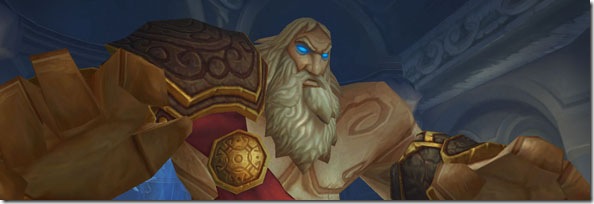
Image, abilities courtesy of MMO Champion

The Beasts encounter consists of three separate fights within 1 encounter. Consider the strategies here in beta. The information is pulled from watching various videos and reading further into datamined abilities. Feel free to make any adjustments or corrections in the comments below. Once I knock out the fight myself, I’ll update this with further information.

Watch this video here. I’ll be referencing it.

Phase 1: Gormok the Impaler

25 man health: 8.92 million

Abilities

Staggering Stomp

Deals a staggering stomp that inflicts 9263 to 9737 Physical damage to all enemies within 15 yards and interrupts spellcasting for 8 seconds.

Impale

Inflicts 150% of weapon damage to an enemy and causes it to bleed for 3500 to 4500 damage per application every 2 sec. for 30 sec. (10 second cooldown)

Your tank is going to position Gormok in the middle of the room.

The raid is going to be assaulted by Snobold Vassal. They come from the boss. Various raid members are going to be attacked by them. Seems like they jump onto players individually and prevent them from using abilities or spells. The only way for them to be removed is for your raid members to target them and kill them.

/target Snobold Vassal

I’d suggest adding that to your macro list and having it bound.

Watch out for patches of fire on the ground. Just stay out of them. No idea how much damage players take. No reason to stand in them.

You will need two tanks to handle this. The cooldown on impale is every 10 seconds. Your tanks have to switch and taunt every 30 seconds before the stacking debuff overwhelms them.

Healing Gormok

Start off with 6 healers.

Assign 2 to the tanks who are switching back and forth.

You may need 1-2 healers on the melee as they will be affected by the Staggering Stomp.

Put the last healers on raid to take care of any Vassal or fire damage. They should also help support the tanks if they’re idle.

Once he dies, you have about 15-20 seconds before the twin worms appear.

Phase 2: Acidmaw and Dreadscale

25 man health: ~6.97 million each

Abilities

Acidmaw Dreadscale
Paralytic Bite

Inflicts 12950 to 15050 Nature damage on an enemy and injects them with a paralytic toxin.

Burning Bite

Inflicts 11100 to 12900 Fire damage to an enemy and coats them with burning bile.

5 yd range, Instant

Paralytic Spray

Sprays acid at an enemy and nearby targets, dealing 8325 to 9675 Nature damage and applying a debilitating paralytic toxin.

Burning Spray

Sprays fluid at an enemy and nearby targets, dealing 8325 to 9675 Fire damage and coating them with burning bile.

100 yd range, 1.1 sec cast

Acidic Spew

Deals 2775 to 3225 Nature damage per 0.25 sec. to enemies in front of the caster.

100 yd range, Instant

Fire Spit

Deals 9250 to 10750 Fire damage to an enemy.

100 yd range, 1.1 sec cast

Slime Pool

Inflicts 5088 to 5912 Nature damage to enemy targets within the Poison Cloud.

Molten Spew

Deals 3700 to 4300 Fire damage per 0.25 sec. to enemies in front of the caster.

100 yd range, Instant

You can see the similarities between the 2 snakes. One snake will be grounded at a time while the other will be above ground. They alternative every so often.

First thing you’ll notice is that the tanks immediately face them away from the group. This helps offset Molten Spew and Acidic Spew. Make sure the tanks aren’t near each other either. You want to avoid overlapping spews.

Take note that all DPS is focused on the snake currently above ground. The snake that’s grounded probably has some sort of damage reduction modifier.

Snake above ground

Kite him in a clockwise fashion. He has to be kept moving. Around the 3:25 mark, you can see poison clouds being left. Think of Grobbulus. Have a traditional tank kite whichever snake is up. What we’re seeing is a caster tank (presumable a Warlock) on Acidmaw and holding aggro (or whoever snake is grounded). You can probably keep one healer on it.

When the snakes switch, keep an eye on the ground. Look for dust particles. Get clear of them as that’s your cue as to the snake positions.

IMPORTANT!

When Acidmaw is grounded, he’s going to be able to hit any player with Paralytic Spray. Targets nearby will be hit with that as well.

Applies a paralytic toxin that inflicts increasing Nature damage every 1 sec. and reduces movement speed over time until the victim is entirely paralyzed.

This is what Burning Bile does:

Coats enemies with burning bile, inflicting periodic Fire damage to them and their nearby allies. The burning bile of a jormungar is known to neutralize paralytic toxins.

So one of these toxins is going to cause your raiders to slowly become paralyzed and take increasing nature damage. The burning bile can clean that crap off. The raiders affected by burning bile have to run towards the toxin affected players. Make it easy and have both players run towards each other to speed it up even more.

If you wish to make it even easier for yourself, just have affected raid members run towards the main tank. It won’t matter who has what buffs as they’ll be able to cancel each other out.

Be sure that you kill Acidmaw first. If you kill Dreadscale first, you won’t have a way of removing the Paralysis.

Acidmaw above ground

The situation is going to be reversed. The main tank is going to be hit with the paralytic poison. Designate a player to run in periodically and stand near the tank to wipe off the poison.

Healing Acidmaw and Dreadscale

2 healers on the main tanks, 1 on the caster tank, and 3 on the rest of the raid. Remember that raiders will take damage from Burning Bile so they have to take care where they stand.

I’m not quite sure when they switch. I don’t know if its time based or percentage based.

Phase 3: Icehowl

25 man health: 13.3 million

Abilities

Ferocious Butt

Delivers a ferocious headbutt to an enemy, inflicting 69375 to 80625 Physical damage and stunning for 3 sec.

8 yd range, Instant

Arctic Breath

An icy breath that freezes targets in a cone in front of the caster, inflicting 20000 Frost damage over 5 sec.

100 yd range, Channeled

Massive Crash

Leaps into the air and crashes down with massive force, dealing 11000 Physical damage to all enemies, stunning them, and knocking them back.

1 sec cast

Whirl

Whirls around, dealing 9250 to 10750 Physical damage to all nearby enemies and knocking them back.

15 yd range, Instant

Frothing Rage

Increases Physical damage and attack speed by 50%.

Instant

No downtime between snakes and Icemaw. He’s tanked near the middle of the room.

Artic Breath doesn’t seem to be controllable. He’ll just turn and spray. Think to those big Sons of Hodir trash mobs in front of Hodir. Have an off tank ready to pick  him up just in case. The Breath is a channelled. As long as hes channeling the spell, players caught in the breath can’t do anything.

Dealing with Ferocious Butt

Okay, fast forward to 7:36. Icehowl leaps in the air and knocks everyone towards the wall (Massive Crash). The boss mod will announce that Icehowl is glaring at a player and lets out a bellowing roar. A quicker way is to see if the boss is facing your direction. If he is, RUN TO THE SIDE AND GET OUT OF THE DAMN WAY. At this point, Icehowl gets stunned for several seconds allowing the raid to get back into position. It seems like he takes extra damage during this stage. Looks like the stun lasts 15 seconds.

After his stun wears off, his Whirl kicks in (spins around and knocks back everyone). Your tank needs to haul ass back in range fast.

Icehowl gains an enrage and it must be dispelled. It’s called Frothing Rage. A Hunter’s Tranquilizing Shot should negate that quite nicely. Look at 8:29 for a better idea. I think this happens if Icehowl manages to connect on a player with Ferocious Butt and kills a guy or manages to hit someone. Note that the Enrage appears to wear off after 10 – 15 seconds if you’re not able to Tranq Shot it.

Healing Icehowl

Same thing as before. 2-3 healers on the main tank (I recommend a Disc Priest). Everyone else is on raid healing.

Keep tanking him centralized. When he nukes the ground, get the heck out of the way. Resume DPS. Rinse, repeat, link loot.

I hope this helps you guys out! Again, any other observations or corrections, please post in the comments. Strategies here were pulled from watching the video and from reading the datamined stuff. I’ll probably end up modifying this later depending on how off I am or if there’s a better idea.

Ulduar Fights Where It’s Just Not the Healer’s Fault

I’ve experienced just about type of death in Ulduar. I’d die to Constrictor tentacles. Early on, I’d get rocked by Hodir’s Flash Freeze. Sometimes I’d get unlucky with a Rocket Strike.

Today’s post is designed to help you identify under what situations a healer is at fault and when it is simply out of their hands. Keep in mind there are several exceptions. In most cases, tanks are the one that will be bearing the brunt of these abilities. If they die, odds are good they weren’t at full health. If it were any other player, well let’s take a look shall we?

This is a really long post. I’d consider using it as a reference when trying to troubleshoot your raid to see if there really was anything that could have been done to keep players alive.

Flame Leviathan

Nothing much here. I don’t send healers onboard the tank. I usually send up hybrid DPS who are able to heal in addition to DPS.

Razorscale

You died because of:

  • Devouring Flame – Your fault. Should not have been standing in them. It’s the blue stuff on the ground.
  • Flame Breath – Your fault. Don’t stand in front of Razor when this happens. Tanks are an exception.
  • Fireball – Our fault. It’s only 11000 damage or so. However, there are times when a player does get gibbed by these. I’ve been hit by this twice in a row in the span of a half second. I happened to have a shield up which saved me with a 15% health left.

Ignis

You died because of:

  • Scorch – Your fault. Why on earth would you stand on a big giant tower of fire?
  • Flame Jets – Our fault. Players should be in the green when Flame Jets connect.
  • Slag pot – Our fault. You can help even more though if you can. I cast Lesser Healing Wave on myself when I play my Elemental Shaman to help the heals out.
  • Construct explosion – Your fault. Run the heck out before it gets detonated.

Deconstructor

You died because of:

  • Gravity Bomb – Neither. It’s the job of the guy who got Gravity Bomb to get clear. If he’s too close, he pulls you in and detonates. Bomb guy’s fault.
  • Light Bomb – Both. It’s the Light bomb’s duty to also get clear. But the raid will take 2 or 3 ticks of Light Bomb damage. Our job is to heal that up. Requires effort on both parts.
  • Tympanic Tantrum – Our fault. We should be able to outheal the damage done by Tympanic Tantrum.
  • Bomb bot – Your fault. Should not be within proximity of these things when they explode.

Iron Council

You died because of:

  • Fusion Punch – Our fault. Unless none of the healers are dispellers. Then it’s the dispeller’s fault. That debuff has to come off quick.
  • High Voltage – Our fault. Steelbreaker’s aura. Everyone gets hit by it no matter what. It just has to be out healed.
  • Rune of Death – Your fault. Shouldn’t be standing in it.
  • Chain Lightning – Both. It depends on how much damage you take. If you die to a chain lightning, check to see if you were properly spaced up. You can stay with 1 or maybe 2 other players nearby. That type of damage is survivable. If your health was too low for a period of time, then its our fault for not getting you back in the green quick enough.
  • Lightning Whirl – Both. It should be interrupted. It’s normal to see 1 or 2 ticks slip through. Most players should be able to survive that. If you didn’t survive it, then chances are you weren’t topped either.
  • Overload – Your fault. When the little guy stops moving and starts doing his Kamehameha move, run out of the blast zone.
  • Lightning Tendrils – Both. It’s difficult to outrun this. Some players are going to get caught in them. At the same time, a concerted effort should be made by those not being focused to run away from it, not run towards it. Focused players are taking 3000 – 5000 damage per second. It’s possible if its one or two players. It’s a nightmare if it’s five or so.
  • Melee hit for 30000 – Not our fault. Ideally a cooldown will be popped. I know when I see Steelbreaker on the tank, I’ll drop a Pain Suppression reflexively on the tank to buy some extra time to get him repositioned. Sometimes Murphy likes to come along and crap on your raid with a Rune of Powered up Fusion Punch. One word: Screwed.

Kologarn

You died because of:

  • Shockwave – Our fault. No player should be that low when Shockwave connects. Otherwise they’re dead.
  • Stone Grip – Our fault. Gripped players just have to be kept alive until the arm takes enough damage.
  • Focused Eyebeam – Your fault. On the one hand, your health should be high enough to eat a tick or two if necessary. On the other hand, if you have several seconds to run and kite the beam before you start registering damage.

Auriaya

You died because of:

  • Seeping Feral Essence – Your fault. It’s basically a void zone. Get out of it.
  • Sonic Screech – Neither. Some players weren’t stacking up when it went off. Obviously if you’re at 5% health when it hits, you’re probably going to die. Should be in the green as much as possible.
  • Sentinel Blast – Our fault. It’s healer duty to heal up the initial parts of the blast. The faster the interrupts, the less we have to worry about it.

Hodir

You died because of:

  • Biting Cold – Your fault. Keep jumping. Keep strafing. Keep dancing and moving.
  • Flash Freeze – Your fault. Weren’t fast enough getting into a snow drift.
  • Icicles – Your fault. You can see the blue runes on the ground. You know where they’re coming from.
  • Frozen Blows – Our fault. There’s nothing you can really do to avoid it. It’s up to us healers to play triage on the whole raid.

Thorim

You died because of:

  • Charge Orb – Your fault. Should be standing near the center of the room to avoid this when in the arena.
  • Smash – Your fault. Should not be standing in front of the Rune Giant in the gauntlet.
  • Shockwave-like ability – Your fault. Dodge them.
  • Rune Detonation – Your fault. You see the fire shield above the target, get clear of them.
  • Chain Lightning – Both. Don’t stand with more than 2 other people. There’s only so much space in the room and you do have to dodge Lightnign Charges.
  • Lightning Charge – Your fault. When you see the streams coming from the wall towards Thorim, break off quickly.

Freya

You died because of:

  • Detonating Lashers – Our fault. Unless your raid manages to precisely kill all of them at the same time.
  • Nature Bomb – Your fault. When you see these big green balls on the ground, that’s your cue to move.

Mimiron

You died because of:

  • Napalm Shell – Our fault. We have to be able to heal this through.
  • Plasma Burst – Our fault. Tanks and healing cooldowns must be used so that they can live.
  • Shock Blast – Your fault. We can’t outheal 100000 damage all at once.
  • Proximity Mine – Your fault. No comment.
  • Heat Wave – Our fault. Shouldn’t be a problem healing this up.
  • Rapid Burst – Out fault. No good reason why we’d die to this either.
  • Rocket Strike – Your fault. Stand out of the red stuff on the ground.
  • Laser Barrage – Your fault. Nothing we can do about this either. Up to you to make a run for it.
  • Bomb bot – Neither. These things do a lot of damage when they explode. By now, your raiders should be able to survive at least one of these with you at full health. Hopefully the rest of your raid can kill these before they become an issue.

General Vezax

You died because of:

  • Shadow Crash – Your fault. Outrun these. We’ll do what we can to heal up the player or two that gets hit by it.
  • Searing Flames – Neither. Someone missed an interrupt. This should not be going off at all.
  • Surge of Darkness – Neither. Depends on the strategy. With defensive cooldowns, it shouldn’t be a problem.
  • Mark of the Faceless – Neither. Again, this requires the efforts of both. The target has to run out fast. Those nearby need to be healed up quickly.
  • Saronite Vapors – Your fault. Be very careful about staying in too late. As a Priest, I Prayer of Mending on stack 6, and Shield myself on 7 and escape with about half my health. Others may not be as lucky.

Yogg-Saron

You died because of:

  • Shadow Nova – Our fault. Unless your raid killed like 5 guardians at the same time.
  • Death Ray – Your fault. These green beams start off harmless at first and don’t move. When you see them, get clear. It amazes me how many players still stand there after it’s been there for several seconds. Drop what you’re doing and move.
  • Crusher Tentacles – Your fault. Shouldn’t be in melee range of these. They will kill with one blow.
  • Brain Link – Technically our fault. But run towards each other quick!
  • Squeeze – Our fault. We have to keep you alive long enough for the DPS to break you out.
  • Sanity – Your fault. There is nothing we can do if your sanity reaches zero.

And there you have it! Use this list only as a rough guideline. There are always exceptions to everything. Look into the context of what happened before making a judgment. You don’t always have to assign fault. But it is important to find out what happened so you can make sure it doesn’t happen again. You’ll notice that a lof of these deaths are easily preventable by healers. But there are some rare cases where there’s just nothing we can do short of a psychic Guardian Spirit on a player.

Yes, you’ll notice I didn’t add any comments on Algalon. I haven’t engaged him and it won’t be for a while.

Healing Ulduar: Kologarn

kologarn

For other bosses in Ulduar, check the Ulduar Healing Strategy Page.

Kologarn is the sentinel that stands in the way between your raid group and the rest of Ulduear. He is a challenging boss for guilds that are new to raiding. Like Deconstructor, victory lies in the ultimate ability of individual players.

Abilities

Eyebeams: Two ways to handle this. Run out the door or run circles on the right side of the platform. More on this later.

Stone grip: He’s going to pluck three players into the palm of his hand and attempt to squeeze them to death until they get broken out. The only way to break players out is by DPSing the arm. Once it takes 380000 damage, the players are released.

Execution

DPS priority is going to approach the boss in this order: Right arm, Elementals, torso. When any arm is destroyed, the torso loses the same amount of health.

It’s best to call out right arm health at 5% intervals starting from 20 so your tanks know when to switch. After the right arm falls, elementals will spawn.

Two tanks are needed to hold Kologarn’s attention. He’s got a Gluth-like debuff that requires two tanks to taunt off each other. Otherwise, the debuff becomes flat-out unbearable.

kolo-beams

Dodging eye beams

When you get focused by twin green beams, you have around 2 seconds to start hustling before you get rocked. There are two ways to handle avoiding them:

Out the door

Make a beeline for the door and down the stairs. The upside is that it presents minimal risk to the players in your raid group. The down side is if the player is too slow, they might die due to line of sight issues. As healers, we don’t have to worry about this.

Laps on the right side

Have beam-focused players run circles along the right side of the room. The pros and cons are the exact inverse of the bailing-out-the-door method. Focused players are well within the range of healers. But poor kiting can lead to multiple casualties.

Whatever solution you choose, drill it in the heads of the rest of the raid to immediately get out of the green. The beams are extremely hard to miss. Keep your head up.

The Elemental Tank

It’s happened before. I’ve seen the off tank gain aggro of all ads and get focused by beams at the exact same time. As a tank, he’ll live for a few extra seconds but not anymore after that. Use whatever saves you can on him to help lessen the blow. Pain Suppression, Guardian Spirit and Blessing of Sacrifice work admirably.

Healing strategy

Around 6-7, healers is a good number to start with. This can drop with more gear and experience. Expect an enormous amount of raid damage being doled out. His left arm sweeps the entire raid for around 15000+. Pick two of your strongest tank healers and assign them to the main tank (this will vary as they’re taunting off each other). Be sure to have Kologarn’s target up so you can see which tank he’s presently on.

If you have access to two Resto Shamans, they can anchor the Stone Grips quite easily.

Healer items

Ironmender OH (Priests, Druids)

Gloves of the Pythonic Guardian Gloves (Paladin)

Robes of the Umbral Brute Chest (Priests)

Unfaltering Armguards Wrists (Paladin)

Downside of Heads Up Healing

A couple of months ago, I wrote about the concept of heads up healing. The basic idea is relying visually on the screen away from the raid frames to spot impending attacks. Being able to spot who the attack is going to land on should buy the healer a few precious global cooldowns to get even more heals.

Well, I think I found a flaw with that strategy.

It’s to do with Mages.

There’s a Mage in the guild, let’s call him Echo. We were working on Mimiron last night and getting another handle on phase 1 again. The ranged players were divided equally among the… tridrants (Is there a 3-version of quadrant?).

Naturally a Napalm shoots out from the Flame Leviathan look-alike that Mimi sits on. The trajectory of the shot shows that it’s going to hit a player in my area. Sure enough, it strikes Echo and I’m able to target him by clicking the center of the Napalm while he’s on fire and all that.

But his heath bar isn’t moving. Moments later, he is burned to crisp. I frowned. I know I hit him. I saw Penance fly out and followed up with a shield. It was one of the few times where I connected with a heal and still lost a player.

A pause.

A curse.

A sigh.

I fired a disgusted look skyward as I realized my error.

That wasn’t Echo.

I healed Echo’s Mirror Image.

Learn from my mistakes. Pay close attention to who you’re targeting. When it comes to Mages, they’re more than meets the eye.