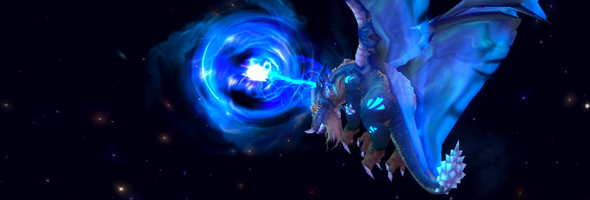
So there he is, a giant dragon. He’s pretty, isn’t he? But guess what–this dragon isn’t your cute and cuddly friend. He’s insane, and he wants to eat you, and probably the whole universe too.
Welcome to heroic Malygos–the best (and worst) boss so far in Wrath of the Lich King.
On Monday night, Conquest spent three hours tackling this internet dragon, and what follows is my post-raid analysis.
Why Malygos is a great fight
1. The boss and his instance are absolutely beautiful. It reminds me of Archimonde in that way. I find myself wanting to take screen caps of the action, particularly in phase one.
2. This is a dragon boss that broke out of the ground phase / air phase model that we’re familiar with from Nightbane, Felmyst, and Sapphiron. There’s only so many times dragons can do that before they become utterly predictable.
3. This is a fight that challenges healers on every skill they have–throughput, mana management, movement, and, in particular, targeting.
4. The fight is genuinely difficult, unlike the current incarnation of Naxxramas or Obsidian Sanctum (cleared the standard method, with the three drakes killed ahead of the boss). I would place it’s difficulty level around that of Magtheridon before the last nerfs to that boss, which makes it exactly right as the keystone of the initial tier of Wrath raiding.
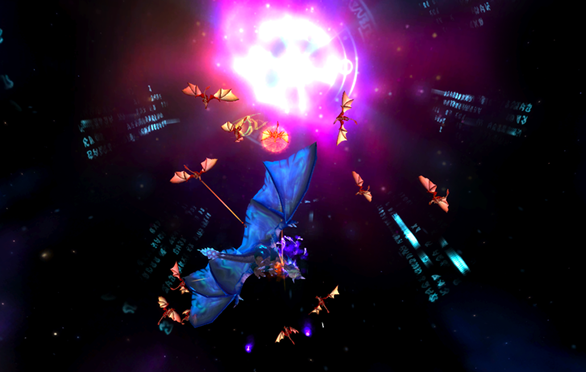
5. Phase 1 and 2. These phases are examples of great boss design. The Beserk timer puts emphasis on dps, and the amount of movement and chaos is enough to be difficult without being totally frustrating. For relative difficulty, think movement in Gruul, not movement in Archimonde. Also, the melee dps gets to ride flying skateboards in Phase 2. Now, tell me that’s not the coolest thing ever.
Why Malygos is a terrible fight
1. Phase 3. Combat on dragonback is a wonderful idea, but both here and in the Oculus, execution by Blizzard is poor. In the Oculus, at least, there are ledges to serve as reference points. However, in Malygos’ uniform 3D space, there are no markers for distance or even relative height except the dragon himself. Even guidelines like “be head height with the dragon” are not error proof. Healing range in this 3D space is more challenging than it ought to be. In addition, I believe that a count of combo points needs to display right there on the vehicle bar. Healers are not used to thinking in combos–I think counting them for us would be the least Blizzard could do.
2. Phase 3 interface. Just like the rest of Wow’s standard interface, it’s all right for dps but practically unusable for healing. If this is what they mean by making healing “more dynamic,” no thank you. It’s well known that healers see our interface, not the encounters. If that interface is difficult to use or does not show enough information, our job is frustrating at best.
3. Phase 3 interface v. Grid. This is mostly a personal complaint. Because the dragons are vehicles, don’t expect to target them through normal means. I was having to physically click on teammates in the air. I’m told that I should use X-perl raid frames for this fight, or just the standard ones, because they will allow me to click target on people’s health bars. That won’t solve the range issue–I will still have to be moving around to find my groupmates in space. However, the issue of having to actually see them will disappear.
Tips for Healers
We did this fight with 6 healers, which is probably the right number for us until phase 3, where we will want more people to convert over to healing once we’re all on dragons. In phase 1 and 2, we scrambled to output enough healing and to manage mana. Here are my suggestions for healers trying this fight.
1. Privilege throughput over mana efficiency. For druids, make sure the tank has all of your hots at all times. Use Wild Growth in between tank refreshes. I alternated between targeting the MT, a select dps, and myself to hit the largest number of people.
2. Heal like mad during vortexes. If you happen to be a tree, just spam that Wild Growth or Rejuvenation and Swiftmend. When I looked at wws last night, it seemed that Rejuv actually did a lot in vortex phase even though it only targeted one person at a time. For priests, CoH seems the way to go, or else Renew. Paladins and Shamans are unfortunately out of luck here.
3. Be ready to move. Use your minimap–which looks just like a compass–to orient yourself. Anticipate your movements before you have to go. Particularly in Phase 1, you’ve got to avoid that nasty Dragon Breath. I died to this on the first attempt but then figured it out. Dragon Butt good, Dragon Head bad.
4. If you have two mana restore abilities, like potion and shadowfiend or potion and innervate, use one in mid-Phase 1 and one in mid-Phase 2. You will have a few seconds to regen at the end of Phase 1, so as Malygos approaches 50%, don’t pot.
5. It’s all right to blow through your mana in phase 2. In fact, keep everyone up at all costs. Don’t be conservative here. AoE heal, pop your cooldowns, innervate yourself–use it all. It won’t matter that you’re dry by the end–phase 3 is on dragonback.
6. Stay alive. Phase 2 is going to challenge priests and druids. When the Scions target you with Arcane Barrage, your health bar will disappear fast. Do what you can–shield, healthstone, etc–to keep yourself alive. No guarantees that your teammates will save you, or even notice that you’re being targeted. Grid doesn’t seem to be able to pick up the ability, so it’s not a situation like Rage Winterchill or Kel’Thuzad where you will receive big heals from your fellows to counter the effect.
And beyond that, good luck. I expect Conquest to beat this encounter in 1-2 weeks–just as soon as we can overcome the Interface Boss of Phase 3.


