Healing Ulduar: Razorscale

razorscale

For other bosses in Ulduar, check the Ulduar Healing strategy page.

Conquest was able to clear out Razorscale on day 2 of Ulduar. It’s a fun encounter and places a lot of emphasis on ad control.

Quick notes

  • 3 phase encounter
  • Repeated waves of incoming trash

Pre-boss preparation

Suggested makeup

  • 3 tanks
  • 7 healers
  • 15 DPS

As raid leader, I like to split my raid into groups that have meaning in the raid frames. In other words, I set aside groups 1 and 2 to deal with trash ads coming in from the left side. Groups 4 and 5 would take care of the right. I made sure there was 1 tank and 3 healers in each ad control team. Try to split up interrupters as best as you can since you’ll want them to disrupt as many chain lightning casts as possible. It’s difficult to evenly split the DPS so use your discretion there accordingly.

Group 3 consists of your third tank and the 4 healers that were unable to fit into either teams.

Warrior tank Hunter Druid tank Hunter Paladin tank
Resto Shaman Rogue Disc Priest Rogue Resto Shaman
Mage Death Knight Resto Druid Death Knight Warlock
Mage Balance Druid Holy Paladin Ret Paladin Mage
Shadow Priest Resto Druid Holy Priest DPS Feral Druid Hunter

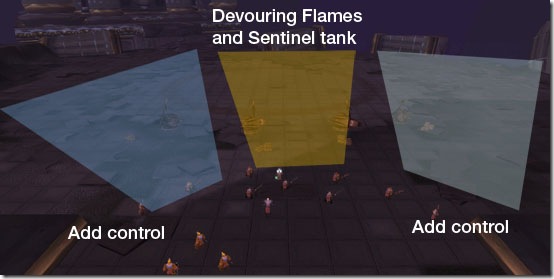
That’s a rough visual representation of how I split my groups. Dark blue team on the left, light blue team on the right. Gold team is responsible for big, bad whirlwind titan’s which I’ll elaborate on in a moment.

Process

Phase 1

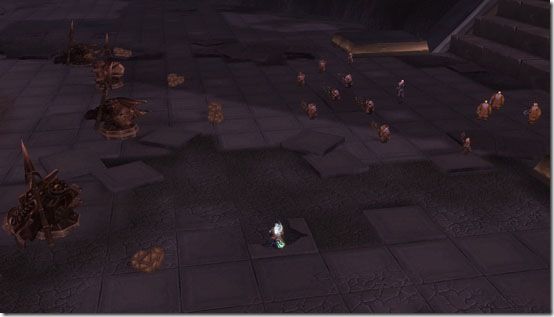
On the ground, the things you have to worry about are the incoming mobs that spawn from the different drill-shaped ground pods. Meanwhile, Dwarven expedition teams will be repairing the four harpoons.

Razor’s attacks

Fireball: Fire damage to players

Flame buffet: Increases fire damage taken by players. I believe this ability stacks. It’s duration is ~1 minute.

Devouring Flame: Spits a Lava Bomb at a player inflicting fire damage and leaving a fiery patch on the ground dealing fire damage to everyone within 6 yards.

She enrages after 10 minutes.

Add attacks

Dark Rune Guardian: Puts a magical debuff on your raid. Dispellable. Will go after your friendly expedition dwarves.

Dark Rune Sentinel: Whirlwind. These guys typically spawn in the middle.

Dark Rune Watcher: Interrupt their Chain Lightning when possible. Their Chains can hit up to 5 targets.
razor-process

Adds will show up from the left and right. Dark blue and light blue teams will have to take care of them via DPS and CCs if necessary.

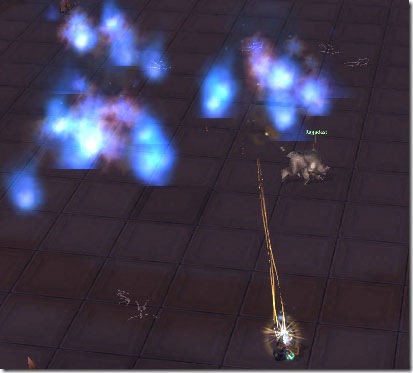
Now gold team gets to have some fun here. That Devouring Flame ability I mentioned above? Here’s a hint I found out from the Plusheal forums. Devouring Flame can be predicted and controlled. Razor shoots Devouring Flames at the player closest to it. So all gold team has to do is stay under the boss as much as possible and soak up incoming flames. The Disc Priest in that group (me) just heals him. At the same time, gold team needs to pick up Dark Rune Sentinels that show up in the middle.
devo-flame

Gold team in action

The tanking Druid played first person and looked up. I stayed within range in support. When I see a Sentinel spawn, I’ll cue him and let him know there’s a sentinel and he’ll pick it up right away. Once gold team establishes aggro, he calls for ranged DPS to focus and nuke. Once the sentinel is down, it’s back to add control.

There are four harpoons. When they’re all repaired and fired, Razorscale is brought down to the ground. Get three harpoons fired and hold on to the fourth one. You fire them by having a player from either blue team right click on the turrets. Your raid leader should call when to fire the fourth one. When most of the ads are dead, cue the fourth turret call.

When a Harpoon is fixed, it will flash on your screen. I personally like to say things like “harpoon 1 fired, harpoon 2 fired, harpoon 3 fired, harpoon 4 standing by” so that the entire raid knows where we’re at.
turrets

Phase 2

When the raid leader calls for harpoon 4 to be hit, all DPS should be switching off ads. Anything extra should be CC’d in the process. Razor will fall to the ground and remain stunned for seconds. Full DPS on Razor at this point. Stay away from the front of this boss. After time is up, Razor will do a wing buffet knocking everyone back and light a conical flame breath. She’s facing the entrance into this area while she’s stunned.

After the stun wears off, the turrets will explode and have to be repaired again. Razor flies back into the air and triggers phase 1 again.

This would be the phase to hit Heroism or Bloodlust to push Razor into phase 3. If Razor’s health isn’t low enough then you have to do phase 1 all over again.

Phase 3

Have your main tank of choice pick up Razor and immediately face her away from the raid. A good position would have Razor face the entrance just past the turrets. She’s going to continue to do AoE knockbacks (Wind Buffet), Devouring Flame, and Flame Buffets. The Flame Buffet debuffs will continue to stack. If it reaches a certain point, it’s going to insta-kill your tank.

Fused Armor is another debuff your tank will take. When it reaches 5 stacks, your tank is not going to be able to move, use skills or taunt. You’ll have to change tanks before it reaches 5 to buy enough time for your raid to finish her off.

Your raid positions themselves and spreads out behind the boss during this part.

Healing strategy

For both blue teams, you’ll want 2 raid healers and 1 tank healer on each side. You’ll also want 1 tank healer in the gold team. Stay as far back as possible to avoid any chain lightnings that manage to get through. Use strong AoE heals to mitigate them as well. During phase 2 when DPS switches over, the tank healers need to remain on the tank if they’re on any ads. Any idle healers are encouraged to jump up into the play and DPS the boss during phase 2.

Healer drops

Belt of the Fallen Wyrm – Mail

Bracers of the Broodmother – Leather

Guiding Star – Mace

Razorscale Shoulderguards – Plate

Shackles of the Odalisque – Wrists
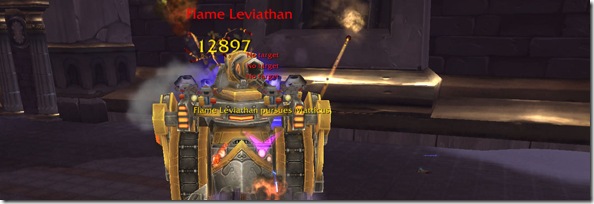
Healing Ulduar: Flame Leviathan

flame-leviathan

For other bosses in Ulduar, check the Ulduar Healing strategy page.

I managed to squeeze some PTR time on this boss earlier in the weeks before. But here’s a step-by-step break down of what you need to do in order to get through the encounter.

Quick notes

  • Vehicular fight
  • Trash should be cleared using your vehicles
  • After ~two attempts on the boss, trash will respawn (not sure if there’s a link to time)
  • Four towers control the difficulty of the boss
  • Vehicle health is based on item level not stats

Map

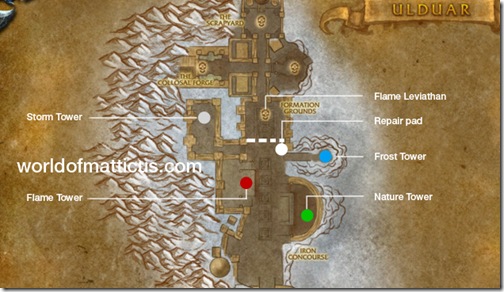
fl-map

Trash phase

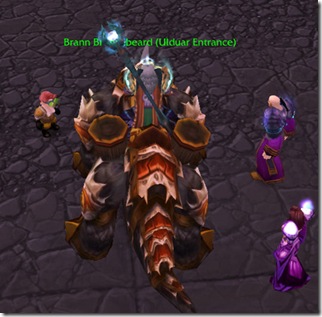
This is not a Hyjal style waves encounter. Your raid group will have access to vehicles first. When your raid is ready to move out, speak to Brann Bronzebeard to engage the Iron army.

bronzebeard-thumb

(Click image for dialogue)

Tower information

Your targets are the four towers throughout the area. The difficulty level of Flame Leviathan can be controlled based on which towers you leave up. Towers are easily identifiable because of the color of their glow. Location of the towers are shown in the map above. Use your vehicles to bring them down.

Storm beacons will summon additional units. Destroy them to stem the tide of incoming spawning mobs.

Roles and vehicular abilities

There are different roles that each vehicle plays. I’ll break them down below.

Carrying capacities

Chopper: 1 driver + 1 passenger
Demolisher: 1 driver + 2 passengers
Siege engine: 1 driver + 1 turret + 2 passengers

Chopper abilities

Sonic horn (20 energy): Conical DPS within 35 yards to all enemies
Tar: 10 yard pool of tar that slows down enemies by 75% (important)
Speed boost (50 energy): Increases vehicle’s movement speed by 100% for 5s

Demolisher abilities

Driver

Hurl boulder: Throws a really big rock at a variable range. Think Wintergrasp or Strands type. Ignites Tar upon impact.
Hurl pyrite barrel: Using 5 pyrite, will do ~30000 damage
Ram: Damage and knockback effect
Throw passenger: Used only when the passenger is in the catapult. Dwarf tossing is finally a reality (important)

Passenger

Cannon: Fires a missile. Upon impact, deals damage to enemies within 10 yards. 50 yard range.
Grab crate: Uses a hook and chain to grab crates. Lets you pick up pyrite off the ground.
Increase speed: Uses pyrite to add extra speed to the demolisher. Lasts 1 minute.
Load into catapult: Self explanatory. Passenger gets into the catapult. (important)

Siege engine abilities

Driver

Ram (40 energy): Damage and knock back effect
Electroshock (38 energy): 25 yard conical, interrupts spells, and 4 seconds of locking out the magic school (important)
Steam Rush (40 energy): Sort of like a sprint effect.

Turret

Anti-Air launcher (10 energy): Fires missiles at aerial targets.
Cannon (20 energy): Up to 70 yard range. It’s a gun that shoots stuff.

Siege Engines

The Flame Leviathan will only lock on to one siege engine at a team. The targeted engine must kite the boss around.

Non-kiting siege engines will have to stay close to the rear of the Leviathan as much as possible and should interrupt Flame Jets. After 30 seconds, Flame Leviathan will switch and target a different Siege Engine and chase after that. Use Steam Rush to build up some distance.

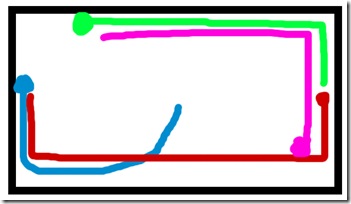
Here’s a kite path you can try out.

kite-path

Blue line: Opening route. The boss will be weapons free at this time (as in engage-able).

Siege engine passengers should be targeting pyrite ammo that’s floating in the air. If there aren’t any available, switch fire to the boss.

If you’re out of siege engines, FL will go after demolishers or choppers.

Choppers

There should be 1 chopper following the targeted siege engine. Choppers will be laying down tar directly in front of the Flame Leviathan to slow him down and the tar can be ignited by Boulders from demolishers.

Choppers also have to extract the FL Unit (explained further).

Demolishers

Stay as far away as you can. DPS with Hurl Boulder. Firing Pyrite Barrels should be held off until FL is stunned.

Demo passengers not being thrown up will need to work the catapult to load up Pyrite.

Flame Leviathan stun unit

Your demolishers have the capability to launch players onto the Flame Leviathan. The FL unit is going to comprise of:

  • 3 DPS (Suggest Druid, Death Knight, Rogue)
  • 1 Healer (Suggest Paladin or Druid)

I suggested those classes because they’re going to be under fire from various guns while up there. You’ll want maximum survivability.

Both players must be in the passenger seat of the demolisher. There’s an ability called “Load into Catapult” which places them in the throwing arm of the demo as a projectile. When itÃ’s called for, your demo’s close in. The driver then hits “Throw passenger” which launches the passengers on top of the Flame Leviathan.

When the FL unit is on the back of the boss, they will be able to take out all 4 turrets. When the turrets explode, there’s a button. You hit the button which starts a 10 second channel resulting in a stunned boss and a damage taken by Flame Leviathan by 50% and resetting his speed.

The FL unit will then be ejected and parachuted off the boss. Your choppers must swoop in and extract them back to the demolishers. You’ll want to stun Leviathan while he’s in a tar’d area.

Video

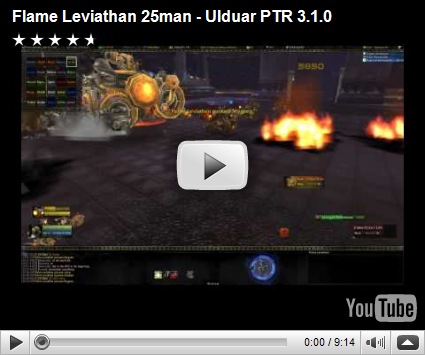
For a visual “how to” see this video below. Actual encounter starts around 20 seconds or so in. Note the positioning of siege engines and how the tar is laid out.

Healer drops

Heroic

Constructor’s Handwraps – Cloth gloves

Embrace of the Leviathan – Cloth belt

Freya’s Choker of Warding – Necklace

Glowing Ring of Reclamation – Ring

Steamcaller’s Totem – Ranged slot

Steamworker’s Goggles – Mail Helm

Boots of Fiery Resolution – Cloth feet – (Hard mode only)

Shoulderpads of Dormant Energies – Leather shoulders – (Hard mode only)

Ulduar Caster Weapons and Tier Gear: A Primer

Here’s a list of all spellcaster related weapons that drop from Ulduar. Items are sorted in the rough order of progression that raiding groups will be going in. I linked all currently known spellpower weapons and off hands so that your raid group can get a general idea of what item to go for and what items are better off in the hands of other players along with the rough order they will appear in. It seems heroic mode drops slightly more weapons. Loot tables for some of the bosses are still unknown at this time (like Yogg-Saron and Algalon). Read the bottom of the post for a theory of tier gear drops.

Heroic Mode weapons

Weapon Weapon Type Source
Overcharged Fuel Rod OH (Spell hit) Flame Leviathan
Intensity 2H Staff (Spell hit) Ignis the Furnace Master
Scepter of Creation Wand (Spirit) Ignis the Furnace Master
Guiding Star 1H Mace (MP5/Haste) Razorscale
Quartz Crystal Wand Wand (Spell hit) XT-002 Deconstructor (Hard mode)
     
Rapture 2H Staff (Spirit) Iron Council
Ironmender OH (Spirit) Kologarn
Runescribed Blade 1H Sword Auriaya
The Lifebinder 2H Staff (Spirit) Freya
Staff of Endless Winter 2H Staff (Spirit) Hodir (Hard mode)
Scepter of Lost Souls Wand (Haste/Crit) General Vezax


Normal Mode Weapons

Weapon Weapon Type Source
Firesoul MH Sword (Spell hit) Flame Leviathan
Plasma Foil 1H Dagger (Spirit) XT-002 Deconstructor
Pulsing Spellshield OH (Shield) XT-002 Deconstructor
Stormtip 1H Dagger (Spirit) The Iron Council
Nurturing Touch Wand (Spirit) Auriaya
Pulse Baton 1H Mace (MP5) Mimiron
Unraveling Reach 2H Staff (Hit) Freya
Icecore Staff 2H Staff (Spirit) Hodir
Ice Layered Barrier OH Shield (MP5/Haste) Hodir (Hard mode)
Pillar of Fortitude 2H Staff General Vezax

Tier gear

All we know right now is that Mimiron drops tier 8 gloves. I’m assuming Yogg-Saron either drops the chest or the helm. I have a sneaking suspicion the other 3 Titans (Freya, Hodir, Thorim) drop the other 3 tier 8 pieces. My theory is unconfirmed, however. But I think it’s a decent assumption that the 4 titans along with the “end” boss of the instance are the ones that drop the tier pieces.

Quick Thoughts About Val’Anyr

There’s been a few updates about Val’nyr since the last time I wrote about it. Now we have some more information regarding the retrieval and construction of the legendary mace. Here are the Coles’ notes version:

  • 30 fragments
  • Step 1: Bring shattered fragments to the Archivum Console
  • Step 2: Throw the shattered fragments into Yogg-Saron’s maw while he is casting Deafening Roar
  • Kill Yogg-Saron and loot
  • Condition 1: Can only be completed in Ulduar Heroic mode
  • Condition 2: If at least one Ulduar Watcher is not assisting you

This leads me to conclude a few things.

First is that it appears the person who is collecting all the fragments does not have to be the same person who ends up with the constructed mace. After all, the fragments must be thrown into Yogg-Saron who must then be killed. The loot master should then find the completed mace on the loot table of the old god.

This means the fragments can be looted to any one person as a keeper until the guild collects the necessary amount of fragments.

Second is that the construction of this weapon is going to be out of the reach of many of the casual oriented raiding guilds due to the conditions needed.

Some more questions remain

What happens if the raid group fails at killing Yogg-Saron during that attempt? Or even during that week? Are the fragments lost?

Lastly, it seems that PTR build 9767 (the most recent) was pushed through mostly for bug fixes. Since the latest build was meant to fix stuff, we can assume then the patch is very close to completion. I do believe 3.1 will be here sometime this April. Two weeks.

A good indicator that the patch will be coming out soon is when PTR servers shut down.

Shaman Tier 8 Bonuses

Lodur here to chime in on the Tier 8 set bonuses for Restoration Shamans. Matt posted them earlier, but I‘ll paste them here again for easy reference

Shaman

  • Shaman T8 Restoration 2P Bonus — Reduces the cooldown on Riptide by 1 sec.
  • Shaman T8 Restoration 4P Bonus — Reduces the cast time of Chain Heal by 0.2 sec.


So, lets take a gander here. Like many of the other sets, the two piece bonus has left me feeling a bit strange. This is different then what they’ve done with our 2 pieces in the past.  Lets take a look at the Tier 7 2 piece. 

Water Shield Boost

  •  Your Water Shield is 10% stronger 

That is a very very nice 2 piece. It’s a percentage, so if the amount of mana Water Shield returns goes up, this has that much more punch. Lets take this a step further and go back to the Tier 6 2 piece. 

Chain Heal Discount

  • Your Chain Heal ability costs 10% less mana. 

Again, same deal. A percentage that scales well with the abilities on hand. I know I used this set bonus well into Naxxramas healing and I was very sad to see it go.

This new 2 piece set bonus is interesting to me because its a flat amount, it doesn’t scale since a second is a second anyway you slice it. 1 second reduction brings the ability to a 5 second cooldown, which makes it like any of the shock spells with 5/5 reverberation. Having it available 1 second sooner is nice, I know I’ve wished I had it up that one second sooner many times (Malygos Vortex comes to mind). There is something that can take this a step up from decent however. Another recent Shaman change that has to do with a particular glyph available in the patch fits this set bonus quite handily. 

Glyph of Riptide — Increases the duration of Riptide by 6 sec. (Up from 3 sec)

This, with the 2 piece bonus gives us a 20 second hot, on a 5 second cooldown. I can definitely see that being useful, and if it stays at a 6 second increase, I’ll most assuredly pick one up. 

Next on the billet is the 4 piece set bonus.

It doesn’t seem like a lot up front, but I like this. I really really like this. Right now through moderate gearing (and taking on more crit to reach a balance of stats) Lodur is at 438 haste before Wrath of Air totem. 438 haste equates to roughly 13% which means Chain Heal right now is 2.2 seconds to cast for me without the totem, and 2.1 seconds with. This will let me bring it down to 1.9 second cast with only self buffs. Add Heroism / Bloodlust and a Retadin or Critchicken and thats about a second and a half cast time for chain heal, with only the global cooldown to worry about. With Glyphing and a decent amount of spell power you’re going to be hitting 4 people with sizeable heals that much faster.  This set bonus pushes us a bit further up the raid healing totem pole so to speak. 

While I’m here I’d also like to mention our new relic

Shaman T8 Restoration Relic — Increases the base amount healed by your chain heal by 243

Keep that relic in mind as you’re looking at the 4 piece set bonus and it’s just one more notch in the belt for swinging Chain Heals. 

Overall I’m pretty pleased with the itemization coming in 3.1. 
What do you think?

Till next time, Happy Healing

Lodur