The Hard Mode Thrill

The post you’re about to read is from the past. I wrote this post on Saturday hours after we had taken down Deconstructor on hard mode. It’s the 10 player version.

Going in there, I figured that this was a boss well within the crosshairs of what our guild was capable of doing.

The adrenaline rush and feeling the entire raid got was immense. It’s been a long time since I had a feeling like that wash over me. I could tell it was the same thing for the others in the group. The challenge, the wipes, and all the little things added up and resulted in a big giant virtual fist pump when we took him down.

Some of these hard modes really transform the fight into a whole new level. The complexity, the demands and requirements transcend everything. Sometimes I think to myself what would have happened if I was in an organization that was way more involved then what Conquest is now. I’d imagine one of the requirements would be doing everything on hard mode first before dialing back. Could you imagine? I tried Thorim on hard mode a few times. It made me appreciate just how much simpler and stress free the easy mode was.

If you’re looking for a pre-nerf Hyjal, Black Temple, or Sunwell type of experience, give hard mode a shot. They do drop Badges of Conquest after all.

That feeling can be replicated on 10 mans. I found it similar to hitting the Zul’Aman bear timer.

Expect a post sometime later this week with a tactical break down of how Syd, myself, and the rest of the raid handled the walking bunch of bolts.

An early teaser

Quick notes though for those of you wanting to get some attempts on him.

  • 1 tank
  • Doable with 2 healers
  • Position at the front of the stairs not to the sides
  • No bots to worry about at all
  • Priority on life sparks that spawn
  • Designate positions for players to run to with gravity well (they spawn void zones)

Healing Ulduar: Kologarn

kologarn

For other bosses in Ulduar, check the Ulduar Healing Strategy Page.

Kologarn is the sentinel that stands in the way between your raid group and the rest of Ulduear. He is a challenging boss for guilds that are new to raiding. Like Deconstructor, victory lies in the ultimate ability of individual players.

Abilities

Eyebeams: Two ways to handle this. Run out the door or run circles on the right side of the platform. More on this later.

Stone grip: He’s going to pluck three players into the palm of his hand and attempt to squeeze them to death until they get broken out. The only way to break players out is by DPSing the arm. Once it takes 380000 damage, the players are released.

Execution

DPS priority is going to approach the boss in this order: Right arm, Elementals, torso. When any arm is destroyed, the torso loses the same amount of health.

It’s best to call out right arm health at 5% intervals starting from 20 so your tanks know when to switch. After the right arm falls, elementals will spawn.

Two tanks are needed to hold Kologarn’s attention. He’s got a Gluth-like debuff that requires two tanks to taunt off each other. Otherwise, the debuff becomes flat-out unbearable.

kolo-beams

Dodging eye beams

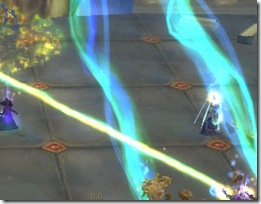
When you get focused by twin green beams, you have around 2 seconds to start hustling before you get rocked. There are two ways to handle avoiding them:

Out the door

Make a beeline for the door and down the stairs. The upside is that it presents minimal risk to the players in your raid group. The down side is if the player is too slow, they might die due to line of sight issues. As healers, we don’t have to worry about this.

Laps on the right side

Have beam-focused players run circles along the right side of the room. The pros and cons are the exact inverse of the bailing-out-the-door method. Focused players are well within the range of healers. But poor kiting can lead to multiple casualties.

Whatever solution you choose, drill it in the heads of the rest of the raid to immediately get out of the green. The beams are extremely hard to miss. Keep your head up.

The Elemental Tank

It’s happened before. I’ve seen the off tank gain aggro of all ads and get focused by beams at the exact same time. As a tank, he’ll live for a few extra seconds but not anymore after that. Use whatever saves you can on him to help lessen the blow. Pain Suppression, Guardian Spirit and Blessing of Sacrifice work admirably.

Healing strategy

Around 6-7, healers is a good number to start with. This can drop with more gear and experience. Expect an enormous amount of raid damage being doled out. His left arm sweeps the entire raid for around 15000+. Pick two of your strongest tank healers and assign them to the main tank (this will vary as they’re taunting off each other). Be sure to have Kologarn’s target up so you can see which tank he’s presently on.

If you have access to two Resto Shamans, they can anchor the Stone Grips quite easily.

Healer items

Ironmender OH (Priests, Druids)

Gloves of the Pythonic Guardian Gloves (Paladin)

Robes of the Umbral Brute Chest (Priests)

Unfaltering Armguards Wrists (Paladin)

Paladin Healing in 10 man Ulduar

This is a guest post by Adgamorix, who’s launched his own blog: Divine Plea.

So last week I wrote a post talking about Paladin healing in Heroic Ulduar, and voicing my opinion that I thought Paladin healing was spot on. I was open about my lack of 10 man Ulduar experience, and was told to come back when I’d experienced that pain – with the expectation that my opinion would change.

Taking that to heart, the next day I rounded up nine of my fellow guild mates and began my assault. This week has been an absolute blood-bath of raiding, seeing me log six days of straight raiding (no less than three hours a day) when I normally log two or three. Why did I throw my schedule to the side and perform this atrocious attack on my sanity you ask? Simple. I thought maybe I was missing something.

So 9 hours of 10 man raiding later and we’re staring at General Vezax and laughing at how the trash was essentially mini-bosses. We’re now one boss away from Yarg himself, and of course a whole slew of bosses on hard mode to go. I believe that I’ve tasted the cool-aid, and I have a response for those who still say Paladin healing is broken.

What’s the fuss?

Yeah, it’s not a real adult reaction, but it fits in my opinion. Our raid makeup was fairly balanced, with a Resto shaman, and the Holy/Disc priest from my 25 man group. We used a Druid/DK tanking combo, two rogues (our hunter is suffering from severe wife agro), ret paladin, a shadow priest, and a balance druid. Yes, we could have had a better raid makeup for buff purposes, but this group is a solid core of players and we did our 10 man Naxx together.

We had our share of wipes and pain (Mimiron alone took 2 or 3 hours), but the overall experience was enjoyable. We learned new bosses, we got to hear the “I thought the button started the encounter!” cry from a curious rogue, and we learned some things to help with our 25 man raid. I learned that more than ever, I have to trust my fellow healers, and trust my raid mates to know when to use cool-downs and consumables. I felt the agony of no mana return with Illumination on Vezax, and I may have actually shed a tear the first time I tried casting a Holy Light while under the effects of Thorim’s Defaning Thunder (75% increased cast time). Overall though I felt like the raid was tuned beautifully, and it was a lot of fun actually being challenged.

So what’s different between me and those that think we’re broken?

I will concede that our group is the x factor in this equation. Are the healing problems coming from Paladins in unbalanced groups? Are they trying to two heal, or heal content beyond their gear/experience level? Maybe it’s the synergy between the healers, in that we know the role we play, and can accurately predict the actions of our fellow healers. For example, I know that on Mimiron while I’m healing the MT through the Plasma Blast, if someone gets Napalm Shelled I can toss them a quick Holy Shock to absorb the base damage while the tree HoTs them up and the Disc priest keeps the MT alive. We don’t have to talk about it, it just happens. Would it be awesome if I could still throw a Sacred Shield on them to help with the damage absorption? Of course it would, but we seem to be making it through ok as it is.

Canceling out the X factor

So after healing a lot of 10 man (and more 25 man), I decided to take the x factor out of the equation. I couldn’t down rank my gear (short of taking a piece off) to simulate healing in blues , but I could put myself in the LFG channel and heal any PUG that came along. I tossed aside any gear/instance standards I had, and went willy-nilly into the groups. After getting through Gun’Drak, VH, UK, and UP – I decided Paladin healing still isn’t broken. Yes it’s slightly tougher, the lack of multiple SS and Glyph crits huts some, but it’s still doable (and fun).

I’m going to stick by original statement that Holy Paladins are in great shape right now, and while we could use another tool in our kit, or maybe some kind of decent raid heal, we’re still really strong.

Healing Ulduar: Flame Leviathan

flame-leviathan

For other bosses in Ulduar, check the Ulduar Healing strategy page.

I managed to squeeze some PTR time on this boss earlier in the weeks before. But here’s a step-by-step break down of what you need to do in order to get through the encounter.

Quick notes

  • Vehicular fight
  • Trash should be cleared using your vehicles
  • After ~two attempts on the boss, trash will respawn (not sure if there’s a link to time)
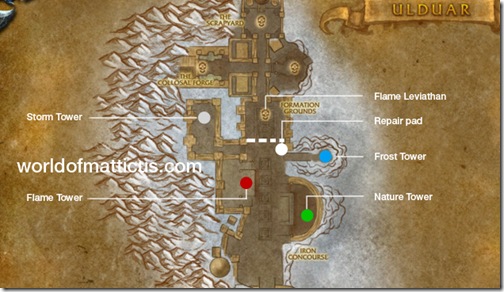
  • Four towers control the difficulty of the boss
  • Vehicle health is based on item level not stats

Map
fl-map

Trash phase

This is not a Hyjal style waves encounter. Your raid group will have access to vehicles first. When your raid is ready to move out, speak to Brann Bronzebeard to engage the Iron army.
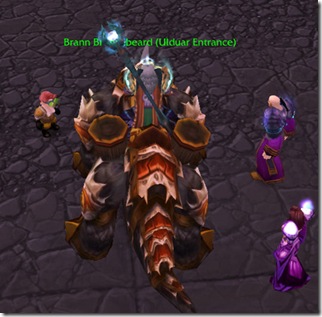
bronzebeard-thumb

(Click image for dialogue)

Tower information

Your targets are the four towers throughout the area. The difficulty level of Flame Leviathan can be controlled based on which towers you leave up. Towers are easily identifiable because of the color of their glow. Location of the towers are shown in the map above. Use your vehicles to bring them down.

Storm beacons will summon additional units. Destroy them to stem the tide of incoming spawning mobs.

Roles and vehicular abilities

There are different roles that each vehicle plays. I’ll break them down below.

Carrying capacities

Chopper: 1 driver + 1 passenger
Demolisher: 1 driver + 2 passengers
Siege engine: 1 driver + 1 turret + 2 passengers

Chopper abilities

Sonic horn (20 energy): Conical DPS within 35 yards to all enemies
Tar: 10 yard pool of tar that slows down enemies by 75% (important)
Speed boost (50 energy): Increases vehicle’s movement speed by 100% for 5s

Demolisher abilities

Driver

Hurl boulder: Throws a really big rock at a variable range. Think Wintergrasp or Strands type. Ignites Tar upon impact.
Hurl pyrite barrel: Using 5 pyrite, will do ~30000 damage
Ram: Damage and knockback effect
Throw passenger: Used only when the passenger is in the catapult. Dwarf tossing is finally a reality (important)

Passenger

Cannon: Fires a missile. Upon impact, deals damage to enemies within 10 yards. 50 yard range.
Grab crate: Uses a hook and chain to grab crates. Lets you pick up pyrite off the ground.
Increase speed: Uses pyrite to add extra speed to the demolisher. Lasts 1 minute.
Load into catapult: Self explanatory. Passenger gets into the catapult. (important)

Siege engine abilities

Driver

Ram (40 energy): Damage and knock back effect
Electroshock (38 energy): 25 yard conical, interrupts spells, and 4 seconds of locking out the magic school (important)
Steam Rush (40 energy): Sort of like a sprint effect.

Turret

Anti-Air launcher (10 energy): Fires missiles at aerial targets.
Cannon (20 energy): Up to 70 yard range. It’s a gun that shoots stuff.

Siege Engines

The Flame Leviathan will only lock on to one siege engine at a team. The targeted engine must kite the boss around.

Non-kiting siege engines will have to stay close to the rear of the Leviathan as much as possible and should interrupt Flame Jets. After 30 seconds, Flame Leviathan will switch and target a different Siege Engine and chase after that. Use Steam Rush to build up some distance.

Here’s a kite path you can try out.
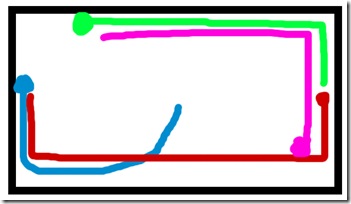
kite-path

Blue line: Opening route. The boss will be weapons free at this time (as in engage-able).

Siege engine passengers should be targeting pyrite ammo that’s floating in the air. If there aren’t any available, switch fire to the boss.

If you’re out of siege engines, FL will go after demolishers or choppers.

Choppers

There should be 1 chopper following the targeted siege engine. Choppers will be laying down tar directly in front of the Flame Leviathan to slow him down and the tar can be ignited by Boulders from demolishers.

Choppers also have to extract the FL Unit (explained further).

Demolishers

Stay as far away as you can. DPS with Hurl Boulder. Firing Pyrite Barrels should be held off until FL is stunned.

Demo passengers not being thrown up will need to work the catapult to load up Pyrite.

Flame Leviathan stun unit

Your demolishers have the capability to launch players onto the Flame Leviathan. The FL unit is going to comprise of:

  • 3 DPS (Suggest Druid, Death Knight, Rogue)
  • 1 Healer (Suggest Paladin or Druid)

I suggested those classes because they’re going to be under fire from various guns while up there. You’ll want maximum survivability.

Both players must be in the passenger seat of the demolisher. There’s an ability called “Load into Catapult” which places them in the throwing arm of the demo as a projectile. When itÃ’s called for, your demo’s close in. The driver then hits “Throw passenger” which launches the passengers on top of the Flame Leviathan.

When the FL unit is on the back of the boss, they will be able to take out all 4 turrets. When the turrets explode, there’s a button. You hit the button which starts a 10 second channel resulting in a stunned boss and a damage taken by Flame Leviathan by 50% and resetting his speed.

The FL unit will then be ejected and parachuted off the boss. Your choppers must swoop in and extract them back to the demolishers. You’ll want to stun Leviathan while he’s in a tar’d area.

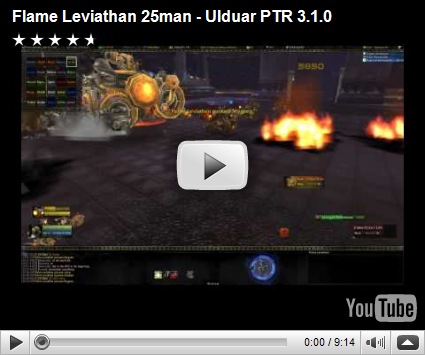
Video

For a visual “how to” see this video below. Actual encounter starts around 20 seconds or so in. Note the positioning of siege engines and how the tar is laid out.

Healer drops

Heroic

Constructor’s Handwraps – Cloth gloves

Embrace of the Leviathan – Cloth belt

Freya’s Choker of Warding – Necklace

Glowing Ring of Reclamation – Ring

Steamcaller’s Totem – Ranged slot

Steamworker’s Goggles – Mail Helm

Boots of Fiery Resolution – Cloth feet – (Hard mode only)

Shoulderpads of Dormant Energies – Leather shoulders – (Hard mode only)
Ulduar Caster Weapons and Tier Gear: A Primer

Here’s a list of all spellcaster related weapons that drop from Ulduar. Items are sorted in the rough order of progression that raiding groups will be going in. I linked all currently known spellpower weapons and off hands so that your raid group can get a general idea of what item to go for and what items are better off in the hands of other players along with the rough order they will appear in. It seems heroic mode drops slightly more weapons. Loot tables for some of the bosses are still unknown at this time (like Yogg-Saron and Algalon). Read the bottom of the post for a theory of tier gear drops.

Heroic Mode weapons

Weapon Weapon Type Source
Overcharged Fuel Rod OH (Spell hit) Flame Leviathan
Intensity 2H Staff (Spell hit) Ignis the Furnace Master
Scepter of Creation Wand (Spirit) Ignis the Furnace Master
Guiding Star 1H Mace (MP5/Haste) Razorscale
Quartz Crystal Wand Wand (Spell hit) XT-002 Deconstructor (Hard mode)
     
Rapture 2H Staff (Spirit) Iron Council
Ironmender OH (Spirit) Kologarn
Runescribed Blade 1H Sword Auriaya
The Lifebinder 2H Staff (Spirit) Freya
Staff of Endless Winter 2H Staff (Spirit) Hodir (Hard mode)
Scepter of Lost Souls Wand (Haste/Crit) General Vezax


Normal Mode Weapons

Weapon Weapon Type Source
Firesoul MH Sword (Spell hit) Flame Leviathan
Plasma Foil 1H Dagger (Spirit) XT-002 Deconstructor
Pulsing Spellshield OH (Shield) XT-002 Deconstructor
Stormtip 1H Dagger (Spirit) The Iron Council
Nurturing Touch Wand (Spirit) Auriaya
Pulse Baton 1H Mace (MP5) Mimiron
Unraveling Reach 2H Staff (Hit) Freya
Icecore Staff 2H Staff (Spirit) Hodir
Ice Layered Barrier OH Shield (MP5/Haste) Hodir (Hard mode)
Pillar of Fortitude 2H Staff General Vezax

Tier gear

All we know right now is that Mimiron drops tier 8 gloves. I’m assuming Yogg-Saron either drops the chest or the helm. I have a sneaking suspicion the other 3 Titans (Freya, Hodir, Thorim) drop the other 3 tier 8 pieces. My theory is unconfirmed, however. But I think it’s a decent assumption that the 4 titans along with the “end” boss of the instance are the ones that drop the tier pieces.