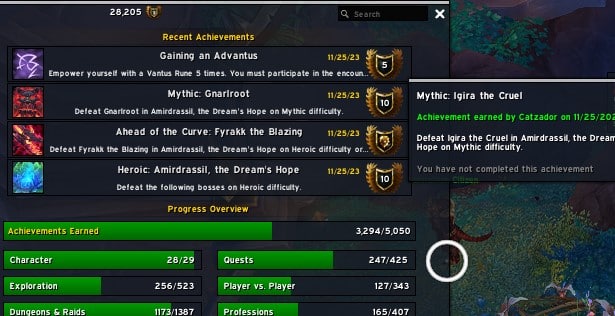
Hey everybody! Can you believe another year has passed us by? I wanted to thank all of you for still sticking with me all these years later. Your being part of this journey means the world here! In DJs, we knocked out two CE clears with Raszageth defeated and Sarkareth crushed we’re well on our way to the third one before we close out this expansion.
Let’s take a look back at some of the posts from this past year, shall we?
We started off the year discussing the Dragonflight Launch Experience, which was a bit rough. A portal had to be spawned in the Stormwind docks just to get us over to the new continent and everything. The initial season 1 mythic dungeon experience wasn’t the greatest either.
On the guild leadership side of things:
- How to be an Effective 21st Raider: You won’t be like Max right away but at least you can help orient your raid and head in the right direction.
- How to Advance from an AotC Guild to a CE Guild: If your guild wants to start pushing to that next step, here’s what they need to know.
- How to Advance from an AotC Player to a CE Player: If you want to progress and be a better player, here’s what you need to know.
- What Separates CE Players from Mythic Players: The little nuances between Mythic versus CE players.
- How to Manage Loot Council in Dragonflight: Admittedly, it’s challenging to figure out how to sort out the headache of loot.
- Traits of an Effective Healing Officer: Stuck with setting up cooldowns for your raid? I understand the feeling.
- Recruiting the Right Players at the Right Time: Your raid needs different types of players at different points of progression.
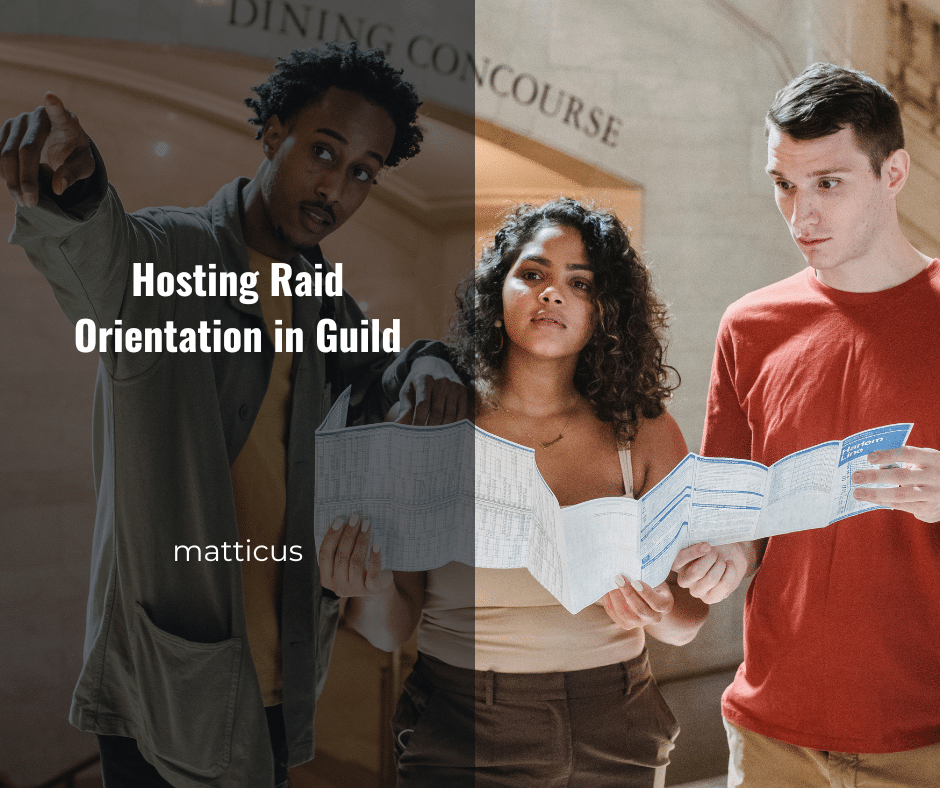
- How to Run Raid Orientation: What you need to do before you begin a new tier with a new roster.
I’m thrilled to see what’s going to happen in 2024. The first expansion in a trilogy is expected to come out later in the year. We’ll have fated raids and dungeons for season 4 which signals the start of the off-season which means players can take time to catch up on other games (like Baldur’s Gate 3, in my case). I snatched it up on the recent Steam sale (although I did end up with a complete party wipe barely 5 minutes into Act 1).
My writing plan for 2024 is to continue to be more consistent. I did get a new job, and it’s severely cut down on my writing time. I have to remain more disciplined here, and that means more days set aside for planning and actually bulk-writing some stuff in advance and then scheduling them. I’ll have more videos coming and various clips with different raiding lessons and laughs, especially from this tier. You can always find me on Blue Sky and Twitter, and let me know what kind of content or advice you’re looking for. You’re better off searching elsewhere for actual healing advice (the class Discords or various guides will make a good start).
Anyway, thanks for being around! Here’s to making the next year even more amazing!