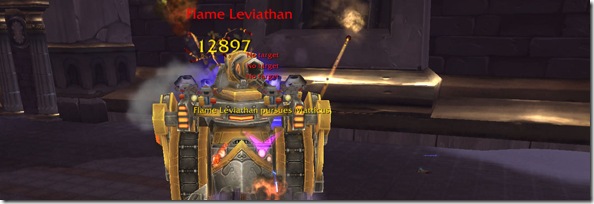
Healing Ulduar: Flame Leviathan

flame-leviathan

For other bosses in Ulduar, check the Ulduar Healing strategy page.

I managed to squeeze some PTR time on this boss earlier in the weeks before. But here’s a step-by-step break down of what you need to do in order to get through the encounter.

Quick notes

  • Vehicular fight
  • Trash should be cleared using your vehicles
  • After ~two attempts on the boss, trash will respawn (not sure if there’s a link to time)
  • Four towers control the difficulty of the boss
  • Vehicle health is based on item level not stats

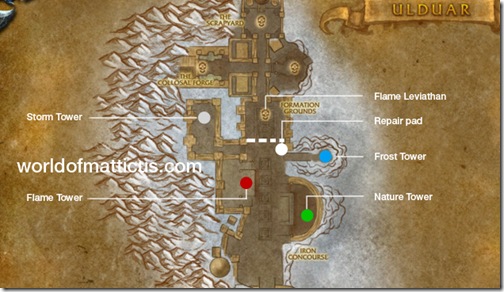
Map

fl-map

Trash phase

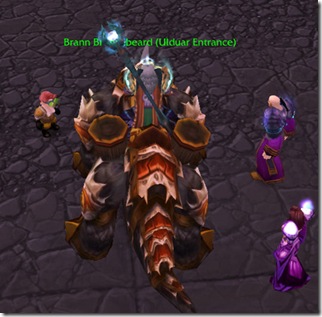
This is not a Hyjal style waves encounter. Your raid group will have access to vehicles first. When your raid is ready to move out, speak to Brann Bronzebeard to engage the Iron army.

bronzebeard-thumb

(Click image for dialogue)

Tower information

Your targets are the four towers throughout the area. The difficulty level of Flame Leviathan can be controlled based on which towers you leave up. Towers are easily identifiable because of the color of their glow. Location of the towers are shown in the map above. Use your vehicles to bring them down.

Storm beacons will summon additional units. Destroy them to stem the tide of incoming spawning mobs.

Roles and vehicular abilities

There are different roles that each vehicle plays. I’ll break them down below.

Carrying capacities

Chopper: 1 driver + 1 passenger
Demolisher: 1 driver + 2 passengers
Siege engine: 1 driver + 1 turret + 2 passengers

Chopper abilities

Sonic horn (20 energy): Conical DPS within 35 yards to all enemies
Tar: 10 yard pool of tar that slows down enemies by 75% (important)
Speed boost (50 energy): Increases vehicle’s movement speed by 100% for 5s

Demolisher abilities

Driver

Hurl boulder: Throws a really big rock at a variable range. Think Wintergrasp or Strands type. Ignites Tar upon impact.
Hurl pyrite barrel: Using 5 pyrite, will do ~30000 damage
Ram: Damage and knockback effect
Throw passenger: Used only when the passenger is in the catapult. Dwarf tossing is finally a reality (important)

Passenger

Cannon: Fires a missile. Upon impact, deals damage to enemies within 10 yards. 50 yard range.
Grab crate: Uses a hook and chain to grab crates. Lets you pick up pyrite off the ground.
Increase speed: Uses pyrite to add extra speed to the demolisher. Lasts 1 minute.
Load into catapult: Self explanatory. Passenger gets into the catapult. (important)

Siege engine abilities

Driver

Ram (40 energy): Damage and knock back effect
Electroshock (38 energy): 25 yard conical, interrupts spells, and 4 seconds of locking out the magic school (important)
Steam Rush (40 energy): Sort of like a sprint effect.

Turret

Anti-Air launcher (10 energy): Fires missiles at aerial targets.
Cannon (20 energy): Up to 70 yard range. It’s a gun that shoots stuff.

Siege Engines

The Flame Leviathan will only lock on to one siege engine at a team. The targeted engine must kite the boss around.

Non-kiting siege engines will have to stay close to the rear of the Leviathan as much as possible and should interrupt Flame Jets. After 30 seconds, Flame Leviathan will switch and target a different Siege Engine and chase after that. Use Steam Rush to build up some distance.

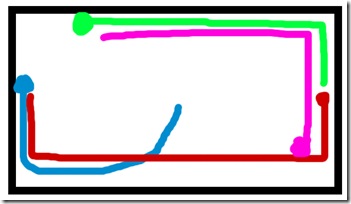
Here’s a kite path you can try out.

kite-path

Blue line: Opening route. The boss will be weapons free at this time (as in engage-able).

Siege engine passengers should be targeting pyrite ammo that’s floating in the air. If there aren’t any available, switch fire to the boss.

If you’re out of siege engines, FL will go after demolishers or choppers.

Choppers

There should be 1 chopper following the targeted siege engine. Choppers will be laying down tar directly in front of the Flame Leviathan to slow him down and the tar can be ignited by Boulders from demolishers.

Choppers also have to extract the FL Unit (explained further).

Demolishers

Stay as far away as you can. DPS with Hurl Boulder. Firing Pyrite Barrels should be held off until FL is stunned.

Demo passengers not being thrown up will need to work the catapult to load up Pyrite.

Flame Leviathan stun unit

Your demolishers have the capability to launch players onto the Flame Leviathan. The FL unit is going to comprise of:

  • 3 DPS (Suggest Druid, Death Knight, Rogue)
  • 1 Healer (Suggest Paladin or Druid)

I suggested those classes because they’re going to be under fire from various guns while up there. You’ll want maximum survivability.

Both players must be in the passenger seat of the demolisher. There’s an ability called “Load into Catapult” which places them in the throwing arm of the demo as a projectile. When itÃ’s called for, your demo’s close in. The driver then hits “Throw passenger” which launches the passengers on top of the Flame Leviathan.

When the FL unit is on the back of the boss, they will be able to take out all 4 turrets. When the turrets explode, there’s a button. You hit the button which starts a 10 second channel resulting in a stunned boss and a damage taken by Flame Leviathan by 50% and resetting his speed.

The FL unit will then be ejected and parachuted off the boss. Your choppers must swoop in and extract them back to the demolishers. You’ll want to stun Leviathan while he’s in a tar’d area.

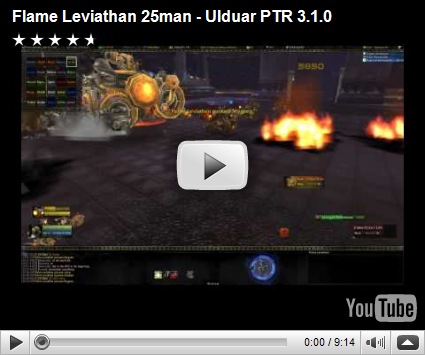
Video

For a visual “how to” see this video below. Actual encounter starts around 20 seconds or so in. Note the positioning of siege engines and how the tar is laid out.

Healer drops

Heroic

Constructor’s Handwraps – Cloth gloves

Embrace of the Leviathan – Cloth belt

Freya’s Choker of Warding – Necklace

Glowing Ring of Reclamation – Ring

Steamcaller’s Totem – Ranged slot

Steamworker’s Goggles – Mail Helm

Boots of Fiery Resolution – Cloth feet – (Hard mode only)

Shoulderpads of Dormant Energies – Leather shoulders – (Hard mode only)

Resto Druid Specs and Glyphs in 3.1

contrasting_leaves

For the record, Moonkins are wonderful. I love them, and I love their dance. However, I am not going to be shaking a tailfeather–at least not for a little while. I might be the only crazy tree out there, but I’m going to use both of my specs for healing, at least for the time being. I expect to be in Ulduar tonight, and quite honestly, no one really knows how difficult it’s going to be. None of us have raided with our usual setups on the PTR, and many of us, me included, never made it there at all. We quite simply don’t know how we, as individual raid groups, will confront the challenges. Thus, it’s a great time to take two healing specs–one for raid healing, and one for tank healing. The changes to mana regen and to some individual spells (ahem, Lifebloom) may make your usual healing assignment no longer the order of the day. Are two healing builds overkill? Maybe. But are they fun? Oh yes, for me anyway.

Build #1: Single tank focused

I am working on the assumption that rolling Lifebloom on multiple tanks is good and dead, so that technique is not part of my calculations. My talent build for tank healing focuses on propping up Nourish, Rejuvenation, and Regrowth. The druid tank healer will do a version of what she’s always done: load HoTs on the tank and then cast a direct heal. The only change for me is that this heal will now be Nourish instead of Regrowth. My tank-healing spec is a version of the 14/0/57 build many of us have been using throughout Naxx, so there are very few surprises. Follow this link to see the build, but I’ll mention the key talents here.

#1: Nature’s Splendor
This talent makes direct healing much easier. The longer your HoTs tick, the more casts of Nourish you can sneak in the rotation.

#2: Nature’s Grace
This talent has been updated to benefit Nourish-heavy rotations. There’s no need to worry about Nourish clipping. An extra haste proc, of course, benefits direct healing much more than HoTs.

#3: Tranquil Spirit
Once an optional talent, Tranquil spirit looks better with the new mana constraints. Druid healers who rely on Nourish for tank filler healing should pick this one up.

#4: Nature’s Bounty
This talent replaces the old Improved Regrowth. It is the one change that cements Nourish’s place in the druid’s rotation. Do not leave the trainer without it.

#5: Living Seed
This talent used to account for less than 1% of my healing, which encouraged me to drop it altogether. Now it procs from overheal in addition to effective healing, making it a better safeguard for a tank target.

Glyphs for Tank Healing

I am going to glyph for Swiftmend, Nourish, and Innervate for my tank healing needs. Your mileage may vary. The glyphs of Lifebloom and Regrowth might still be interesting for certain playstyles, but I’m keeping Innervate until I’m sure I don’t need it.

Build #2: Raid Healing with Healing Touch

What I’m going to share with you is a bit unorthodox and is NOT to be used for tank healing. This build only becomes possible if you have another healing spec to switch to for tank healing or multitasking. In this particular raid healing build, I am going to take the opportunity to try out some new techniques. The basic idea is that Ulduar is an unknown quantity. This build de-emphasizes HoT combos, which is the druid’s strength in tank healing or in normal content. This build features a glyphed Healing Touch, which I know from experience can help when 1) the druid is undergeared for the throughput needed or 2) the druid is running around like a chicken with her head cut off. Don’t worry, there’s a second build coming up later that’s a more standard build for raid healing. The basic technique with this first build is to use Wild Growth and Rejuvenation very liberally and to save that quick HT for heavy damage targeted on a small number of raid members. Mana survival in this build depends on not spamming HT, but rather using it judiciously. The reason I’ve preferred it to the similar Nourish is that it has a decent throughput with no prior HoT setup. Regrowth might work in this role too, but it tends to be a little too slow when the healer is surprised by damage. Just as a note, with this build, Nature’s Swiftness gets used with Regrowth.

Caveat: Yes, I know I’m advocating a flash heal as a raid heal. If your team has extra paladins who end up raid healing, it wouldn’t look as good. However, if you’d been reading my guild’s WWS reports for early Naxx or harder heroics back when we were undergeared, you would have seen glyphed Healing Touch kick the ass of Nourish, Regrowth, and Swiftmended Rejuvenation as a raid heal. I credit Sthirteen with putting a glyphed HT to great use (and outperforming me and my conventional build every time).

Naturalist: Clipping be damned. Yes, your Healing Touch casts will be so fast they’ll clip. With this build, I don’t intend to use more than one at a time. It’s not set up for constant heal bombs on a tank. This is more of a run, run, heal, run, run kind of build.

Tranquil Spirit: Necessary for survival with glyphed HT. The spell is a resource hog, and you’ll need every ounce of mana efficiency.

Revitalize: With this build, the druid will be seeding the raid really heavily with Rejuvenation and Wild Growth. This little talent puts the damage buffer of those two HoTs to a secondary use. One of the things that remains to be seen is how effective Revitalize really is. I’m not counting on huge benefits, but if I’m using the affected spells anyway? Might as well.

Glyphs for HT-oriented raid healing

I’ll be using Healing Touch, Wild Growth, and Innervate for this build. I know, no Swiftmend. Believe me when I tell you that I’ll need the glyph of Innervate to sustain any amount of HT usage.

Build #3: Raid Healing Standard Build

I will likely switch to this build when I get more comfortable with Ulduar. It has more mana efficiency than the HT build, and thus it might let the raid healing druid sneak some HoTs onto the tank. My experience with the HT build is that it’s only really great when multiple healers are undergeared or don’t know WTF to do. I’d never take it as an all-purpose build, because it really reduces the druid’s rotation. With this second raid healing build, I will continue to cast Wild Growth and Rejuvenation liberally. Additionally, once I complete the 4pc T8 set bonus, raid healing with Rejuvenation will be positively delightful. I won’t need my direct heals nearly as much. However, I’ll be using Regrowth as a direct heal on targets with no existing HoT and Nourish as a direct heal on targets that already have one HoT. Swiftmend will also be extremely prominent with this build. For healing on the run, both Rejuv and Lifebloom might be cast on the target, particularly if the raid is spread out enough to make Wild Growth wasteful. The key talents are below.

Swiftmend: I can’t emphasize this enough for this build, but well, any good tree has this anyway.

Nature’s Bounty: I need to buff my two direct heals in order to deal with targeted boss effects.

Revitalize: The very heavy reliance on Wild Growth and Rejuvenation ensures the inclusion of this talent.

Glyphs for Raid Healing

My “standard” raid healing build uses the glyphs of Swiftmend, Wild Growth, and Innervate until I get the 4pc T8 bonus. With the bonus, the glyphs become Swiftmend, Wild Growth, and Rejuvenation.

As a final comment, why would I carry two healing specs when one would do? Because now I can! And also, I apparently didn’t get enough fun out of doing dailies with a Resto spec. At least that gives me a little time to look at elf-Syd instead of a tree or a bird.

Suggested Restoration Spec and Glyphs for 3.1

3.1 is upon us and it’s free respec time. Here’s my suggestion feel free to edit it as you see fit. I’m going to quote matt here from his post previous to mine

WoW Insider has a great roundup toeverything 3.1 related.

No Stock UI has a great list of updated and compatible 3.1 addons for you to peruse.

Restoration Shamans were largely untouched in this patch (yay) but some things have shifted around allowing use to move some talent points and gather up our talents.

0/16/55

Restorative Totems: Increases the effect of your Mana Spring Totem by 20%, and increases the amount healed by your Healing Stream Totem by 45%

This is still a must have, if for nothing else with mana spring totem no longer staking with Blessing of Wisdom, you’ll be using healing stream totem a lot more.

Healing Way: Your Healing Wave spells have a 100% chance to increase the effect of subsequent Healing Wave spells on that target by 18% for 15 sec.

With the talent points being freed up, there is no good reason not to take this

Thundering Strikes: Improves your chance to get a critical strike with all spells and attacks by 5%.

More crit is always good

Elemental Weapons: Increases the damage caused by your Windfury Weapon effect by 40%  increases the spell damage on your Flametongue Weapon by 30% and increases the bonus healing on your Earthliving Weapon by 30%

People may scoff at this one, but with the points floating around, taking this with it’s full 3 points is a great way to give your spell power a bit of a boost.

The spec lets you get everything and the kitchen sink, foregoing the more pvp centric ones. The movement of the talents to different tiers and just a couple point changes really give us everything we need.

As far as glyphs go it might be time to change it up a bit, I’ll list the ones I feel are the great contenders

Water Mastery
Healing Stream Totem – With the change to restorative totems this is worth a second look.
Mana Tide Totem
Earth Shield – NEW 20% increase in the healing done by your Earth Shield is always a good thing.
Riptide – NEW while it might not seem like much, increasing the duration of riptide makes it more into a true HoT instead of just a Chain Heal buffer.
Chain Heal

Now as far as totem mods go, I will make an endorsement here. Totem Timers worked for me on the PTR’s latest build when Yata and Flototem failed me. If you haven’t seen it, it’s worth checking out. Tracks Earth Shield charges, water shield, lightning shield, all totem schools, has a totemic recall option and is pretty light weight.

Good luck in Ulduar!

As always feel free to follow on twitter http://twitter.com/LodurZJ And don’t be afraid to ask questions using direct message there or the contact form here on the site!

Ulduar Caster Weapons and Tier Gear: A Primer

Here’s a list of all spellcaster related weapons that drop from Ulduar. Items are sorted in the rough order of progression that raiding groups will be going in. I linked all currently known spellpower weapons and off hands so that your raid group can get a general idea of what item to go for and what items are better off in the hands of other players along with the rough order they will appear in. It seems heroic mode drops slightly more weapons. Loot tables for some of the bosses are still unknown at this time (like Yogg-Saron and Algalon). Read the bottom of the post for a theory of tier gear drops.

Heroic Mode weapons

Weapon Weapon Type Source
Overcharged Fuel Rod OH (Spell hit) Flame Leviathan
Intensity 2H Staff (Spell hit) Ignis the Furnace Master
Scepter of Creation Wand (Spirit) Ignis the Furnace Master
Guiding Star 1H Mace (MP5/Haste) Razorscale
Quartz Crystal Wand Wand (Spell hit) XT-002 Deconstructor (Hard mode)
     
Rapture 2H Staff (Spirit) Iron Council
Ironmender OH (Spirit) Kologarn
Runescribed Blade 1H Sword Auriaya
The Lifebinder 2H Staff (Spirit) Freya
Staff of Endless Winter 2H Staff (Spirit) Hodir (Hard mode)
Scepter of Lost Souls Wand (Haste/Crit) General Vezax


Normal Mode Weapons

Weapon Weapon Type Source
Firesoul MH Sword (Spell hit) Flame Leviathan
Plasma Foil 1H Dagger (Spirit) XT-002 Deconstructor
Pulsing Spellshield OH (Shield) XT-002 Deconstructor
Stormtip 1H Dagger (Spirit) The Iron Council
Nurturing Touch Wand (Spirit) Auriaya
Pulse Baton 1H Mace (MP5) Mimiron
Unraveling Reach 2H Staff (Hit) Freya
Icecore Staff 2H Staff (Spirit) Hodir
Ice Layered Barrier OH Shield (MP5/Haste) Hodir (Hard mode)
Pillar of Fortitude 2H Staff General Vezax

Tier gear

All we know right now is that Mimiron drops tier 8 gloves. I’m assuming Yogg-Saron either drops the chest or the helm. I have a sneaking suspicion the other 3 Titans (Freya, Hodir, Thorim) drop the other 3 tier 8 pieces. My theory is unconfirmed, however. But I think it’s a decent assumption that the 4 titans along with the “end” boss of the instance are the ones that drop the tier pieces.

Suggested Healing Priest Specs, Glyphs, and Addons for 3.1

Not sure how to spec or glyph for 3.1? Here are my suggestions. Feel free to modify accordingly. WoW Insider has a great roundup to everything 3.1 related.

No Stock UI has a great list of updated and compatible 3.1 addons for you to peruse.

Discipline Priest Specs

57/14/0

Soul Warding: Reduces the cooldown of Power Word: Shield by 4 seconds and reduces the mana cost of Power Word: Shield by 30%.

Absolution: Reduces mana cost of Dispels and Disease curing spells by up to 15%.

Focused Will: Increases your spell critical effect by 3% fully talented. If you get crit, incoming damage is reduced by 4% and healing effects on you increase by 5/10/15%.

3 points can go either into Absolution or Focused Will. With the amount of cleansers and dispelers in my arsenal, I opted for the increase crit for the time being. But that might change later.

Improved Flash Heal: Must talent, I think. Reduces mana cost of Flash Heal by 15% and increases the crit chance if your targets are below half health.

Rapture: It’s different now. When your Shield is absorbed or dispelled, you instantly get back 2.5% of your total mana and your target gains 2% mana, 8 rage, 16 energy, or 32 runic power. Works every 12 seconds.

Discipline Priest Glyphs

Glyph of Flash Heal
Glyph of Power Word: Shield
Glyph of Penance – NEW: Your Scribes will have to be lucky here.
Glyph of Prayer of Healing – At least it’s some form of AoE healing if the fight calls for it

Holy Priests Specs

14/57/0

Blessed Resilience: For 3 points, it increases your healing effectiveness by 3%. The stronger your healing effectiveness, the better this talent will be. For the time being I opted not to get it.

Serendipity: A haste inducing talent. Requires you to Flash Heal or Binding Heal before it adds a 12% haste buff per stack up to 3 (total of 36%). Makes your next Greater Heal or Prayer of Healing faster. Note: Binding Heal used to grant 2 haste buffs per one cast. It doesn’t do that anymore.

Test of Faith: No change here.

You’re going to end up with 6 talent points. You can only invest in two of the above abilities. I recommended Serendipity and Test of Faith.

Empowered Renew: Another instant healing spell added to Priests. The closest thing I can think of is that it’s an inverse Lifebloom. Instead of tick, tick, tick, BOOM! It becomes BOOM! Tick, tick, tick.

Holy Priest Glyphs

Glyph of Circle of Healing
Glyph of Hymn of Hope
Glyph of Renew
Glyph of Flash Heal
Glyph of Guardian Spirit

Things will be very busy in the World. New places to explore, new dungeons to conquer. All of us will do our best to provide the advice and guidance in the challenges ahead.