Conclave of Wind

Conquest scored their first 10 man raid boss kill a few weeks ago with the Conclave of Wind. It’s another Council-type encounter that involves multiple bosses. They don’t share health pools or anything. Once a djinn (genie?) goes down, you have a minute to take down the rest of them otherwise the disabled djinn’s will have their health restored to 100%. When engaged, the djinn’s need to have someone within attacking range otherwise players will get hit with a really strong wipe-inducing debuff.

Otherwise, keep reading for an account of each healer’s perspective on their platforms along with a quick breakdown on what actually happens.

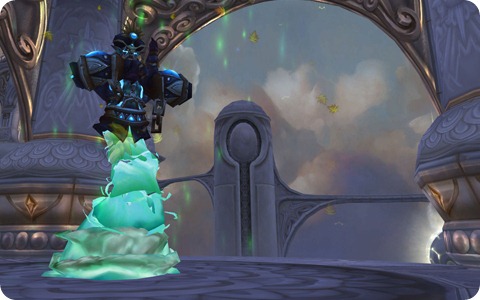
Nezir

nezir

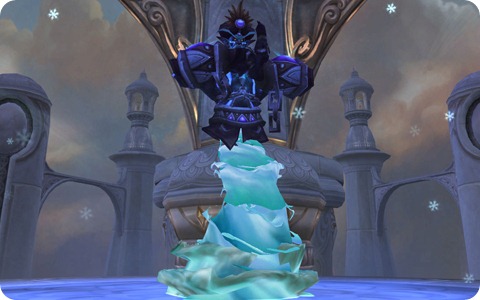
Nezir is the Frost djinn. He places Frost patches on the ground which needs to be avoided as the movement slow effect will stack. His Wind Chill deals Frost damage. His Sleet Storm is a Frost DoT. Be wary of Permafrost as it is a conical Frost spell hitting anyone near the target. Wind Chill is the mechanic that forces platform teams to switch as it steadily increases all Frost damage taken by 10% (in other words, it’s a stacking debuff).

His ultimate ability is Sleet Storm. It deals ~30000 damage divided by all targets within 100 yards. Make a note of this effect.

Alette’s point of view

My starting platform was Nezir’s, which is the frost platform of conclave. The damage that the boss deals scales with how many stacks of Wind Chill that the tank and I had. When 5 stacks of Wind Chill is reached, the healing becomes intense. We originally tried switching platforms at about 8 stacks but shifted it down to 5 instead. As a healer, try to always be behind or to the side of him to avoid taking permafrost damage. His ice patches are a nuisance, but I used Hand of Freedom to remove the slow effect. 

Once I reached 3 stacks, I started moving towards the ramp. At stack 5, transition was signalled verbally and the jump was made to Anshal’s platform. 

Pro tip: Don’t forget you can cast instant spells when flying through the air from platform to platform.

Make sure you hit the ramp straight on and not at an angle.

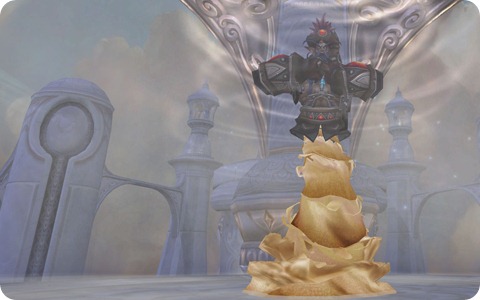
Anshal

anshal

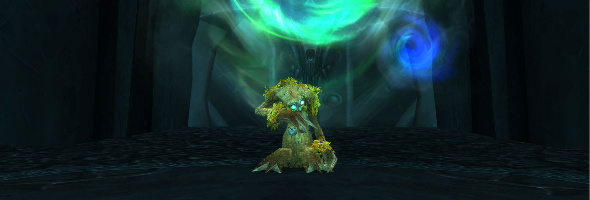
Anshal has an AoE effect which silences any players within it and heals any of his allies. Melee players will have a field day here. Every so often, Ravenous Creepers will appear with the ability to eject Toxic Spores. These Spores will infect players with a stacking toxin. Unfortunately, there’s no direct way to remove it. The Toxin hits for about 500 damage and  it stacks. When the stacks get too high, a switch is called where the players jump over to Nezir and do a bit of damage to him for a while before jumping back. The key here is all about Ad control. Make sure those ads are dead or as weak as possible. Anshal’s ultimate heals all of his allies for 25000 health per second and they deal and extra 15% damage. In the seconds leading up to his Zephyr (his ultimate spell), you’ll want to ensure his little friends are down for the count. Once they are, all the DPS players here need to make the jump to Nezir’s platform immediately.

Ophelie’s point of view

It started like any other fight: Beacon on the tank, Holy Shocking players, and building up Holy Power. Anshal actually doesn’t hit that hard and my concentration started to waver… Then adds spawned and it took every bit of Holy Radiance and Light of Dawn and pounding my fist on the keyboard to make sure our DPS survived. The adds had barely stopped moving (and the dps had barely been healed enough) that my tank suddenly jumped onto the wind tunnel on the side. Being a good loyal healer, I jumped after him, leaving the DPS players to their misery.

I found myself in front of Nezir. I avoided frost patches on the ground the best I could. I secretly thanked the existence of Hand of Freedom, which sped up the delicate process that is reaching the frost boss. By then, the DPS had caught up with me, demanding to be healed again. I pulled out Holy Radiance, Light of Dawn and my fist again before adding Aura Mastery + Resistance Aura to the mix in order to do my best in keeping everyone alive as Nezir cast Sleet Storm. After all the excitement, the DPS left to kill more of Anshal’s flowers and I hung out with my tank and Nezir, until we noticed that we’d each gathered 4-5 stacks of debuffs, making us take more frost damage. Not wanting to mess with that, we jumped back onto the wind tunnel to hang out with Anshal, the flowers and the dps.

Healing the DPS on Anshal’s side was frustrating at times. My AoE heals were able to keep everyone up long enough for me to blast them with some Divine Lights.

It’s a coordination fight, notably coordinating damage dealt to the right boss at the right time, but from a healing perspective, it’s about communicating with your tank and with the other tank-healer team to coordinate jumping. The DPS doesn’t like to be left alone on a platform with no tank and no healer. And occasionally you have to communicate with the team working on Rohash (but they get really edgy late into the fight, so be forewarned).

Get your utility spells right too:

  • Lay on Hands is a wipe saver if your tank decides to jump while you’re mid-cast.
  • In times where your tank and your DPS are fighting for your affection, Hand of Sacrifice lets you keep the tank alive while paying attention to the DPS.
  • Bubble can be used to remove frost debuff stacks, but I found it more helpful in avoiding aggressive flowers.
  • Hand of Protection can rescue a softer DPS from those flowers.
  • Hand of Freedom can help you (or your tank) navigate the Nazir’s frost patches.
  • Holy Radiance and Light of Dawn are fantastic when you’ve got the DPS bunched up in front of you. During alone time with the tank, or to quickly save a DPS, use Word of Glory as your holy power sink.

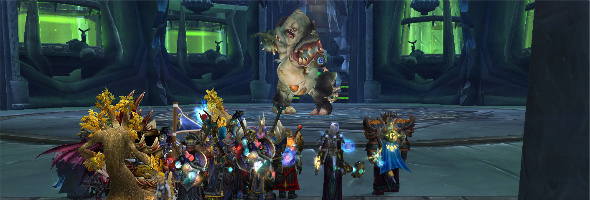
Rohash

rohash

The big threats to watch out for from Rohash is his Wind Blast. If he faces you while casting it, you better move fast (and note that the wind spout turns in a clockwise direction). Veterans of Serpentshrine Cavern will recognize the ability as one based from the Lurker Below. His ultimate spell is called Hurricane where players on the platform are throw around in the air (akin to Malygos’ Vortex). The only spells which can be cast are instant ones. Otherwise, a tank is not needed. In fact, it is strongly advised that no melee players engage Rohash at all.

Matt’s point of view

Don’t let the other two Paladins fool you. We drew straws. I lost. I got arguably easiest djinn in the instance (which I also found fairly boring).

We took two approaches to Rohash. We tried with both a Mage or a Mage and a Warlock. We were able to progress quite nicely with both ranged DPS on this platform. There were times when our Warlock needed to switch to other platforms for diagnostic checks to ensure everything was being done properly or to help level out the damage. For the most part, Rohash was the key. Once he was down to a certain percentage, everything would come together.

Healing the damage by Rohash is a piece of cake. Heal was enough to slow down any damage dealt before relying on either Flash Heal or Greater Heal to get players back up to full again. I’ll admit I got caught off guard once or twice by the Wind Blast. The trick to avoiding Wind Blast is to pay careful attention to his bars and the direction he is facing. As a Priest, I was able to Body and Soul my way clear fairly quickly. Don’t stand too close to him as he conjures these three mini-cyclones that revolve around him. Their radius is slightly larger than the graphic. Get nailed by one, and you will get knocked back.

During the Hurricane portion, I relied on instant spells to keep myself at a high health pool as much as possible before hitting Levitate so I wouldn’t take fall damage. Yes, Circle of Healing if you have to.

How it works

The majority of the DPS will be between Nezir and Anshal (actually, that might be dependant on your raid composition). Melee players will definitely be working on Anshal and jumping platforms to Nezir as necessary to help mitigate Sleet Storm. Once the ultimate abilities have worn off, DPS players are free to resume their original positions. Our game plan was to concentrate on Rohash and Anshal. Incidental damage and DoTs or AoE would be used to gradually lower Nezir.

As soon as we took Rohash down to about 10%, we checked to ensure Anshal was near death. If he was not close, we held off DPS on Rohash. If Anshal was close to death, we lit up Time Warp and dropped both Anshal and Rohash as quick as possible. The moment the Djinn’s fell, we hightailed it to the central platform where Nezir was waiting. 1 minute was more than enough time to eliminate Nezir with concentrated fire.

We just completely blew them out of the sky.
Casual 101: Knowing Is Half The Battle

It’s no secret that I’m a fan of the “Hardcore Casual” mentality.  In my 3 years of playing World of Warcraft, I’ve cut my teeth against some of the best in the game (well, my server or battlegroup).  I’ve seen some of the strongest players, and I’ve seen some of the weakest players.  The first thing I’ve noticed is a fundemental difference between the two extremes.  The strongest possess it.  The weakest lack it.  By “IT”, I’m talking about knowledge.  Yes, there are casuals that are some of the strongest players I know.  What separates them from a smattering of hardcores is their level of knowledge.

The Usual Scenario

A small guild consists of a tight-knit circle of friends.  All of them have made the necessary adjustments or rolled toons to fill all the roles that a 10man raid needs.  2-3 tanks, 2-3 Healers, and a slew of DPS, both ranged and melee.  When this guild gets together, there’s rarely a duplicate class, let alone spec.  Each player wants to benefit the raid as much as possible.  However, scheduling is always the issue.

Everyone’s got their own lives.  Everyone’s constantly juggling families, kids, jobs, school, friends, and of course, this game.  Each person constantly tries to get a raid together when they see that 8th or 9th person on.  Phone calls fly, text messages flow, and everyone is scouring their friends list to fill the final spots.  On the lucky nights, they can get together ten of their own.  A certain sense of pride swells.  “We got a guild run going,” they all contently utter.

The time is ticking.  One of the healers works the overnight shift on the weekends.  He/she has to be out the door in just over two hours.  The raid gets together surprisingly fast.  Even though ICC is the hot topic, they decide to do ToC since one of the paladins is saved to ICC.  It doesn’t matter, because they derive more joy from the simple act that those ten raiders share the same guild tag.

Buffs ensue, and right before the pull, the off-tank druid confesses his ignorance.  He doesn’t know the fight.  During Acidscale and Dreadmaw, the rogue gets the Burning Bile and runs away, but doesn’t come back to free the tanks with Paralytic Toxin.  This counts for two wipes.  On Lord Jaraxxus, the hunter gets inflicted with Incinerate Flesh and runs to kite it, as though it was Legion Flame.  He runs out of range of the healers, it ticks to zero, and wipes the raid.

We took the time to explain the fights.  The differences in the Wyrms and Jaraxxus’s two flames.  It seemed as though it was in one ear and out the other.  Although they’re all friends, tension is rising, and time is running out.  The healer with the upcoming overnight shift starts to get impatient.  Before they all realize what has happened, he has to leave.  They’ve barely downed Jaraxxus, and he/she is out the door to go to work. 

A reasonably short raid has turned into a long, frustrating endeavour. 

Things to learn as a casual player:

Take a little time to research – Even with my busy schedule, I have the time to watch a video, read a strat, or email a friend that knows.  I download a text-only strategy, copy it into an email, then read it on my phone on the train to work.  Before taking my lunch break, I take 10 minutes to watch a Tankspot video.  I’ve even, yes, downloaded a video to my iPod and watch it while I’m on the can.  (That’s right, I went there).

Listen to what’s being explained – Too often do I see people goofing off in guild chat, making random comments in /say, or participating in /general banter.  I never mind if it’s someone that I’ve done the fight with before, but if a casual player is consistently not listening because they’re engaged in other activities, I have no problem calling them out on it.

My main issue with all of this is the “talk, no walk” scenario.  All of these people will constantly ask, “Hey Thes, do you think we’re raiding tonight?” My constant response is: “I certainly hope so.  Start reading up on the fights.”  They never do.  Oh, they want to raid.  They salivate when the letters ‘I-C-C’ are called out.  Yet, when it comes down to doing a little bit of legwork, they falter.  I dont’ mind explaining the fights, but if after the explanation I hear “I’m sorry, so what am I supposed to do?” from our warlock, I wanna /logout.

Sidenote: Since drafting this blog, we’ve downed new bosses in ICC for us, so I *am* proud of my friends.  I just get agitated sometimes the lack of initiative. 

ANYWAYS….

If you want to make yourself valuable as as casual raider, just take an extra step or two to be prepared.  If not, you’re wasting your own time.  The less a raid has to “nuture” you, the more appealing you’ll be to bring along.  Personally, I love that our guild, though small, is comprised mostly of people that can fill in for any guild’s raid that may need us.  Kind of like hired mercenaries.  Need a healer?  See if Thespean or Discotheque are on.  Need a tank?  See if Dralo or Naryamas are around.  How about a good DPS?  Ask Arcas or Wolfin.  That means, however, that we do our little bit of homework to make that possible.  You don’t have to be hardcore, but if you know your stuff, you are just as skilled (if not more), than someone who devotes most of their time to raiding.

Are you a player that can’t be on as much as they’d like?  How do you make yourself appealing to be pulled into a raid?

Email: Elder.Thespius@gmail.com | Twitter: @Thespius

Rot-Face the Music, People!

The second wing of Icecrown Citadel has been open for just two lockout periods.  There have been the outcries from all sides:

“It’s too soon!”

“Thank God, it’s finally here!”

“Why can’t we just fight Arthas already?”

But my new personal favorite, has GOT to be:

“Rotface is too hard!”

First, let me go on the record that I’m thankful for fights like these.  I’ve mentioned here before, and also when I’ve guest-hosted on Raid Warning (shameless plug), that I loved bosses back in the BC days.  Fights like Leotheras or Al’ar took coordination, teamwork, and dedication.  I remember the guild I was in never took down Al’ar.  Primarily, we lacked perseverance.  We would spend 3-4 attempts on that bird, and then people would gripe about how hard it was and we’d move onto Loot Reaver, I mean Void Reaver.

My point is that in Wrath, we’ve essentially seen easier bosses in raids.  Yogg was hard, Faction Champions held up a lot of guilds, true.  Aside from examples like those, we haven’t seen any fights in ICC thus far that have resembled the challenging nature of a true raid boss.

Rotface as a challenge?  I welcome it.  I think we, as raiders, get tunnel vision too easily.  Most of the fights have been the following:

  • Switching targets to an add or group of adds
  • Stay out of the stuff on the ground
  • Heal through this bout of incoming damage

Hence, Rotface is a breath of fresh air, even if it’s the leading cause of my healer-rage on any given raid night.  Healers, because of the instances of raid damage, have to step it up.  Any combination of the following mechanics will make for a bad experience:

Mutated infection – [UNAVOIDABLE] The primary mechanic for the fight.  Your choice to cleanse it early, though I wouldn’t recommend it unless your raid is totally on their A-Game.  You have to get on top of this as fast as possible because of the Mortal Strike-styled healing debuff.  When I’m assigned to the mutated peeps, I throw PW: Shield, Prayer of Mending, and a quick Penance to pile on Grace.  It’s better to keep them topped off than just keep them alive.

Slime Spray –  [AVOIDABLE] This is a pain in the butt to deal with if people don’t move out of the way.  At roughly 5k each second, multiple victims make healing rough, especially in the later stages of the fight.  It’s a short cast but on a regular timer, so it’s easy to anticipate.  If you keep your raid clumped behind the boss, a simple run-through to the other side is all that’s needed.  Don’t always assume it’s going to the majority of the raid.  Rotface may target the slime tank/kiter.  I’ve seen attempts almost wipe because people ran right into the spray without thinking.

Ooze Flood – [AVOIDABLE] The standard WoW rule of “Don’t stand in the crap on the ground!”  A lot of raiders claim to be taken by surprise, but I don’t buy it.  Not only do you get an audible warning from Petricide, but you see ooze spouting from the pipes before the flood appears.  At crucial moments of kiting or fleeing the ooze explosion, it’s not impossible to miss these entirely.

Radiating Ooze – [SEMI-AVOIDABLE] The only time anyone should be taking damage from this is the person merging an ooze with the big ooze and possibly the player kiting the ooze.  They’ll take damage from their own smaller ooze, which is less, and then momentarily from the big ooze.  I see too many people run INTO the ooze to try to get it to merge.  In actuality, you just need to get the ooze into the 10 yard radius of the big ooze for it to merge.  Even at that, it’s best to wait until your disease is gone to step into that area.  A near-full ooze will tick for a lot of damage, and a half-heal debuff is horrible to try to work through, let alone the tick from the disease itself.  It’s easy to die to this, even with a lot of healers on you.

Unstable Ooze Explosion – [AVOIDABLE] It’s simple.  It’s like the orbs in Void Reaver, except smaller.  Once the ooze explodes, and not before, you should start running away.  From personal experience, try not to be by the tank when it explodes.  If the tank is caught in about 4-5 of those projectile oozes, he or she is a goner.  Don’t run into ooze puddles, and don’t run near other oozes that are still growing.

—–

I highly recommend that you read and know each of the mechanics that I’ve explained above.  These debuffs and mechanics aren’t just for the healers to heal through but for every raider to avoid.  One or two of them together is manageable, but when you’re consistently not paying attention to the different intricacies of the fight, it just makes my soul hurt.

I know there’s a tendency to just want muscle through some of the fights, but on some of these Icecrown fights, it’s imperative to actually know what you’re being afflicted with.  Your little extra focus can get you through that last 30% that most guilds may be struggling with.

Healing Icecrown from a Druid’s Perspective – Part 2

This is a guest post by Epiphanize, a Resto Druid, and co-host of Raid Warning.

Now that we got all that out of the way, it is time to get down to business. You didn’t really show up just to listen to me go on about glyphs, did you? No, you came to heal your branches off! One quick thing: Be sure to check out the comments in my previous article; there were some good suggestions for alternative point distribution.

Lord Marrowgar

So here we are, Lord Marrowgar, a very interesting challenge for healers. However, it does give Druids a chance to show off their ability to heal on the run. This can be a relatively hectic fight, so regardless of whether you are tank or raid healing, you will need to be tossing HoTs at some points during the fight.

Tank Healing

This is the easier of two roles against Marrowgar.  During his initial phase and all the ones where he is not spinning all over the place, it is essentially a one tank fight. Since the nerf, Marrowgar does quit a bit less melee damage. So the damage your meat shield will be taking will be fairly minimal. This is pretty manageable for Trees, as we can keep the tank pretty well topped off with our HoTs.

One ability you need to be prepared for though is Saber Lash.  Saber Lash is an ability similar to Koralon’s Meteor Fists, in which two tanks will need to stack in order to distribute the damage. Your healing priority will be the Main Tank followed by the Off-Tank after a Saber Lash. As a tree, you have the added benefit of hitting both with Wild Growth before topping off the Main Tank. Other than dodging the occasional slow-motion blue flames, there is not much to deal with during this phase.

Raid Healing

As stated above, this fight can be quite hectic for a raid healer. During the first phase you will have quite a bit to manage. In 10-player, one random player will be Bone Spiked. DPS will be turning to focus on getting the player down as quickly as possible. This presents two things for you as a raid healer. You obviously will need to be focusing on healing the spiked player. I’ve managed to safely keep them up with Rejuvenation and Swiftmend, though this can also be accomplished with a few Nourishes as well. The other thing is people taking Coldflame damage, as they will often be ignoring the flames to get the person off the spike. Again this is usually handled by tossing some Rejuvenations and Wild Growth, saving Swiftmend for anyone who stands in the fire just a bit too long.

The last thing you will be concerned with during the pre-Bone Storm phases is the aforementioned Coldflame. As the raid healer, you will be responsible for topping off anyone who doesn’t get out of the way of the flames quick enough. The damage it does is not too horrible as long as no one just stands there. Its actually more of a nuisance avoiding it yourself, as you will often need to decide between standing their long enough to finish casting a heal, or cutting it short to avoid taking too much damage yourself.

Bone Storm

This phase is pretty similar for Druids regardless of your role. Marrowgar will become untauntable and spin around the room doing relatively minor AOE damage. It is still good to avoid him if possible, as it makes life a bit easier on all the healers. The big thing you will be dealing with is blue flames (of ice?) again. Only this time he drops 4 at a time. This phase is all about survival. Since you will be on the move during this, Druids will be arguably the best healer for this phase. This is where glyphs like Rapid Rejuvenation and Wild Growth start to shine in ICC. Just keep HoTs on everyone and toss Wild Growth on cooldown and you should be fine. Make sure to keep Swiftmend and your NS-HT macro at the ready in case anyone gets into trouble.

One last thing that the Tank Healer needs to consider is the position of the tanks during all chaos. The tanks will be sticking close to Marrowgar during Bone Storm in order to pick him up at the end of the phase. Not only will the tanks be taking a bit extra damage, but you will want to be nearby to keep the Main Tank healed up while everyone gets back to some semblance of order.

Lady Deathwhisper

The next boss in The Citadel is quite a bit easier on the healers than Marrowgar. If your group is good about staying out of Death and Decay and interrupting Frost Bolts, you won’t have to mash the keyboard nearly as much. For Druids, this fight is all about situational awareness and keeping in range of the players taking damage.

Phase 1

The key to Lady Deathwhisper is getting through her first phase. During this phase she will be behind a mana shield that DPS will need to burn through in between dealing with adds that spawn from either side of the room. After that, the fight is pretty much tank and spank. In my experience, this is the fight where you are most likely to only use 2 healers.

The mechanics of the adds are pretty complicated at times, so it is good to familiarize yourself with them. There will be times the tank and raid will be taking increased damage based on these mechanics. There is a lot of movement involved, so there will often be times you will have to drag your stump across the room to toss a heal or two.

There are a few other considerations during this phase. First,  Adherents will place Curse of Torpor on random raid members that increases the cooldown of their abilities, so you will want to make sure you are decursing as often as possible. There will be a bit of randomness from the Death and Decay and Shadow Bolts, so be on the look out. Again, there is going to be some bouncing back and forth because of adds, so communicate with the other healer(s) to make sure you have all your bases covered.

Phase 2

Congratulations, you have made it through the hard part. After her shield is down she becomes tauntable, only has 3 million hit points, and the adds stop spawning. Since this is often 2-healed, you will more than likely be both on raid duty and tank duty. While this phase is pretty much tank and spank, there are some things going on that affect the healers.

The tanks will be swapping as Deathwhisper places a stacking debuff on the tank that reduces their threat. So you will want to keep an ear out for who is tanking her and focus your healing accordingly. She will still be dropping Death and Decay, as well as random frost bolts that should be interrupted. Finally, she will summon on non-targetable Vengeful Shade that will follow a player around and explode if it catches them. You will need to do your best to avoid them if they follow you, and be prepared to heal someone if they get caught (if they don’t get one-shotted).  It’s a pretty quick phase though, and you will be on your way up the elevator in no time.

Gunship Battle

This is a gimmick fight through and through and is a lot of fun. There aren’t really a lot of important mechanics here for healers. Your gunship has two guns that you use to attack the enemy’s gunship.  Occasionally, the opposing ship will summon a mage/sorcerer that will freeze your guns. You will then need to send some raid members over to kill it in order free up your cannons. Back on your own ship, mobs will appear through a portal that will need to be killed, while avoiding incoming rockets and axe-throwers.

Defenders

This is the easier of the two healing roles. Usually one tank and some ranged DPS will stay behind to deal with the enemy boarding party.  The portal will spawn a Sergeant and some Marines. The Sergeant is the only one that really poses any threat, as he has pretty nasty Bladestorm and Wounding Strike abilities. Most of your healing will be focused on the tank, especially if you only have ranged DPS defending. Just be prepared to work a bit extra to overcome the -25% healing debuff.

Two other items of note: First, stay out of shinnies! Rockets will be coming over to your side and the big shiny circle on the ground is an indicator your in the path of said rocket. Be prepared to heal anyone who has yet to learn this golden rule of Warcraft. Second, keep an eye on your boarding party tank. They will be taking damage as they fly back over to your ship, and not every healer is as equipped to heal in the air as us Trees. I have seen quite a few tanks bite it on their way back over as they still have the aggro from the ranged mobs on the enemy ship. A well timed heal from you can be the thing that saves them.

Boarding Party

As the boarding party healer you got the short end of the branch (no, the bad tree jokes will not stop). You will be heading over to the enemy ship with most of the DPS and a Tank to take down the mage/sorcerer while fending off the general and adds. On your way over it will be a good idea to HoT up the tank, as things will be a bit chaotic when you first get over there.

The tank will be keeping the enemy commander busy why DPS take down the mage/sorcerer. Keep an eye out because the longer you are over there the stronger the enemy gets. This will cause everyone to take quite a bit of damage. As mentioned earlier, you will need to keep some heals on the tank as he will take some damage on his way back over. Probably a good idea to leave a Rejuvenation in case you need to toss an emergency Swiftmend on the return flight. Again, a fairly straightforward fight for healers.

Deathbringer Saurfang

Phew, here we are, the final encounter of the entrance to the Citadel. This is probably the most interesting fight so far. A lot of what you need to do as a healer will be determined by your groups strategy, but Druids have a few things to keep in mind both as a tank or raid healer, regardless of how you handle Mark of the Fallen Champion.

Raid Healing

First, you do not have any way to stop the damage people will be taking like priests do. So your main role will be to heal up the damage that does get through. There are three mechanics that will be causing you trouble: Boiling Blood, Blood Nova and Mark of the Fallen Champion.

The first ability, Boiling Blood, will be case on a random raid target. If you have a Priest, they will mitigate a lot of the damage to avoid Saurfang building Blood Power. Its still a good idea, whether you have a Priest or not, to toss Rejuvenation on the Boiling Blood target to keep them topped off. The damage isn’t too bad, and one HoT should be enough to keep them safe.

Blood Nova can be more troublesome depending on how much melee you have. If this gets cast on one, a good amount of people will be taking damage. The player that get Blood Nova should run out of the raid to minimize damage and blood power gain. However, if they don’t get out in time, be prepared to throw out Wild Growth and a couple single target heals.

Finally, there is Mark of the Fallen Champion. How you handle this (if at all) is going to depend on your raid strategy. A lot of guilds, mine included, will just let that player die. This minimizes the buildup of blood power and puts a lot less stress on the healers. If you do decide to keep that person alive you will want to give them full HoTs. Yes, you may have to dust off Lifebloom for this one. I usually put up Rejuvenation and Regrowth, with a Swiftmend if needed.

Tank Healing

There is not nearly as much to deal with as a tank healer. The tanks will be switching when they gain the Rune of Blood debuff, so as per most two tank fights you will need to be paying attention. You will also need to be concerned if a player gets Blood Nova near the tank, which could cause a nasty damage spike. Your final obstacle is at 30%, where Saurfang will Frenzy. This means you need to get your stump in gear and heal faster! Other than that, he is business as usual for a tank healer.

—–

And that’s it! You’ve Stormed the Citadel. Just in time for the Plague Works to open. Thus is the life of a WoW player. In the next installment we will be covering healing Rotface, Festergut, and Putricide, all while avoiding getting any goo on your leaves.