Two Ways to Approach Ulduar’s Hard Modes

While patrolling the Plus Heal forums earlier, I ran into this thread. In it, the original poster laments the reduced healer requirement in order to achieve Ulduar’s hard modes. And why not? Let’s take a quick look at some of Ulduar’s heroic hard modes.

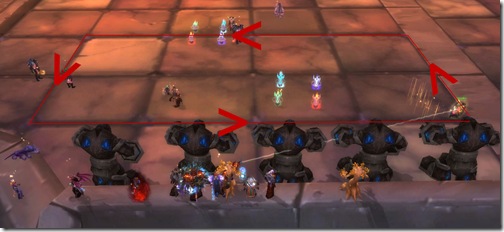
  • Hodir – 32.5 million health, 2 minutes. 270834 DPS required
  • Thorim – Running the gauntlet in 3 minutes after the snake and the ads are eliminated
  • Deconstructor – Bringing the heart from full health to zero in 20 seconds

The DPS requirements for the average raid is simply inconceivable. Honestly, there’s just no way to whip out DPS of that magnitude. The only way to even come close to doing that is to sit healers and tanks and go with the bare bones minimum.

Now let’s stop and think about this for a second. Take a deep breath. More importantly, let’s take a step back.

Hard mode is hard

When Ulduar came out, Blizzard released it with the intention of offering multiple variations of different encounters. The strategy here is to cater towards as many players as possible. The more dedicated raiders could feel good about themselves going after hard modes and earning the higher level of loot. Players that wanted to take it a little easier could take on the bosses in their base form.

Everyone wins.

Hard mode is designed to separate guilds and spread them even further in what I like to call the progression gap. The higher you are on the curve, the better stuff you get and you can scale your guild’s difficulty accordingly. Not every guild is capable of doing hard mode for whatever reason. It’s not meant to be easy. It’s not meant for every guild.

When making the decision to jump to hard mode, there are two possible methods to go at it.

Method 1: High octane DPS right now

seinfeldCurrent DPS output for everyone has a limit: Your guild’s gear. In order to increase DPS, you either switch out tanks or healers and replace them with DPS. Every player added is another 4000-7000 DPS depending on the class.

You saw Hodir’s requirements above.

A little over 270000 DPS.

Obviously the risk here is that you lose raid stability. As in, the lower the amount of healers the higher the risk of not being able to stabilize and recover.

The tradeoff is that you have a chance at accomplishing hard mode right now.

Method 2: High octane DPS later

You continue to work on Ulduar and upgrade your raid’s gear as much as possible.

Even on the test realms when Hard Modes were enabled, Ursula McWeaksauce had to dispense the Shirt of Uber. It’s an increase in the overall raid’s stats by 8% and ratings by 130 assuming we’re decked in full Naxx gear.

For example, the raid DPS output of 4 healers, 20 DPS, and 1 tank right now could be the same as 6 healers, 18 DPS, and 1 tank 8 weeks later.

You don’t have to stack raids with with DPS unless you fully intend to do hard modes right now. You can farm easy mode Ulduar for a few weeks and gear out the players accordingly to raise the overall gear contribution gradually from your players.

To finalize

Jerry Seinfeld ran into a similar problem. In his words:

I was in the drug store the other day trying to get a cold medication…

Not easy. There’s an entire wall of products you need. You stand there going, Well, this one is quick acting but this is long lasting… Which is more important, the present or the future?

How fitting.

In order to meet the requirements for hard mode, you can either raise the quantity of DPS or raise the quality of DPS. Either way, your raid group will reach that minimal floor that hard mode demands. All this does now is determine when your guild can do hard modes.

Do it now with a stacked configuration.

Do it later with the same configuration.

The choice is yours.
Lessons from Talent is Overrated: Welch’s 4 E’s

I’ve been reading a great book called Talent is Overrated: What Really Separates World-Class Performers from Everybody Else. I’ve learned a lot of great lessons and many of the stories are some I’ve found to be inspiring to me online and in the real world. Hopefully you’ll feel the same way.

Former CEO of General Electric, Jack Welch, had a set of criteria he would use when looking at prospective employees to promote into the upper levels of management. It’s called the 4 E’s! Let’s see if we can take them and apply them to players looking to break into the demanding responsibilities of raid leadership. These are all general (and well rounded) traits that Welch would key in on.

Energy

Self-motivated and driven. These are players who aren’t tired (or don’t give off that impression). They want to do something. It doesn’t matter if it’s the first hour of raiding, or the 4th or 12th hour. Their level of energy remains high, focused, and committed. They’re always eager to get going and try something new when strategies don’t work.

Ability to energize

Having someone who can not only motivate themselves but the others around them is a huge benefit. These are players who don’t need a spark to get the raid going. They are the spark that helps to ignite other players. It’s this up tempo attitude that separates okay raid leaders from great ones. This is a trait that doesn’t have to be limited to leaders either. It could very well be anyone.

Edge

(It means decisiveness, but a word was needed that started with the letter e)

Whether you are right or wrong isn’t as important as making the decision in a timely manner. Ideally you want to be right (or have positive results) more often than not. I personally cannot stand indecisiveness. That’s why I’m not a big fan of “co-gm” or democratic guilds. I don’t like standing around waiting 10 minutes for a raid leader to decide Abom wing or Military wing. Loot’s a different matter entirely. But for other raid-to-raid decisions on progression content like who’s tanking what, which boss to do, what strat to try, who sheeps what, and all that, it’s better to just pick a name and get it done. This becomes especially true in make or wipe situations when picking which Druid should battle res, for example.

Execution

This is also known as the follow through. Can you deliver? That’s all there is to it. The ability to execute is a broad look at all the players involved. Sure you’ve topped the healing charts. Every incoming add is CC’d or destroyed. Your tank miraculously survives 3 seconds past an enrage timer. But the raid boss or encounter must be beaten for all of that to matter. You can say all the right things. You can do all the right things. Yet at the end of the day, you’re going to be evaluated by your guild on the coordination and objectives achieved.

Healing Ulduar: Ignis the Furnace Master

header

For other bosses in Ulduar, check the Ulduar Healing strategy page.

Here’s a rather unconventional approach to killing Ignis which utilizes the side of the instance. Using this method does appear to be rather cheesy, but it takes a lot of pressure off many players. Credit this to Kimbo for figuring this out. Ignis is one of the early optional bosses you’ll encounter first in Ulduar. I recommend working on Razorscale first before doubling back to the Furnace Master.

Quick notes

  • Standard tank and spank
  • Periodic Constructs will activate

Abilities

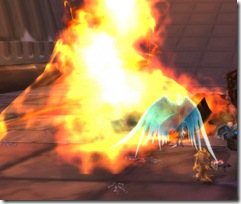
Scorch – All enemies in front of Ignis will take quick dot damage for 3 seconds (ticks every half-a-second). Constructs within the area will start to heat up and become Molten.

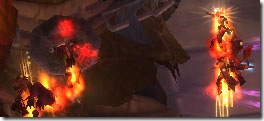
Flame Jets – Geysers of flame shoot up from the ground and throw raid members up into the air. If the Flame Jets connect while a player is casting, they’ll be interrupted for 8 seconds. Targets take fire damage over 8 seconds.

Slag Pot – Ignis will charge a player and grab them tossing them into his Slag Pot (the pot hanging around his waist).

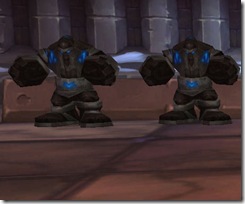
Activate Construct – Activates a Construct with 3.8 million health.

Strength of the Creator – When a Construct is active, damage done by Ignis is increased by 15%. It’s a stacking buff. When a Construct is taken out, the stack is removed.

Ability examples

ignis-flame-patch

Scorch on the ground

ignis-constructs

Construct

flame-jet

Here’s a shot of some of the melee players in the air after a Flame Jet.

Setup

Here’s our non-conventional setup. If you look to your left and right, you’ll see two pools of water that are surrounded by a ledge. Start heading for the one on the left (facing Ignis) that’s nearest the entrance ramp. All ranged DPS and healers should stand on the ledge.

The reason you want to set up in this position is to think back to the days of Starcraft where players set up choke points for enemies to go through. Constructs that spawn, if their aggro is gained by a ranged player, will have to run all the way into the pool and then up the ramp in order to take out a player (green path). The extra distance the Construct has to run should be more than enough time for your off tank to attract the Construct’s attention.

healer-pos-choke

Main tank

ignis-kite-path

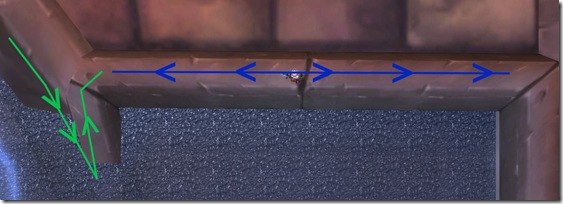
Your tank’s going to be running laps along the red path. The ranged group should not be affected by Scorches. Your healers are going to have to strafe along the blue arrow to maintain range with the tank. The upper line is a little under 40 yards.

Execution

Once Ignis is engaged, your main tank will pick him up and start keeping him moving in a roundabout fashion pictured above. After a period of time has passed, Ignis will begin to activate Constructs. Off tanks need to snatch them up and bring them into Scorched areas and hold them in there until they turn Molten. When it hits 20 stacks, it becomes Brittle.

What do you get when you combine something incredibly hot with something incredibly cold? The object becomes extremely brittle. The same thing applies here. The chance to crit the Construct increases. Damage done over 5000 will effectively kill it. Be sure to target Brittle’d Constructs with your ranged players as they explode dealing damage to players in close proximity.

Have players keep an eye on Flame Jets. If spellcasters are caught casting when Flame Jet connects, they’re locked out of casting for 8 seconds. Not good if you’re a healer.

Healing

There are four healing areas to cover in this fight:

Main tank – One healer should be enough but other healers will need to keep HoTs as active as possible especially with numerous Constructs.

Off tank – If there are Constructs up, your off tank is going to need heals as well.

Slag Pot – Ignis is going to charge and pick up a player and toss them into his sack. While in his sack, they will take 5000 damage every second for 10 seconds. Keep a dedicated raid healer on Slag Pot duty. If there’s no one in there, that healer then returns back to healing the raid.

Healers won’t be able to cast too many spells in there. But healers with instant spells should be able to cast them as much as they can. Priests, for example, can Holy Nova while inside the pot.

Raid – Flame Jet and Scorched melee players are going to involve the bulk of the healing here. Chain Healing Shamans will be at their finest especially since ranged players will be strafing along the ledge. After getting hit by a Flame Jet, I will personally light up a few Holy Novas while I’m in the air.

Healing loot

Flamewrought Cinch – Leather

Lifeforge Breastplate – Plate

Pyrelight Circle – Ring

Scepter of Creation – Wand

Healing Heroic Emalon the Storm Watcher

emalon_phixr If you didn’t know already, Emalon is the new boss in the Vault of Archavon in Wintergrasp. Unlike his cousin though, he’s got a bit of a kick to him and look out because he brought friends!

The encounter starts with Emalon in the middle of the room and four tempest minions surrounding him. Generally you’re set up is going to be one Main Tank and one to two Off Tanks. The offtank will grab all four of the Tempest Minions and drag them off to one side of the room, while the Main Tank grabs Emalon and take him towards the opposite side.

Emalon’s Abilities

First it should be noted he hits very hard on plate. Average hit pushes up around 20,000 damage.

Chain Lightning: Like the name inplies it’s a chain lightning, but the more people it chains to, the more damage it does. The raid will have to be spread out to avoid players eating a rolling chain.

Lightning Nova: This is similar in effect to Loken’s nova. He will occasionally spam a raid wide blast that deals increased damage the closer you are to him. Melee who are not fast to move out of it, and the MT will take a large hit (upwards of 20,000). If you are not in the immediate vicinity when it goes off you can expect to take roughly half the damage.

Overcharge: Occasionally Emalon will cast overcharge on one of the Tempest Minions. This will heal the minion to full health and increase that minions damage output by 20%. After 24 seconds the minion will explode causing massive raid wide damage.

Beserk: On heroic difficulty, Emalon has a 6 minute enrage. This will increase his damage output by 500%.

Healing Emalon

Emalon is a fun fight for healers. He hits hard and there is a lot of raid wide damage going on. The fight is set up though that group healing (Chain Heal, Circle of Healing, Wild Growth and glyphed Holy Light) becomes less effective as generally people are spread out to avoid Chain Lightning.

Main Tank Healing

Two healers should be assigned to the MT. I’ve found that a Disc Priest and a Resto Druid do wonders to even out the spikes in damage. Keeping HoTs on the tank as well as aggressively shielding help to smooth out the damage. The healers on the MT will have to keep a steady stream going as the tank will be eating novas at ground zero, large melee hits and potentially chain lightnings if the melee are not far enough away.

Off Tank Healing

The OT is similarly going to be taking a lot of damage. It is suggested to have two healers dedicated to the OT. Healers should keep a full range of HoT’s on the OT and be ready to drop large heals as adds gain Overcharge. The OT will be taking some of the nova splash as well as being beat on by four adds.

Raid Healing

For healing the raid you should have two to three healers assigned. Between Chain Lightning and Lightning Nova there will be a lot of raid damage being thrown around. The raid will be spread out though and so group healing should be replaced with a series of quick heals (Lesser Healing Wave, Flash Heal, Flash of light) as well as having HoTs up on as many targets as you can. Shamans I would suggest dropping Healing Stream Totem. It’s a 30 yard range so even with people spread out it will still hit most. Similarly Tranquility can be used to great effect because of it’s 30 yard range. Group heals can be used at certain points, such as when melee crowds around Tempest Minion to burn it down. They will be close enough together for a time to shoot off a couple quick Chain Heal, Wild Growth or Circle of Healing before they move back to Emalon.

It’s a fun fight. It forces healers to utilize different heals and keeps us casting pretty much throughout the entire encounter, so make sure you have your MP5/Regen gear on and potions at the ready.

Until next time, Happy Healing

lodsig1

Holy and Disc Too Costly for Dual Spec

At least, those are the conclusions I’ve reached when I tried it.

On Monday night, the Conquest raiding crew was getting hammered by Kologarn. We simply could not heal raid damage of that magnitude. Some assignments were changed around and I activated my dual spec to Holy to see if I could help alleviate some of the stress.

But alas, to no avail. Being specced Holy and geared for Discipline means you rocket through your mana insanely quick. My mana pool lasted about 2 – 3 Right Arm deaths on Kologarn before I ran out of tricks. Pots used, Shadowfiended, and Hymns were already used. This is just because of the way my augments are setup. I don’t have enough Spirit gems and enchants. It’s too costly and too much of a hassle to augment when I need to switch to Holy.

So it is with a heavy heart that I used my (free) talent refunds on Tuesday. I set aside talent 1 for Discipline and talent 2 for Discipline.  The basic structures were the same. Some points were allocated differently and there were a few minor changes to glyphs.

  Endurance Disc AoE
Spec 53/18/0 54/17/0
Major Glyphs Flash Heal
Hymn of Hope
Penance
Power Word: Shield
Prayer of Healing
Penance
Minor Glyphs Fading
Shadowfiend
Shadow Protection
Fading
Levitate
Shadow Protection

Endurance

The deal with Endurance spec is that you’re trying to stretch your mana pool to go even further than before. This involves talenting into Improved Healing for the 15% mana cost reductions to Greater Heal, Penance and Divine Hymn. The glyphs also represent the endurance method with Hymn of Hope and Flash Heal. If your Shadowfiend manages to die, you still get some mana back rather than none. This would be more of a progression spec, I think. In case your raid group loses one or two healers, the idea is that your mana supply can hold and last long enough while you compensate for their deaths until they get Rebirthed or until the boss dies. Out of the upper level Disc talents, Grace is one talent where I felt 1 talent point might be enough to maintain the buff considering the amount of heals you’ll be dumping on the tank anyway.

Disc AoE

With Disc AoE, you’re still going to be focusing on one or two key tanks. But on fights with enormous amounts of AoE damage, you won’t be locked out entirely. Your fast Shields should be placed quickly on players who have taken damage. Your Prayer of Healing adds a HoT effect. At least you won’t be as handicapped during Tympanic Tantrums or anything like that.

This is the result of my experiences in Ulduar so far. It’s still going to be subject to some more tweaking.