Frustrated by Ulduar? Here’s Why

Guys, I have a theory. I want to write about the perceived “easiness” of Ulduar. Random conversations with other WoW players on Twitter and reading of blogs inspired today’s post.

Here’s the theory.

“Ulduar’s easy mode wasn’t cleared because it was easy. It was cleared because the top guilds raid way more than you and I.”

No really?

But let me explain further to the guilds, leaders and raiders who appear to be frustrated by their guild’s lack of progress. Many guilds have forgotten what it’s like to hit a progression wall. Raiders who felt good about themselves and their abilities started having doubts about themselves. More on this later.

Don’t compare your guild to Ensidia or Vodka. Don’t use them as benchmarks to your guild’s success. They are the top guilds in the world for a reason (One of the raid leaders likes to occasionally remind players of this fact). They’re on a completely different level.

It boils down to hard work.

These are guilds that spent extensive time on the PTR. Every time a new boss was active, raid groups were already in and ready to engage. They would spend hours in there wiping relentlessly experimenting, trying new things and making strategy adjustments.

Sounds like your guild right now, doesn’t it?

The learning process that guilds are going through right now has already been experienced by top guilds on the PTR already.

Don’t be ashamed of yourselves or disappointed. Flashes of sadness, anger, and determination (in that order) routinely flood through me during raids. I’m disappointed at myself for not executing. I become angry because I know I can do better. I’m then determined to prove myself right.

It’s called challenge.

And here’s where the payoff lies. It’s the steadily ticking down of boss health. As it counts down from 10% to 9% all the way down to 1%, the adrenaline is still pumping. The euphoric feeling that courses through your body after a kill? That’s what accomplishment feels like. It feels good doesn’t it?

When I measure and compare progress with other players or guilds, one question I like to ask is their hours spent raiding. The problem with using weeks is that the range which guilds can raid vary tremendously. Some guilds log 6 hours a week. Others log 18+. As an example, it took Conquest troopers around 7 hours to get from the start of Ulduar to the kill of Deconstructor. If a progression guild takes down Kologarn after a 16 hour raid week and a progression guild knocks out Kologarn after two 8 hour raid weeks, then I’d say they’re about on par because it took both guilds the same amount of time to get there (16 hours).

MX2CT-4953

You know this. I know this. I’ve talked to players both in different guilds and abroad on Twitter. Everyone knows this. It’s still a difficult and bitter pill to swallow. Like the great Morpheus once said, “There is a difference between knowing the path and walking the path”. The average time it takes for a typical heroic raid to learn and kill a new boss is around 2 hours. Shorten that time if players watched videos, read strategy, or have done the 10-man versions.

Even now, we start seeing progression gaps among the different guilds. The spread from first, to tenth, to twenty-fifth is increasing. It’s becoming increasingly visible to separate the “pretenders” from the “contenders” (Hockey playoffs are still in my head).

To the guilds leading the progression charge, I salute you. I’m always interested in reading what guilds like Fusion are up to (especially with their popular StratFu blog Edit: Defunct) and how they handled particular challenges. I’ve heard stories of how some guilds prefer to keep their raid secrets a secret. Never really bought into that policy. I always preferred to teach players and learn from others.
Healing Ulduar: Ignis the Furnace Master

header

For other bosses in Ulduar, check the Ulduar Healing strategy page.

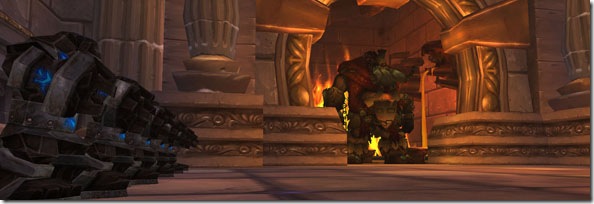
Here’s a rather unconventional approach to killing Ignis which utilizes the side of the instance. Using this method does appear to be rather cheesy, but it takes a lot of pressure off many players. Credit this to Kimbo for figuring this out. Ignis is one of the early optional bosses you’ll encounter first in Ulduar. I recommend working on Razorscale first before doubling back to the Furnace Master.

Quick notes

  • Standard tank and spank
  • Periodic Constructs will activate

Abilities

Scorch – All enemies in front of Ignis will take quick dot damage for 3 seconds (ticks every half-a-second). Constructs within the area will start to heat up and become Molten.

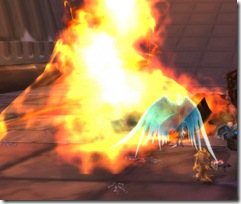
Flame Jets – Geysers of flame shoot up from the ground and throw raid members up into the air. If the Flame Jets connect while a player is casting, they’ll be interrupted for 8 seconds. Targets take fire damage over 8 seconds.

Slag Pot – Ignis will charge a player and grab them tossing them into his Slag Pot (the pot hanging around his waist).

Activate Construct – Activates a Construct with 3.8 million health.

Strength of the Creator – When a Construct is active, damage done by Ignis is increased by 15%. It’s a stacking buff. When a Construct is taken out, the stack is removed.

Ability examples

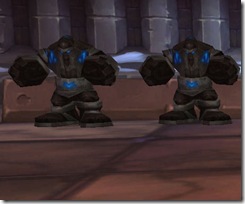
ignis-flame-patch

Scorch on the ground

ignis-constructs

Construct

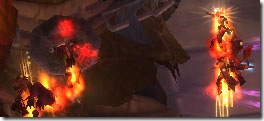
flame-jet

Here’s a shot of some of the melee players in the air after a Flame Jet.

Setup

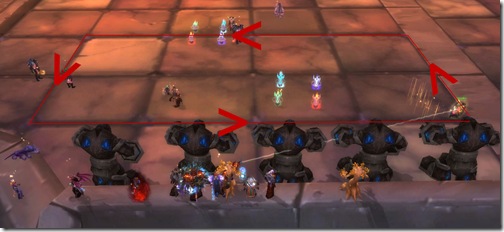
Here’s our non-conventional setup. If you look to your left and right, you’ll see two pools of water that are surrounded by a ledge. Start heading for the one on the left (facing Ignis) that’s nearest the entrance ramp. All ranged DPS and healers should stand on the ledge.

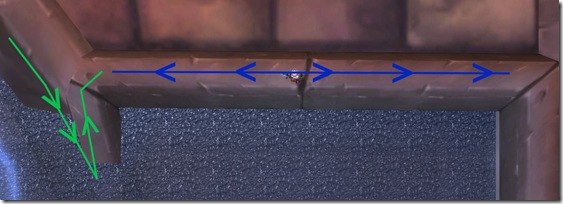
The reason you want to set up in this position is to think back to the days of Starcraft where players set up choke points for enemies to go through. Constructs that spawn, if their aggro is gained by a ranged player, will have to run all the way into the pool and then up the ramp in order to take out a player (green path). The extra distance the Construct has to run should be more than enough time for your off tank to attract the Construct’s attention.

healer-pos-choke

Main tank

ignis-kite-path

Your tank’s going to be running laps along the red path. The ranged group should not be affected by Scorches. Your healers are going to have to strafe along the blue arrow to maintain range with the tank. The upper line is a little under 40 yards.

Execution

Once Ignis is engaged, your main tank will pick him up and start keeping him moving in a roundabout fashion pictured above. After a period of time has passed, Ignis will begin to activate Constructs. Off tanks need to snatch them up and bring them into Scorched areas and hold them in there until they turn Molten. When it hits 20 stacks, it becomes Brittle.

What do you get when you combine something incredibly hot with something incredibly cold? The object becomes extremely brittle. The same thing applies here. The chance to crit the Construct increases. Damage done over 5000 will effectively kill it. Be sure to target Brittle’d Constructs with your ranged players as they explode dealing damage to players in close proximity.

Have players keep an eye on Flame Jets. If spellcasters are caught casting when Flame Jet connects, they’re locked out of casting for 8 seconds. Not good if you’re a healer.

Healing

There are four healing areas to cover in this fight:

Main tank – One healer should be enough but other healers will need to keep HoTs as active as possible especially with numerous Constructs.

Off tank – If there are Constructs up, your off tank is going to need heals as well.

Slag Pot – Ignis is going to charge and pick up a player and toss them into his sack. While in his sack, they will take 5000 damage every second for 10 seconds. Keep a dedicated raid healer on Slag Pot duty. If there’s no one in there, that healer then returns back to healing the raid.

Healers won’t be able to cast too many spells in there. But healers with instant spells should be able to cast them as much as they can. Priests, for example, can Holy Nova while inside the pot.

Raid – Flame Jet and Scorched melee players are going to involve the bulk of the healing here. Chain Healing Shamans will be at their finest especially since ranged players will be strafing along the ledge. After getting hit by a Flame Jet, I will personally light up a few Holy Novas while I’m in the air.

Healing loot

Flamewrought Cinch – Leather

Lifeforge Breastplate – Plate

Pyrelight Circle – Ring

Scepter of Creation – Wand

Healing Heroic Emalon the Storm Watcher

emalon_phixr If you didn’t know already, Emalon is the new boss in the Vault of Archavon in Wintergrasp. Unlike his cousin though, he’s got a bit of a kick to him and look out because he brought friends!
The encounter starts with Emalon in the middle of the room and four tempest minions surrounding him. Generally you’re set up is going to be one Main Tank and one to two Off Tanks. The offtank will grab all four of the Tempest Minions and drag them off to one side of the room, while the Main Tank grabs Emalon and take him towards the opposite side.

Emalon’s Abilities

First it should be noted he hits very hard on plate. Average hit pushes up around 20,000 damage.

Chain Lightning: Like the name inplies it’s a chain lightning, but the more people it chains to, the more damage it does. The raid will have to be spread out to avoid players eating a rolling chain.

Lightning Nova: This is similar in effect to Loken’s nova. He will occasionally spam a raid wide blast that deals increased damage the closer you are to him. Melee who are not fast to move out of it, and the MT will take a large hit (upwards of 20,000). If you are not in the immediate vicinity when it goes off you can expect to take roughly half the damage.

Overcharge: Occasionally Emalon will cast overcharge on one of the Tempest Minions. This will heal the minion to full health and increase that minions damage output by 20%. After 24 seconds the minion will explode causing massive raid wide damage.

Beserk: On heroic difficulty, Emalon has a 6 minute enrage. This will increase his damage output by 500%.

Healing Emalon

Emalon is a fun fight for healers. He hits hard and there is a lot of raid wide damage going on. The fight is set up though that group healing (Chain Heal, Circle of Healing, Wild Growth and glyphed Holy Light) becomes less effective as generally people are spread out to avoid Chain Lightning.

Main Tank Healing

Two healers should be assigned to the MT. I’ve found that a Disc Priest and a Resto Druid do wonders to even out the spikes in damage. Keeping HoTs on the tank as well as aggressively shielding help to smooth out the damage. The healers on the MT will have to keep a steady stream going as the tank will be eating novas at ground zero, large melee hits and potentially chain lightnings if the melee are not far enough away.

Off Tank Healing

The OT is similarly going to be taking a lot of damage. It is suggested to have two healers dedicated to the OT. Healers should keep a full range of HoT’s on the OT and be ready to drop large heals as adds gain Overcharge. The OT will be taking some of the nova splash as well as being beat on by four adds.

Raid Healing

For healing the raid you should have two to three healers assigned. Between Chain Lightning and Lightning Nova there will be a lot of raid damage being thrown around. The raid will be spread out though and so group healing should be replaced with a series of quick heals (Lesser Healing Wave, Flash Heal, Flash of light) as well as having HoTs up on as many targets as you can. Shamans I would suggest dropping Healing Stream Totem. It’s a 30 yard range so even with people spread out it will still hit most. Similarly Tranquility can be used to great effect because of it’s 30 yard range. Group heals can be used at certain points, such as when melee crowds around Tempest Minion to burn it down. They will be close enough together for a time to shoot off a couple quick Chain Heal, Wild Growth or Circle of Healing before they move back to Emalon.

It’s a fun fight. It forces healers to utilize different heals and keeps us casting pretty much throughout the entire encounter, so make sure you have your MP5/Regen gear on and potions at the ready.

Until next time, Happy Healing

lodsig1

Paladin Healing in Heroic Ulduar

This is a guest post by Adgamorix with some tips for Holy Paladins working their way through Ulduar.

3.1 and Ulduar are upon us, and the tears of Healadins fill the forums, feeding Yarg-Saron and keeping XT’s joints lubed. Bloggers and forum goers alike lament the death of Flash of Light as a useful heal, and wonder if the new Infusion is even worth it. 10% extra crit on a Holy Light? I want my haste back! I need to raid heal!

Can you taste the tears?

My question is what is the real issue? Granted, my guild hasn’t cleared Ulduar yet, but we did get six bosses down in the first week (no hard modes), and I haven’t seen the problem. As we’re a 25 man raid guild, we typically run with seven healers: two Paladins, Disc priest (dual spec’d for Holy which some Priests just aren’t good enough to do *wink*), Holy Priest, two trees, and a Resto Shaman. Our tanks are a mix of all the tank classes, and we run a fairly balanced mix of melee vs. ranged (though we do have a lot of hunters – fortunately no huntards).

Given a balanced raid makeup, I’m very happy with where paladin healing is right now. On any boss fight that we’ve done so far, I’m confident in putting my paladin partner and I on the tank and letting the other healers take care of the raid, off tanks, etc. Between Beacon of Light and Sacred Shield, we can run a steady rotation on the tanks, and it hasn’t failed us yet. Granted, I haven’t seen the fights in 10 man yet, but I’m confident that it’ll be ok.

Note that I’ve said ‘balanced raid makeup’ a couple of times here. Even though we’ve been told to “bring the player and not the class”, I don’t think anyone would reasonably expect to waltz through Ulduar with nothing but a pocket-full of rogues and no ranged DPS… at least not for a while anyway. Having a mix of buffs and abilities is part of what makes raiding so much fun. It’d be boring if any 25 people (regardless of class/spec) could walk in and down the content during the first week.

I think the problems being experienced by some paladins can be explained with the same explanation we had when our MT pulled XT with his face the first time, leaving all his healers 40 yards behind him.

“You’re doing it wrong!”

Ulduar isn’t Naxx, and I’m glad. The trash is harder than most Naxx bosses, and “gasp” we have to use crowd control again. XT’s trash brought back nightmares of old Kael’Thas trash (with a mix of Void Reaver), and it takes some getting used to. Healers can’t snipe any more, and target assignments are crucial. Trusting your raid mates to do their assigned task, and focusing on yours, keeps the raid alive. I generally can’t spare the GCD to hit someone else, and I count on the raid healers to cover me when I’m not beaconed. Sure, I’m lower on the meters than I used to be, but our strategy works and bosses die.

I won’t disagree that it would be nice to have another tool in my box, but I love the healing aspect of my paladin so much that my Resto Shaman has been collecting dust for two months. I like the challenge of healing without a designated ‘raid heal’, and learning new ways to cope with the incoming damage.

Here’s how we’ve pulled off each boss so far

Healing rotation: This healing rotation is similar to what we use for every boss we two heal. My partner will spam HL while I run FoL/HS rotations. I generally keep my SS up on the tank, and we beacon an OT if they are close, our we just beacon ourselves. After about one minute of this, we switch roles, and she hits DP to start her regen (I usually hit Illumination right at the start – I also pop my haste gloves). This continues for one minute, and then we switch again (this time I Plea). With this rotation the MT is getting around 30k in healing every 2 – 2.5 sec (lag depending), and there is always a heal landing.

Flame Leviathan: All I can say is, flying through the air with a boom-chicken by your side is worth it. I beacon the boom-chicken and unleash my holy DPS on the turrets. Instant FoLs on myself are enough to keep us both alive without any stress (hard mode may be different).

Ignis: Pallies beacon themselves and do nothing but roll heals on the MT. We have our Disc priest on the OTs, with the druids dropping HOTs on them as they race by with the constructs. Raid healing is covered with the shaman and holy priest, and the druids kicking in after a flame jet.

Razorscale: This fight is a lot less coordinated. Generally I sit on our DK who picks up the whirlwinders and also stays closest to Razor so he gets her fire patches. I beacon myself, and just roll FoL on him until the fight ends. I’ll also run in and hit the boss a few times while she’s harpooned, that way I have a full mana bar at the start of phase 3 (phase 2 if you don’t count the chained phase) so I can just bomb the tanks with HL.

XT-002 Deconstructor: We handle this fight just like Ignis. Prot pallies on the tank, Disc Priest on the add tank, and the rest of the healers on the raid. The only change up is during the earthquake/pound one of us will switch off the MT and drop HL bombs on the melee to help with the damage.

Kologarn: See previous strategies. I usually beacon the add tank on this one, since he’s close enough to always receive my heals. Only one of the tanks holding Kologarn should be taking a significant amount of damage, so we focus on them individually. A Resto shaman is also amazing for the folks caught in the grip.

Assembly of Iron: This one we switch up just a touch. We’ve only downed this once, and that was in the ‘easy’ mode. Here we flip the disc priest and a holy paladin, beaconing the off tanks and healing through the damage. A shaman is an ideal healer for the tank on Stormcaller, as they can interrupt the chain lightning and the lightning whirl.

Healing Ulduar: XT-002 Deconstructor

xt002_banner

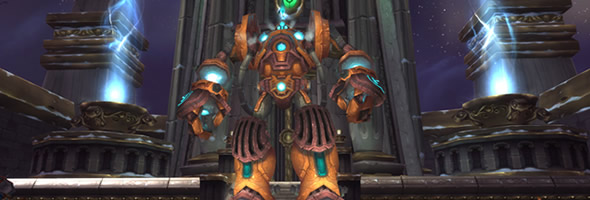
Welcome to Ulduar folks. If you made it past the lag, the vehicles, and the guard-dragon, and you didn’t get sidetracked by Ignis’ Hot Pockets, chances are you’ll soon find yourself standing in front of my favorite shiny robot in the game, the XT-002 Deconstructor. She just wants to give everyone a big hug . . . a spine-cracking hug, that is. She reminds me of eeeevil pet collector Elmyra from the Animaniacs. In all seriousness, Blizzard outdid themselves here. The boss’s animations and voice are oh-so-entertaining, and this fight provides a juicy-yet-manageable challenge for healers. Conquest downed XT on 4/21 using this strategy.

Essential Abilities

To effectively heal this boss, all healers need to make sure that their unit frames show the following three abilities. If you are a Grid or Pitbull user, add these to your custom debuffs.

Gravity Bomb
This ability places a debuff on a player. They need to move away from others to avoid causing AoE damage. This debuff does not tick immediately but rather does a significant chunk of damage at the delay of a few seconds. A player with Gravity Bomb will need a large heal once the ability triggers.

Light Bomb
This ability places a debuff on a player, and as with Gravity Bomb, the player must move away from others to avoid causing AoE Damage. This debuff is a strong, fast-ticking dot, and it lasts 9 seconds, dealing 3500 damage each tick. A player with Light Bomb needs immediate and steady attention.

Tympanic Tantrum
Of the three abilities, this one is the most dangerous. Tympanic Tantrum deals damage equal to 10% of each player’s maximum health every 1 sec for 12 sec. Nearby enemies are also dazed for the duration. Every player in the raid needs to receive a medium amount of healing in order to survive this ability. AoE and group heals (Divine Hymn, Circle of Healing, Prayer of Healing, Wild Growth, Tranquility) are good solutions.

Healing Assignments

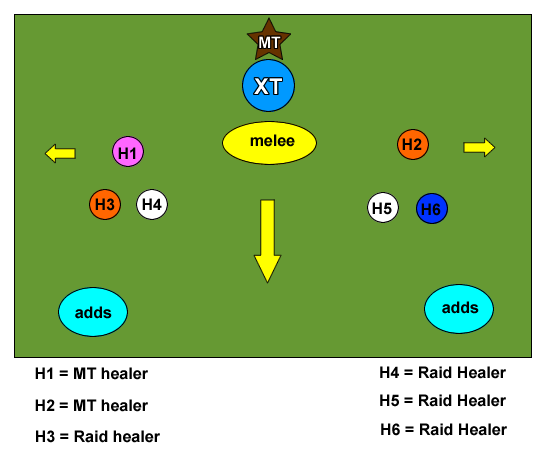
In order to meet the dps minimum for the boss, you will probably need either 6 or 7 healers. These assignments will assume 6. Consult the following diagram for the optimum positioning of your 6 healers.
xt-healing1

As always, the diagram is coded by class color. Our favorite arrangement uses a paladin and a tank healing-specced druid on the MT. On the raid, we have had good luck with using two priests, one shaman, and one raid-healing specced druid. In this diagram, you’ll notice that H3 and H4 are standing together, as are H5 and H6. The raid splits into two groups, and ranged dps stacks with raid healers. This grouping makes it easier for the person with Light Bomb or Gravity Bomb to run away. Your MT healers will have to cheat forward a bit of the pile of players in order to be in range of the tank. XT is big–approximately 10 yards across–and your tank will be on the far side.

Techniques

I’ve had the pleasure to both MT and raid heal for this fight, so I can share with you my top strategies for both positions. The key to this fight is using your abilities wisely.

MT healing
Two healers are necessary because this bot hits hard! Damage is spiky because the boss hits hard but swings slowly. We found a combination of a Resto Druid and a Holy Paladin to be very successful. The druid can keep some HoTs on the MT even through the Exposed Heart phase, in which there is no damage to the tank. We’ve lost the tank before when XT has come back with a vengeance, so be prepared with some HoTs or shields. Throughout the fight, the druid will probably be able to make a small contribution to raid healing. During Tympanic Tantrum, both MT healers will raid heal, and during the Heart phase, the paladin can probably dps, with the druid contributing as well if she is able to afford the mana hit.

Raid Healing
I learned the hard way that HoTs won’t cut it for Gravity Bomb and Light Bomb. For Gravity Bomb, have raid healers shield or pre-HoT and then time a big nuke heal to land as the bomb explodes. For Light Bomb, the player will need a series of quick heals (Flash of Light, Flash Heal, Lesser Healing Wave) or a combination of HoTs and direct heals. A Rejuv+Swiftmend is not enough. With my raid healing build, I was using HoTs + glyphed Healing Touch to good effect. Light Bomb is the more dangerous of the two bombs because it hits fast and hard.

For Tympanic Tantrum, HoTs and AoE heals are king. I was having great luck with Tranquility, Wild Growth, and Lifebloom during this phase. When you assign raid healers, make sure you distribute your AoE healers evenly on both sides.

Melee and Offtanks
There’s no way to get around doing double duty on this fight. At least one offtank will assist a couple of ranged dps with controlling the adds. Specific Raid Healers (perhaps H4 and H5) should be assigned to keeping the adds team alive.

Melee will need some attention, but Judgement of Light, if you have it, goes a long way towards keeping them healthy. We assigned our Resto Shaman to chain heal the melee group when she could.

DPS the heart!

All of the non-tree healers in your raid should switch to dps-ing the heart when it is exposed. Every little bit helps you meet the very high dps demand! I also recommend that any raid-healing druids switch forms and dps the heart. However, the MT healing druid should keep her HoTs on the tank, because XT returns suddenly and with a vengeance. If she can sneak a Moonfire in there too, by all means.

Mana Control

This fight has a few moments that will allow for OOFSR regen. It’s fairly tough on mana, and you will probably use a potion and your mana-restoration abilities (Innervate, Shadowfiend) if you are only carrying six healers. The fight is short with a 6 min enrage timer, but it’s fast and furious, so you can blow your mana if you’re not careful. If you find yourself running out, take a break instead of using your mana for offensive spells when the heart is exposed.

A Healer Check?

This boss tests healers in more ways than one. I like to think of it as a healing assignment check. Everyone has to do his or her specific job, and there’s no time for sniping. Moreover, you need a good balance of single-target and AoE heals to pull this off with 6 healers. There is both heavy Main Tank damage and extensive raid damage. Expect to use all of your skills.

sydsignature