Apologies. Contact form is down.

Seems like my email service is currently fried. When I switched from shared hosting to a private server, it appears something happened to my email server. So anyone who’s been trying to use the forms to contact us since Friday will need to do so again.

Other alternative methods:

  • Via Twitter: @mattycus
  • Via GMail or Google Talk: matttz at gmail dot com
  • Via AIM: worldofmatticus

Be patient with Twitter and with the IMs. It may still take me a while to respond. I could be raiding, eating, writing, Left 4 Deading, DoTAing, Command and Conquering, PvPing, hockeying, volleyballing, or sleeping (among other possibilities)

EMail problems fixed. Contact form should be good to go.

Behind the Scenes Upgrades and 10 Post Ideas

State of the Blog

Over the past week, I’m sure many of you have noticed the instability, not just on World of Matticus, but on Plus Heal and No Stock UI as well. I’m happy to say that steps have been taken to alleviate this. All sites are now hosted on a private server.

It’s going to hit the wallet hard but it’ll be manageable (I hope). More importantly, I should be able to withstand links from WoW Insider on patch a day without being perma-stunned for the day.

Day 11 – 10 Post Ideas

The past week blew by like Rogue with Rocket Boots carrying the flag in WSG. Between a new patch and exams, I barely kept up with the 31 DBBB challenge. Today’s is coming up with 10 post ideas.

Here’s mine:

Tier 8 Set Bonuses Analyzed

Ulduar is Two Zones in One

Why Top Guilds are Top Guilds

Handling Incoming AoE as Discipline

4 Boss Factors that Will Make or Break Heroism (or Bloodlust)

New Healing Trinkets: Which Healers Benefit?

Paladins Being Shut Out? – Inspired by this post

13 Important Checks Before Starting Your Guild

Pacta Sunt Servanda: Treaties (and Loot Rules) must be Kept – Inspired by this thread.

Recognizing When to Change Healers on the Fly

Other notes

Canucks are up 2 games over the Blues.

LF Paladin blogger to join the World of Matticus team.

Conquest is LF Warlock and an Enhancement Shaman for raiding.

Expanded the Instance Discussions on Plus Heal. Each raid instance has its own forum.

Healing Ulduar: Razorscale

razorscale

For other bosses in Ulduar, check the Ulduar Healing strategy page.

Conquest was able to clear out Razorscale on day 2 of Ulduar. It’s a fun encounter and places a lot of emphasis on ad control.

Quick notes

  • 3 phase encounter
  • Repeated waves of incoming trash

Pre-boss preparation

Suggested makeup

  • 3 tanks
  • 7 healers
  • 15 DPS

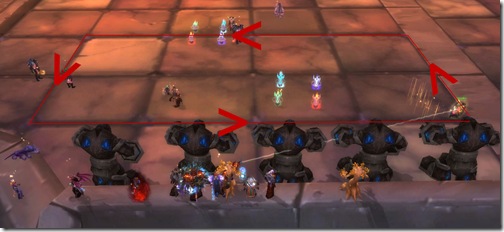
As raid leader, I like to split my raid into groups that have meaning in the raid frames. In other words, I set aside groups 1 and 2 to deal with trash ads coming in from the left side. Groups 4 and 5 would take care of the right. I made sure there was 1 tank and 3 healers in each ad control team. Try to split up interrupters as best as you can since you’ll want them to disrupt as many chain lightning casts as possible. It’s difficult to evenly split the DPS so use your discretion there accordingly.

Group 3 consists of your third tank and the 4 healers that were unable to fit into either teams.

Warrior tank Hunter Druid tank Hunter Paladin tank
Resto Shaman Rogue Disc Priest Rogue Resto Shaman
Mage Death Knight Resto Druid Death Knight Warlock
Mage Balance Druid Holy Paladin Ret Paladin Mage
Shadow Priest Resto Druid Holy Priest DPS Feral Druid Hunter

That’s a rough visual representation of how I split my groups. Dark blue team on the left, light blue team on the right. Gold team is responsible for big, bad whirlwind titan’s which I’ll elaborate on in a moment.

Process

Phase 1

On the ground, the things you have to worry about are the incoming mobs that spawn from the different drill-shaped ground pods. Meanwhile, Dwarven expedition teams will be repairing the four harpoons.

Razor’s attacks

Fireball: Fire damage to players

Flame buffet: Increases fire damage taken by players. I believe this ability stacks. It’s duration is ~1 minute.

Devouring Flame: Spits a Lava Bomb at a player inflicting fire damage and leaving a fiery patch on the ground dealing fire damage to everyone within 6 yards.

She enrages after 10 minutes.

Add attacks

Dark Rune Guardian: Puts a magical debuff on your raid. Dispellable. Will go after your friendly expedition dwarves.

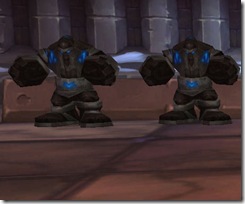
Dark Rune Sentinel: Whirlwind. These guys typically spawn in the middle.

Dark Rune Watcher: Interrupt their Chain Lightning when possible. Their Chains can hit up to 5 targets.

razor-process

Adds will show up from the left and right. Dark blue and light blue teams will have to take care of them via DPS and CCs if necessary.

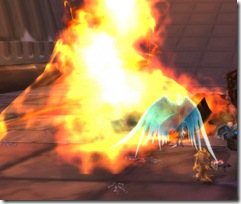
Now gold team gets to have some fun here. That Devouring Flame ability I mentioned above? Here’s a hint I found out from the Plusheal forums. Devouring Flame can be predicted and controlled. Razor shoots Devouring Flames at the player closest to it. So all gold team has to do is stay under the boss as much as possible and soak up incoming flames. The Disc Priest in that group (me) just heals him. At the same time, gold team needs to pick up Dark Rune Sentinels that show up in the middle.

devo-flame

Gold team in action

The tanking Druid played first person and looked up. I stayed within range in support. When I see a Sentinel spawn, I’ll cue him and let him know there’s a sentinel and he’ll pick it up right away. Once gold team establishes aggro, he calls for ranged DPS to focus and nuke. Once the sentinel is down, it’s back to add control.

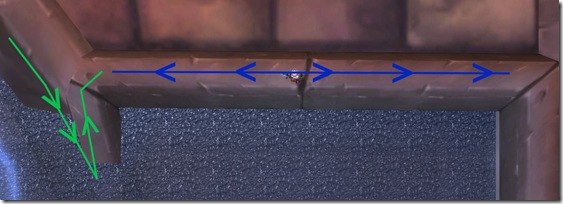
There are four harpoons. When they’re all repaired and fired, Razorscale is brought down to the ground. Get three harpoons fired and hold on to the fourth one. You fire them by having a player from either blue team right click on the turrets. Your raid leader should call when to fire the fourth one. When most of the ads are dead, cue the fourth turret call.

When a Harpoon is fixed, it will flash on your screen. I personally like to say things like “harpoon 1 fired, harpoon 2 fired, harpoon 3 fired, harpoon 4 standing by” so that the entire raid knows where we’re at.

turrets

Phase 2

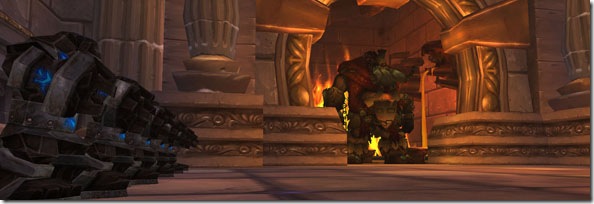
When the raid leader calls for harpoon 4 to be hit, all DPS should be switching off ads. Anything extra should be CC’d in the process. Razor will fall to the ground and remain stunned for seconds. Full DPS on Razor at this point. Stay away from the front of this boss. After time is up, Razor will do a wing buffet knocking everyone back and light a conical flame breath. She’s facing the entrance into this area while she’s stunned.

After the stun wears off, the turrets will explode and have to be repaired again. Razor flies back into the air and triggers phase 1 again.

This would be the phase to hit Heroism or Bloodlust to push Razor into phase 3. If Razor’s health isn’t low enough then you have to do phase 1 all over again.

Phase 3

Have your main tank of choice pick up Razor and immediately face her away from the raid. A good position would have Razor face the entrance just past the turrets. She’s going to continue to do AoE knockbacks (Wind Buffet), Devouring Flame, and Flame Buffets. The Flame Buffet debuffs will continue to stack. If it reaches a certain point, it’s going to insta-kill your tank.

Fused Armor is another debuff your tank will take. When it reaches 5 stacks, your tank is not going to be able to move, use skills or taunt. You’ll have to change tanks before it reaches 5 to buy enough time for your raid to finish her off.

Your raid positions themselves and spreads out behind the boss during this part.

Healing strategy

For both blue teams, you’ll want 2 raid healers and 1 tank healer on each side. You’ll also want 1 tank healer in the gold team. Stay as far back as possible to avoid any chain lightnings that manage to get through. Use strong AoE heals to mitigate them as well. During phase 2 when DPS switches over, the tank healers need to remain on the tank if they’re on any ads. Any idle healers are encouraged to jump up into the play and DPS the boss during phase 2.

Healer drops

Belt of the Fallen Wyrm – Mail

Bracers of the Broodmother – Leather

Guiding Star – Mace

Razorscale Shoulderguards – Plate

Shackles of the Odalisque – Wrists

Ulduar Almost Cleared and Some Priest Notes

Ensidia has cleared out Yogg-Saron. Only Algalon remains. I only have time for a quick post today. I have an exam on International Politics coming up in around 4 hours. The similarities between inter and intra-nation relations and guild relations is eyebrow raising. But that’s a post for another time.

Healing strategies for Razorscale and Ignis are on the way. I’ve got them written down from various PTR notes. Just a few corrections, some screenshots and they’ll be up within days.

I’m going to expand on and revise my Flame Leviathan tips a bit more. I forgot to mention the amount of vehicles there were. There are 15 in total. The Siege Engines and the Demolishers have spots for a driver and a gunner. I set group 1 as Siege Engine drivers, group 2 as Siege Engine gunners, group 3 as Demolisher divers, group 4 as Demolisher gunners, and group 5 as Choppers. That made organization and overall raid direction much easier.

Quick notes regarding the new Divine Aegis from Duct Tape and a Prayer. Wanted to get this out there quick for Priests who were curious.

If you or another Disc priest casts another critical heal on the same target, the Divine Aegis effect refreshes its duration (back up to 12 seconds), and 10/20/30% of the second critical heal is added to the remaining shield from the first crit heal. For example, I establish a 1.5k DA on the Tank, the Tank takes 1000 damage, and then I cast another crit heal on the Tank for another 2k shielding, which makes the total shielding 3.5k and the remaining shielding 2.5k (since the shield absorbed 1k damage between the first and second crit heal).

Etherjammer has got more information regarding Divine Aegis. Go check it out and remember to subscribe to his blog while you’re there.

Now if I can just remember the 6 points of a “Just War”…

1-0 Canucks.

Healing Ulduar: Flame Leviathan

flame-leviathan

For other bosses in Ulduar, check the Ulduar Healing strategy page.

I managed to squeeze some PTR time on this boss earlier in the weeks before. But here’s a step-by-step break down of what you need to do in order to get through the encounter.

Quick notes

  • Vehicular fight
  • Trash should be cleared using your vehicles
  • After ~two attempts on the boss, trash will respawn (not sure if there’s a link to time)
  • Four towers control the difficulty of the boss
  • Vehicle health is based on item level not stats

Map

fl-map

Trash phase

This is not a Hyjal style waves encounter. Your raid group will have access to vehicles first. When your raid is ready to move out, speak to Brann Bronzebeard to engage the Iron army.

bronzebeard-thumb

(Click image for dialogue)

Tower information

Your targets are the four towers throughout the area. The difficulty level of Flame Leviathan can be controlled based on which towers you leave up. Towers are easily identifiable because of the color of their glow. Location of the towers are shown in the map above. Use your vehicles to bring them down.

Storm beacons will summon additional units. Destroy them to stem the tide of incoming spawning mobs.

Roles and vehicular abilities

There are different roles that each vehicle plays. I’ll break them down below.

Carrying capacities

Chopper: 1 driver + 1 passenger
Demolisher: 1 driver + 2 passengers
Siege engine: 1 driver + 1 turret + 2 passengers

Chopper abilities

Sonic horn (20 energy): Conical DPS within 35 yards to all enemies
Tar: 10 yard pool of tar that slows down enemies by 75% (important)
Speed boost (50 energy): Increases vehicle’s movement speed by 100% for 5s

Demolisher abilities

Driver

Hurl boulder: Throws a really big rock at a variable range. Think Wintergrasp or Strands type. Ignites Tar upon impact.
Hurl pyrite barrel: Using 5 pyrite, will do ~30000 damage
Ram: Damage and knockback effect
Throw passenger: Used only when the passenger is in the catapult. Dwarf tossing is finally a reality (important)

Passenger

Cannon: Fires a missile. Upon impact, deals damage to enemies within 10 yards. 50 yard range.
Grab crate: Uses a hook and chain to grab crates. Lets you pick up pyrite off the ground.
Increase speed: Uses pyrite to add extra speed to the demolisher. Lasts 1 minute.
Load into catapult: Self explanatory. Passenger gets into the catapult. (important)

Siege engine abilities

Driver

Ram (40 energy): Damage and knock back effect
Electroshock (38 energy): 25 yard conical, interrupts spells, and 4 seconds of locking out the magic school (important)
Steam Rush (40 energy): Sort of like a sprint effect.

Turret

Anti-Air launcher (10 energy): Fires missiles at aerial targets.
Cannon (20 energy): Up to 70 yard range. It’s a gun that shoots stuff.

Siege Engines

The Flame Leviathan will only lock on to one siege engine at a team. The targeted engine must kite the boss around.

Non-kiting siege engines will have to stay close to the rear of the Leviathan as much as possible and should interrupt Flame Jets. After 30 seconds, Flame Leviathan will switch and target a different Siege Engine and chase after that. Use Steam Rush to build up some distance.

Here’s a kite path you can try out.

kite-path

Blue line: Opening route. The boss will be weapons free at this time (as in engage-able).

Siege engine passengers should be targeting pyrite ammo that’s floating in the air. If there aren’t any available, switch fire to the boss.

If you’re out of siege engines, FL will go after demolishers or choppers.

Choppers

There should be 1 chopper following the targeted siege engine. Choppers will be laying down tar directly in front of the Flame Leviathan to slow him down and the tar can be ignited by Boulders from demolishers.

Choppers also have to extract the FL Unit (explained further).

Demolishers

Stay as far away as you can. DPS with Hurl Boulder. Firing Pyrite Barrels should be held off until FL is stunned.

Demo passengers not being thrown up will need to work the catapult to load up Pyrite.

Flame Leviathan stun unit

Your demolishers have the capability to launch players onto the Flame Leviathan. The FL unit is going to comprise of:

  • 3 DPS (Suggest Druid, Death Knight, Rogue)
  • 1 Healer (Suggest Paladin or Druid)

I suggested those classes because they’re going to be under fire from various guns while up there. You’ll want maximum survivability.

Both players must be in the passenger seat of the demolisher. There’s an ability called “Load into Catapult” which places them in the throwing arm of the demo as a projectile. When itÃ’s called for, your demo’s close in. The driver then hits “Throw passenger” which launches the passengers on top of the Flame Leviathan.

When the FL unit is on the back of the boss, they will be able to take out all 4 turrets. When the turrets explode, there’s a button. You hit the button which starts a 10 second channel resulting in a stunned boss and a damage taken by Flame Leviathan by 50% and resetting his speed.

The FL unit will then be ejected and parachuted off the boss. Your choppers must swoop in and extract them back to the demolishers. You’ll want to stun Leviathan while he’s in a tar’d area.

Video

For a visual “how to” see this video below. Actual encounter starts around 20 seconds or so in. Note the positioning of siege engines and how the tar is laid out.

Healer drops

Heroic

Constructor’s Handwraps – Cloth gloves

Embrace of the Leviathan – Cloth belt

Freya’s Choker of Warding – Necklace

Glowing Ring of Reclamation – Ring

Steamcaller’s Totem – Ranged slot

Steamworker’s Goggles – Mail Helm

Boots of Fiery Resolution – Cloth feet – (Hard mode only)

Shoulderpads of Dormant Energies – Leather shoulders – (Hard mode only)